
 Hello, I'm Tsuneo(@yoshiokatsuneo).
Are you using smart speaker?
I just started using Amazon Echo(Alexa). At first, I thought I don't need such a device. But, once start using Alexa, I cannot go back the life without the Alexa.
With Amazon Echo(Alexa), I don't need to pick up my mobile phone but I can just speak to use it without using hands. As the result of evolving machine learning and AI technology, I feel the speech recognition is practical level.
On a research, 18% of the adults in the US have a smart speaker, and 65% of that wouldn't go back to life without one. (Ref: National Public Media The Smart Audio Report from NPR and Edison Research).
And, we can write programs for the Amazon Echo(Alexa) to extend and add features!
Amazon Echo(Alexa) itself is quite useful, but by adding your own feature, it becomes more fun and useful!
As platform handle speech recognition, you can easily write code just by handling simple string.
Everyone can use the smart speaker just by voice. It is fun that your family, friends, or colleague can use your voice application right away.
But, creating and running the Amazon Echo(Alexa) application requires installing and setting up the development environment, and a server to run the Alexa application. Those can be annoying when we just want to create a simple Alexa program.
So, here comes PaizaCloud Cloud IDE, a browser-based online web and application development environment.
As PaizaCloud have Amazon Echo(Alexa) application development environment, you can just start coding for the Alexa application program in your browser.
And, as you can develop in the cloud, you can just run the Alexa application on the same machine without setting up another server and deploying to it.
Here, we develop an Amazon Echo(Alexa) application reading tweets on Twitter using Ruby on the PaizaCloud Cloud IDE.
Following the instruction below, you'll create and run the Amazon Echo(Alexa) application just in 10 minutes.
Getting started with PaizaCloud Cloud IDE
Let's start!
Here is the website of PaizaCloud Cloud IDE.
Just sign up with email and click a link in the confirmation email. You can also sign up with GitHub or Google.
Create new server
Let's create a new server for the development workspace.
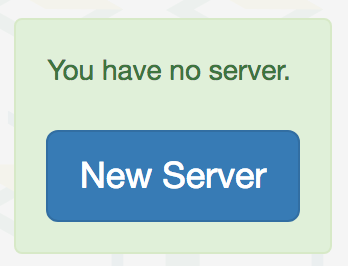
Click "new server" to open a dialog to set up the server. Just click "New Server" button in the dialog without any settings.
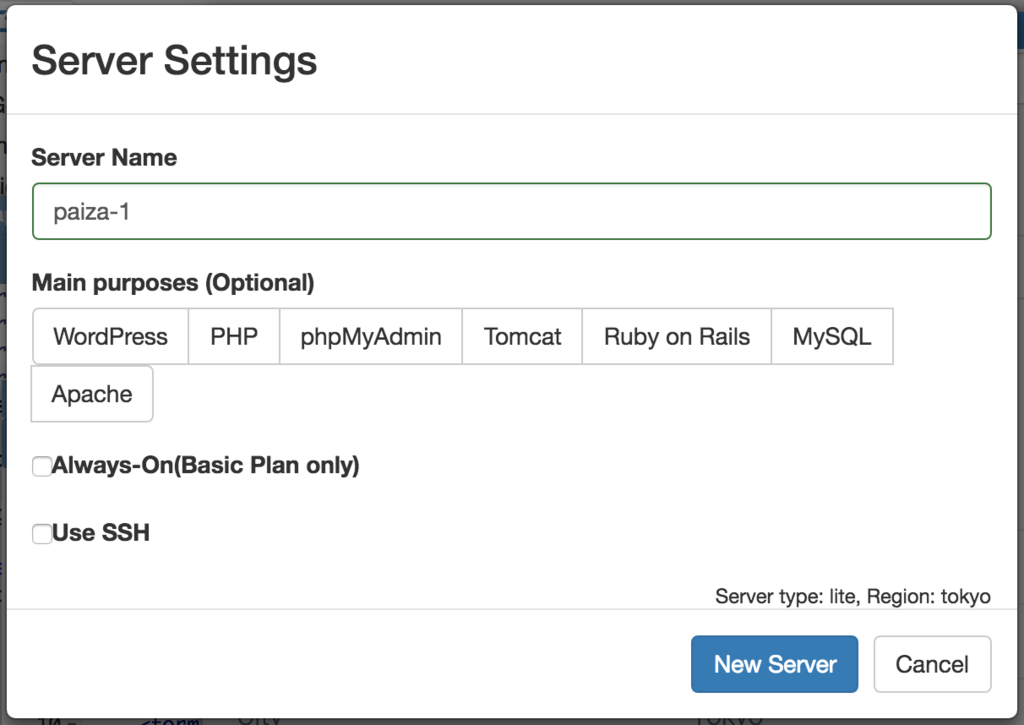
Just in 3 seconds, you'll get a browser-based online development environment for creating Alexa application using Ruby.

Create Amazon developer account
Alexa's voice conversation application is called as Alexa Skill.
You can create the Alexa Skill on Amazon Developer site.
Open the Amazon Developer site below.

To develop Alexa application, you need the Amazon developer account. So, let's create it.
Click "Sign In" button at the top of the page.
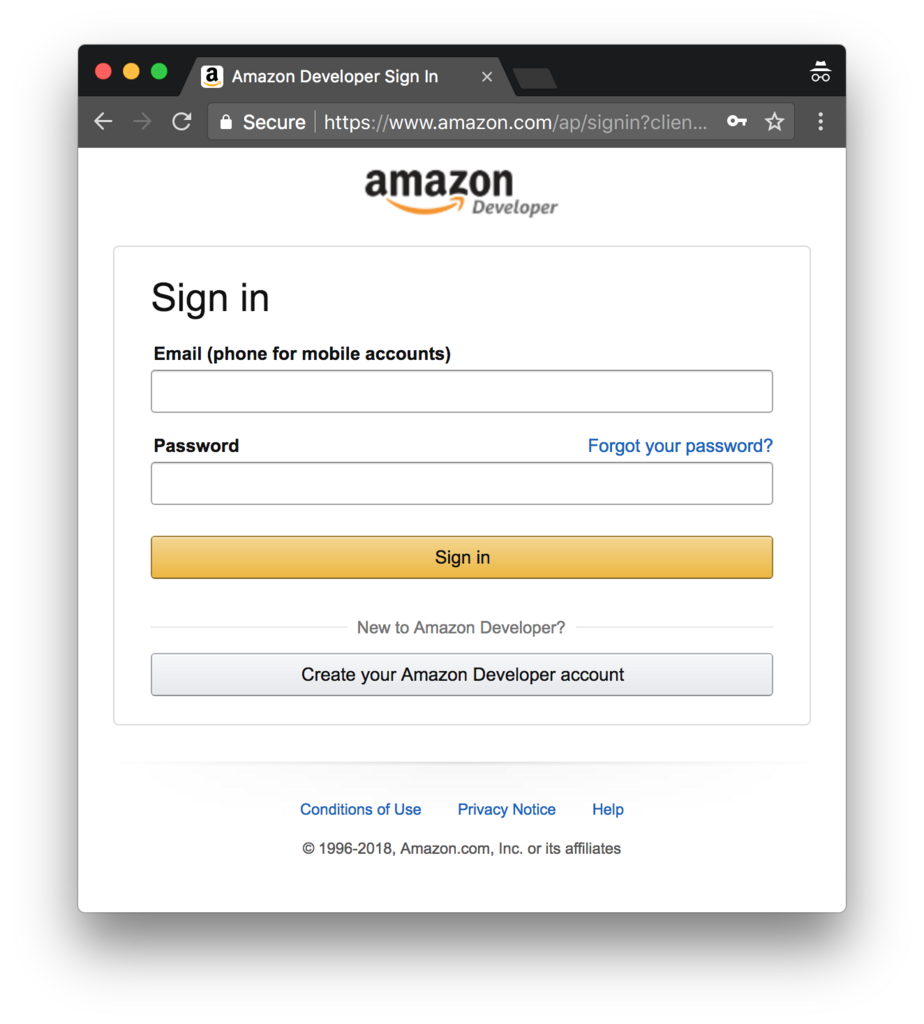
The Sign In page opens. You can see the logo of the page, and find that the page is not for the Amazon shopping site, but for the developer site.
Here, you can sign in using your Amazon account. You can also create the "Create your Amazon Developer account" link, but it will create the Amazon account for your country, but for US(amazon.com).
Input your profile, and agree to the license. You don't need to change payment settings.
Now, you have your Amazon developer account.
Go to Amazon developer site(https://developer.amazon.com), and click "Sign In" to sign in the developer site.
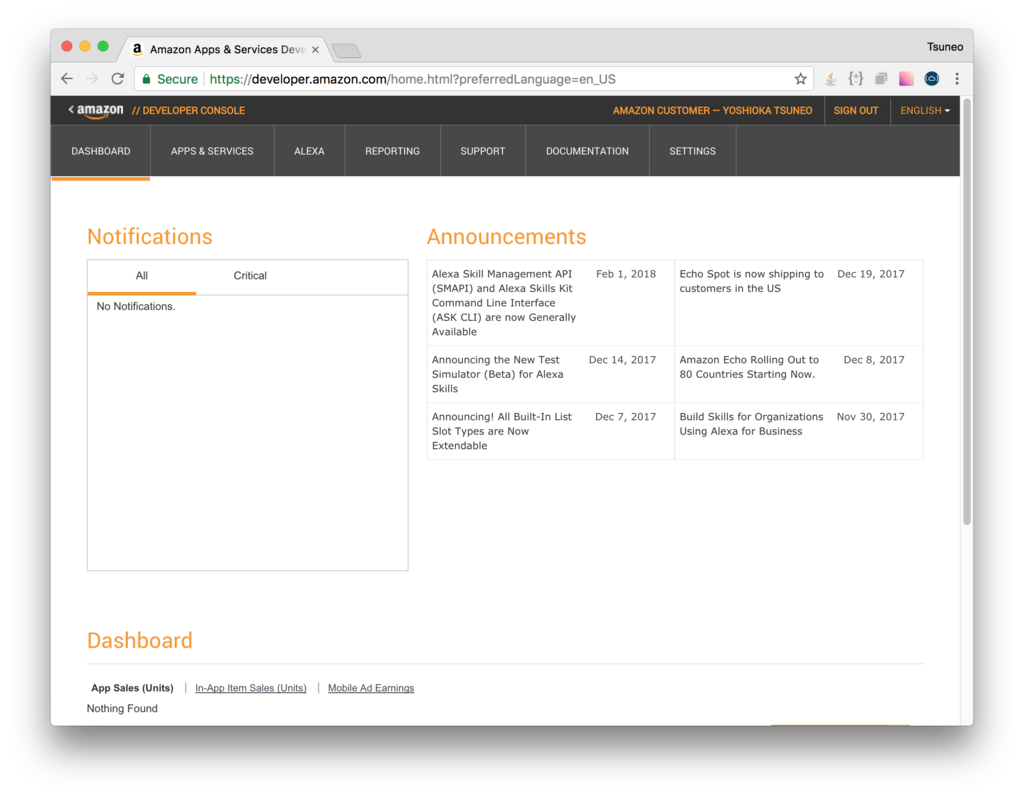
After the sign in, click "Developer Console" on the top of the page, or just go to the URL below to open the developer console.
https://developer.amazon.com/home.html
Create Alexa Skill
Next, let's create the Alexa Skill.
On the developer site, go to tab menu, and click "ALEXA" tab.
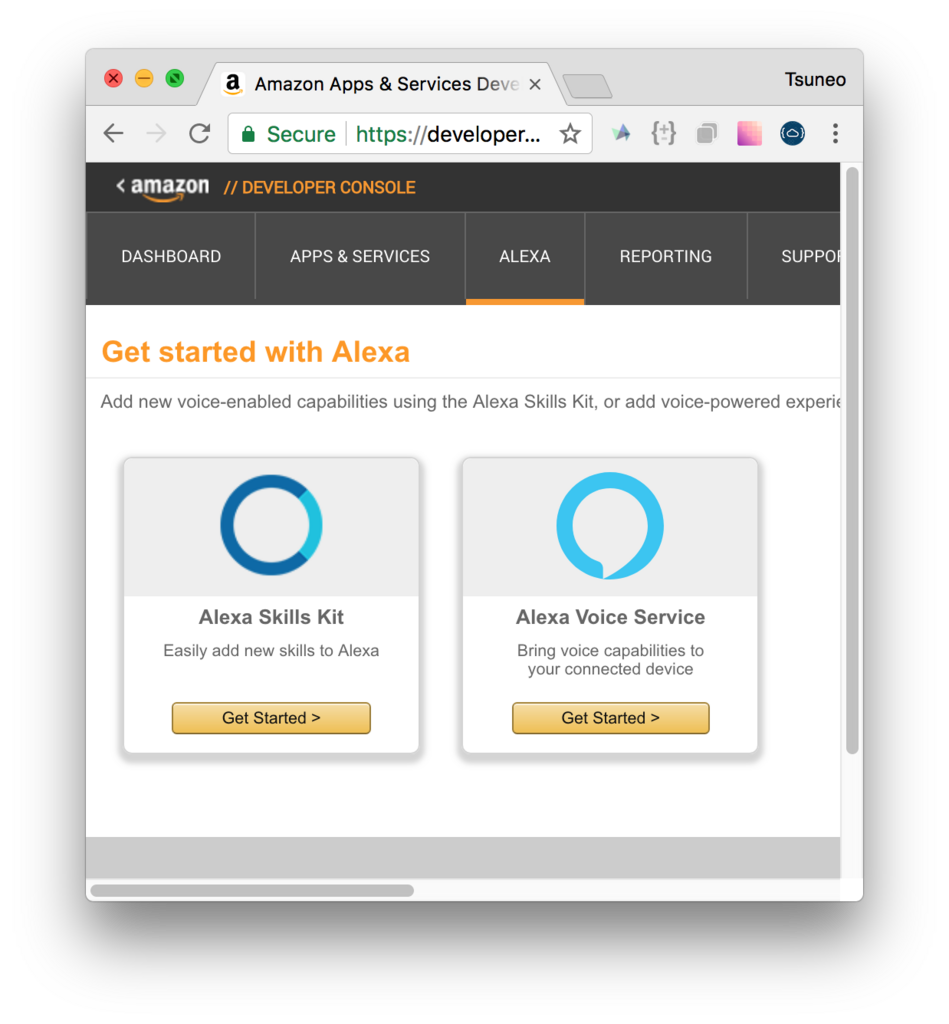
Click "Get Started" button in the "Alexa Skill Kit" box.
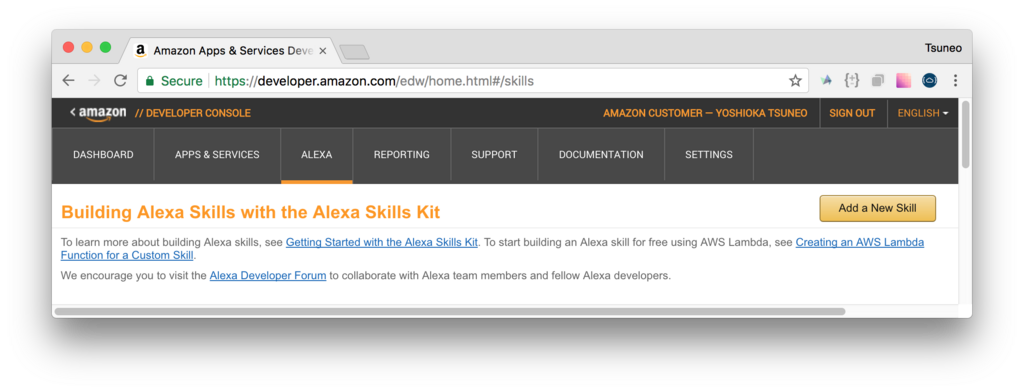 A page "Building Alexa Skills with the Alexa Skills Kit" opens.
Click "Add a new skill".
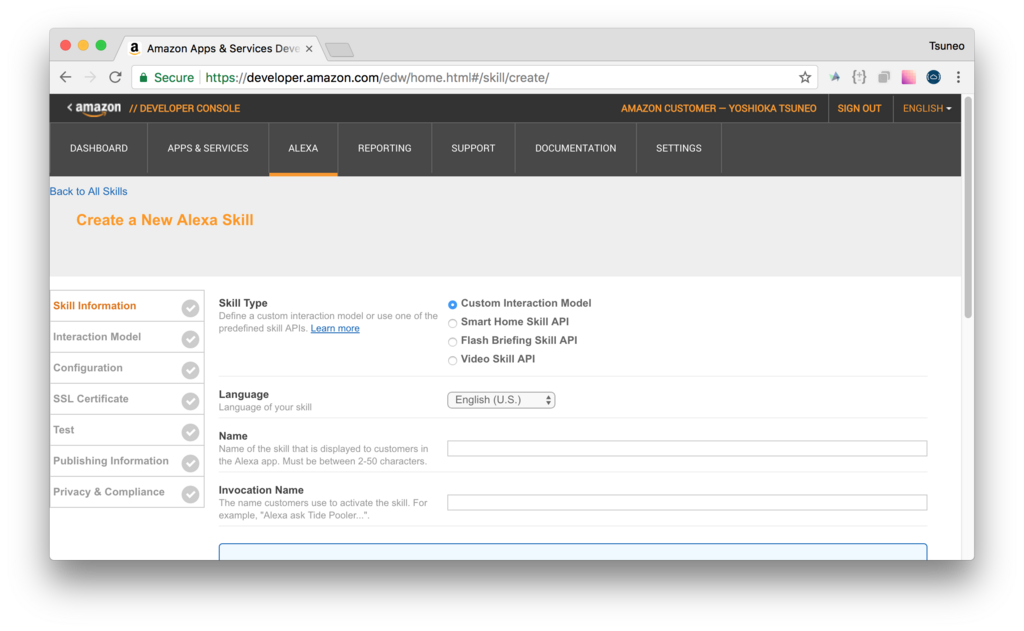 A page to create a new Alexa Skill opens. Here, you can create the Alexa Skill.
Skill: Skill information
At first, set the skill information.
On Skill Type, choose "Custom Interaction Model". And set Language to your language. You can choose from English, German, or Japanese.
Set Name to your Alexa application name. Here, we set it to "My Twitter".
Invocation name is the words to launch your application. Here, we set it to "My Twitter", too. Now, we can launch your application by saying "Alexa ask My Twitter.".
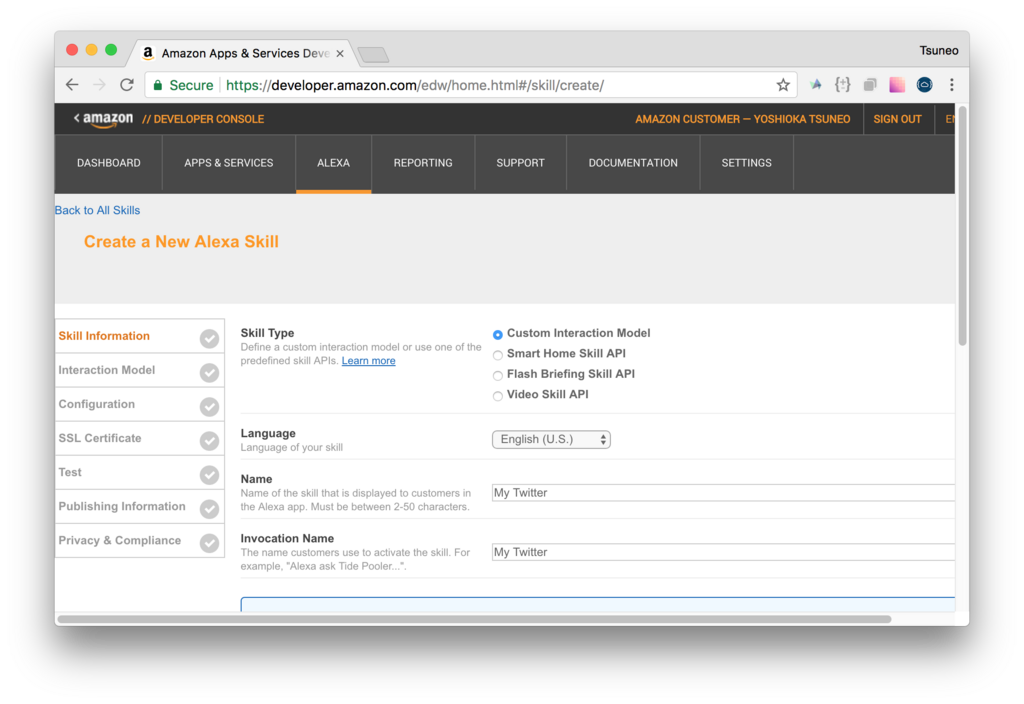 Click "Save" button, and then click "Next" button.
Skill: Interaction Model
Next, set the Interaction Model. Here, we set how to recognize the user's voice.
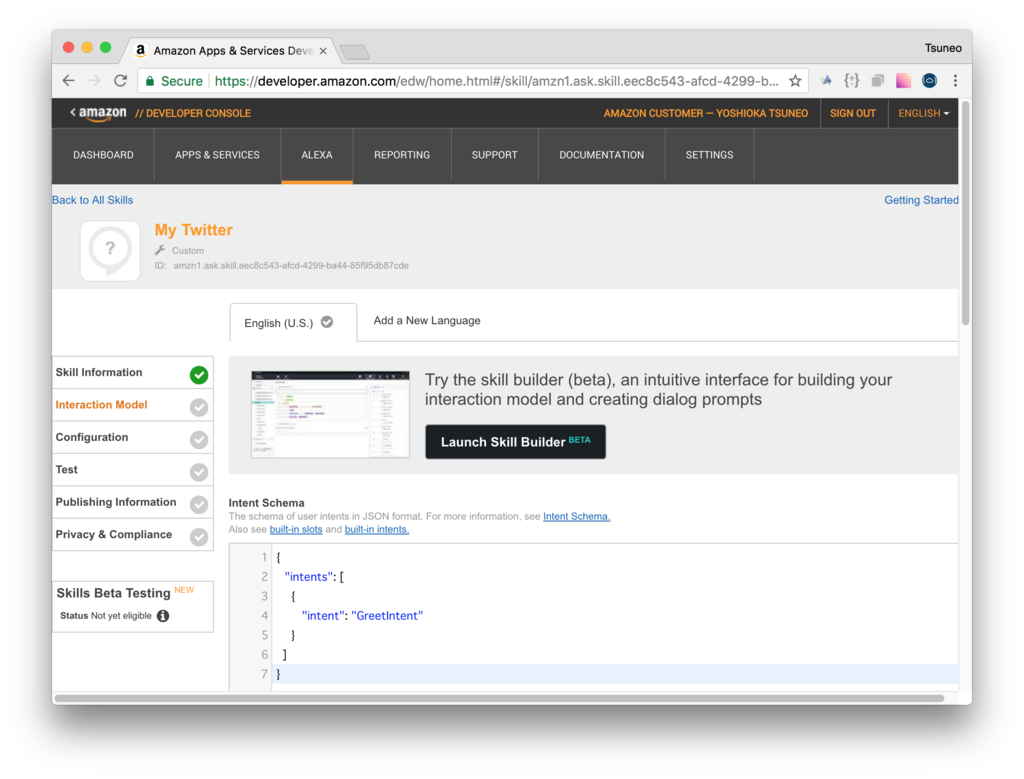 At first, let's create the interaction model just greeting without doing anything.
On Intent Schema, set the user's intents. Here, we just create one intent for greeting. Input the intents in JSON format with a GreetIntent intent for greeting.
{
  "intents": [
    {
      "intent": "GreetIntent"
    }
  ]
}
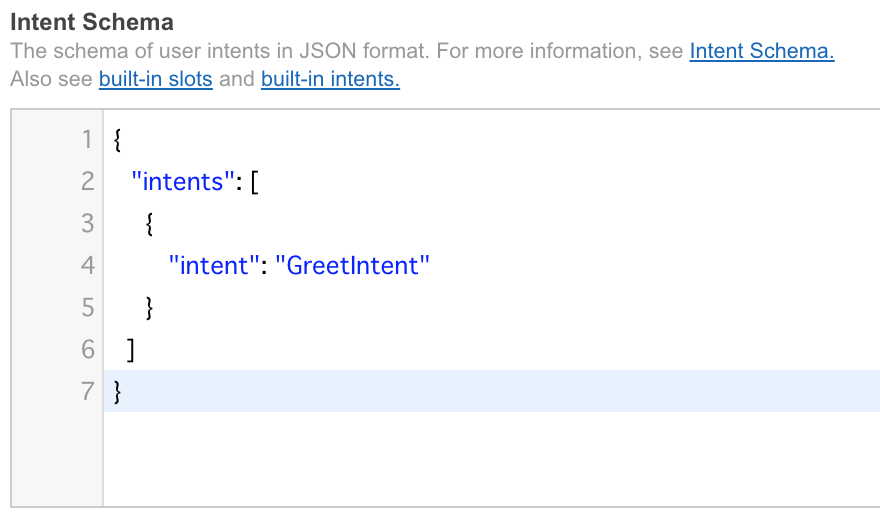
On Custom Slot Types, we have nothing to do.
On Sample Utterance, we set the pair of intent and the user's voice. For now, we only have on intent and nothing to recognize, we input one pair with a placeholder word "Hi" below.
GreetIntent Hi
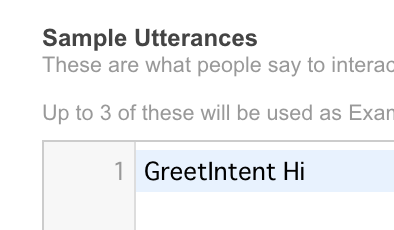
After the settings, click "Save", and "Next" button.
Skill: Configuration
Now, we open the Configuration.
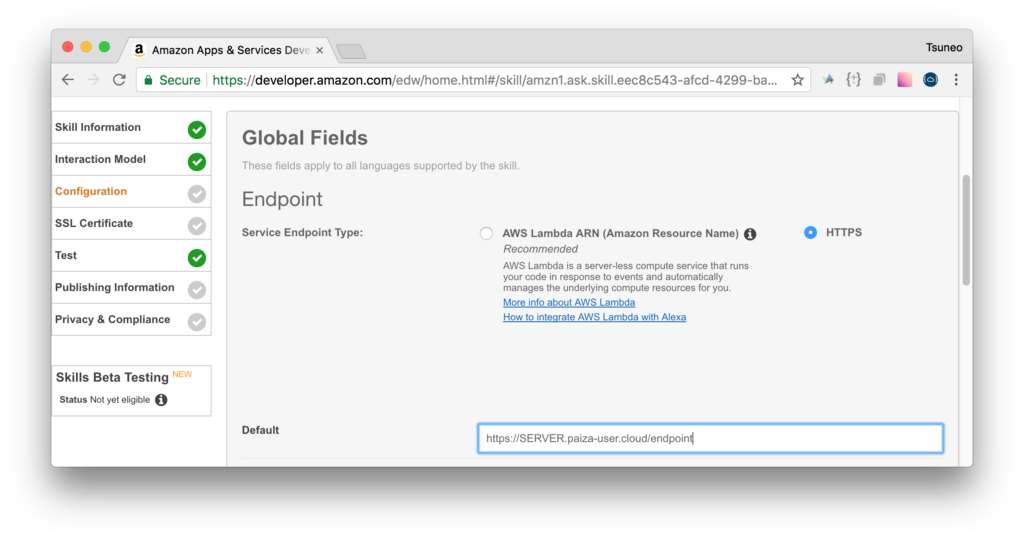
Here, we set the service endpoint which is the program to response to the user's saying. As the program is called in HTTPS, the program needs to run as a web server on the Internet.
We can choose "Service Endpoint Type" from "AWS Lambda" or "HTTPS". As we run the program on PaizaCloud, we choose "HTTPS".
Although AWS Lambda is scalable, there is limitation on the program languages or flexibility, and it may be difficult for debugging the program.
On Default field, we set the service URL.
Alexa's application program need to run on HTTPS default port with the certificate. As PaizaCloud already have HTTPS(SSL) settings and can run on the arbitrary port, you don't need to set up servers.
On PaizaCloud, the server name is "[SERVER NAME].paiza-user.cloud". The port number of "Sinatra" application we'll create is "80". As you can automatically use HTTPS instead of HTTP on PaizaCloud, the protocol of the URL is HTTPS. On PaizaCloud, the server running on HTTP port 80, can also listen on HTTPS port 443, without any settings, on PaizaCloud. And, we'll use path name '/endpoint'.
So, the URL is " https://[SERVER-NAME].paiza-user.cloud/endpoint "(Replace "[SERVER-NAME]" to your server name on PaizaCloud).

After the setting, click "Save" button, and "Next" button.
Skill: SSL certificate
Next, let's set for SSL certificate. As PaizaCloud have the wildcard certificate, choose the second option "My development endpoint is a sub-domain of a domain that has a wildcard certificate from a certificate authority". Choosing other will cause the connection error.
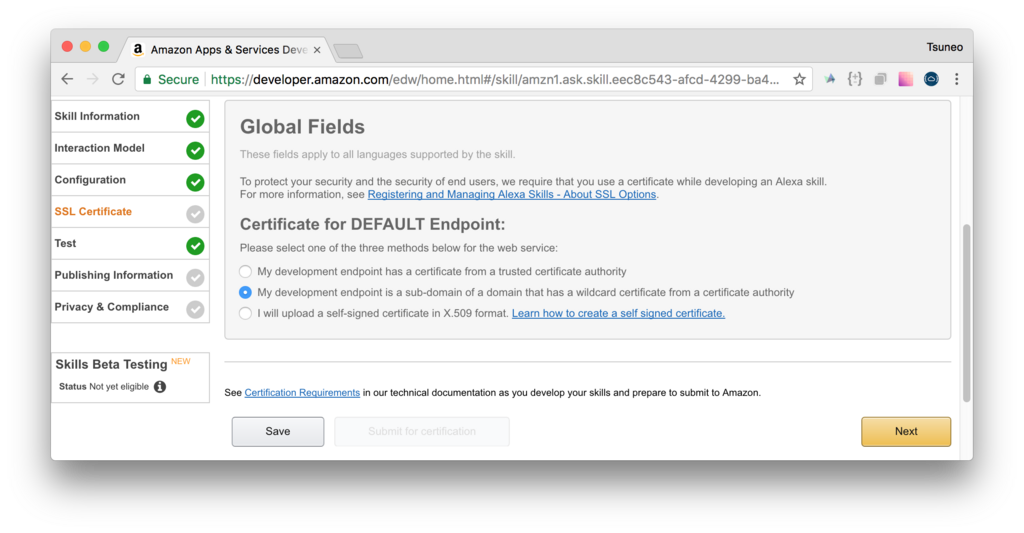
After the setting, click "Next" button.
Now, you see the "Test" page.
Check that the "This skill is enabled for testing on your account" is enabled. By enabling the setting, you can call your application from your Amazon Echo.
Let's talk to Amazon Echo: "Alexa ask My Twitter".
You got the reply "You cannot access the requested skill". Yes, you have not created the program to answer to user's saying.
So, next, let's create your application program.
Create server program
Now, we create a program on PaizaCloud. Here, we use Ruby and Sinatra to create the server.
On PaizaCloud, you can create and edit the file in the browser. On PaizaCloud, click "New File" button at the left-side of the page.
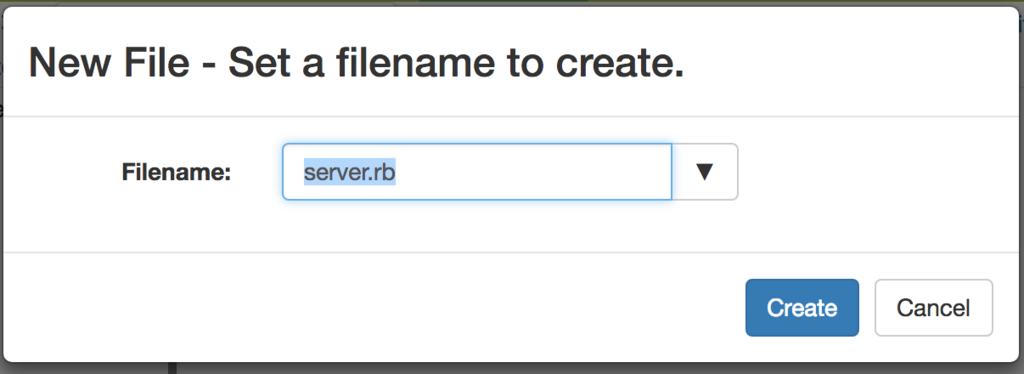
As a dialog box to put filename is shown, type a filename "server.rb" and click "Create" button.
The file is created!
Let's write a simple application just return the fixed message. Write a Ruby program like below.
server.rb:
require 'sinatra'
require 'sinatra/reloader'
require 'sinatra/json'

post '/endpoint' do
    return json({
        "version": "1.0",
        "response": {
            "outputSpeech": {
                "type": "PlainText",
                "text": "Here is the server program.",
            },
        }
    })
end

get '/' do
    return "Hello World"
end
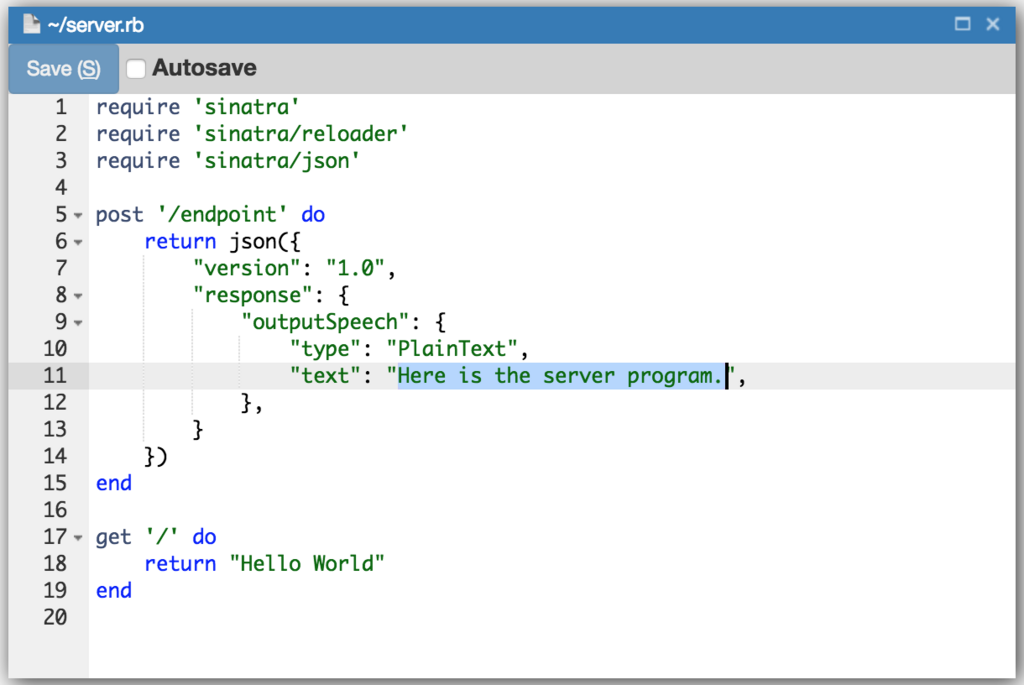
After writing the code, click "Save" button to save the file.
Let's see the code. On "post /endpoint'" block, we write the action for the POST "/endpoint" request. The return value for the block will be the HTTP response.
As Alexa endpoint requires the response message on JSON format, we use json() method here.
"speech" field of the return object is the message the application speech. Here, we set the fixed message "Here is the server program.".
Also, to test the program, we write the action for GET '/' request to "get '/'" block. Here, we just return a text "Hello World".
Then, let's run the Slack bot program we created. To run the program, run a command "sudo ruby ./server.rb -o 0 -p 80". As Sinatra listen only on localhost and does not accept connection from out of the server by default, we add "-o 0"(or, "-o 0.0.0.0") option to listen on the global address to accept connection from the clients. And, as you need to run the server on the default port, we add "-p 80" option to listen on the port 80. On PaizaCloud, the server listening on HTTP on the default port(80) can also accept connections from HTTPS on the default port(443). To run the server on the port 80, you need to run the program on root privilege.
On PaizaCloud, you can use a Terminal application in the browser to run the command.
Click "Terminal" button at the left side of the PaizaCloud page.

The Terminal launched. Type the command "sudo ruby ./server.rb -o 0 -p 80", and type enter key.
$ sudo ruby ./server.rb -o 0 -p 80
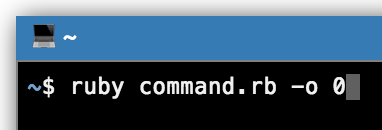
The command started. The text "tcp://0:80" means that the server is running on port 80.
Now, you see a button with a label "80" at the left-side of the PaizaCloud page.
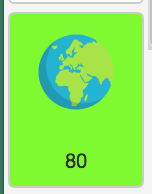
Sinatra listens on port 80. PaizaCloud detects the port number 80, and add the button for the port 80 to launch browser automatically. On PaizaCloud, you can also connect to the server running on HTTP port 80 with HTTPS port 443.
By clicking the button, browser(a browser on PaizaCloud) launch and you see the message from the server "Hello World".
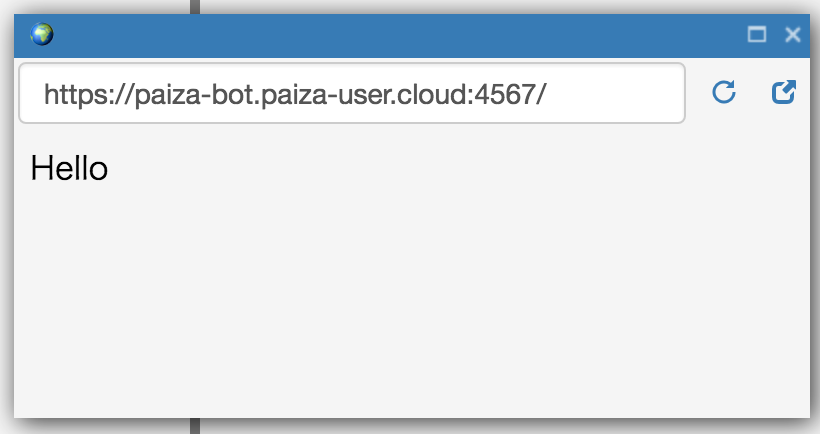
Now, let's test the program.
Skill: Test
You can test using Amazon Echo. But, on the Amazon developer site, there are simulators where you can test your application in the browser. So, let's use the simulator.
Go to the Amazon developer site below.
https://developer.amazon.com/edw/home.html#/skills
Click "Getting Start" button in "Alexa Skills Kit" box, and choose your application("My Twitter") from the list to open the Skill settings page. From the menu on the left side of the page, choose "Test".
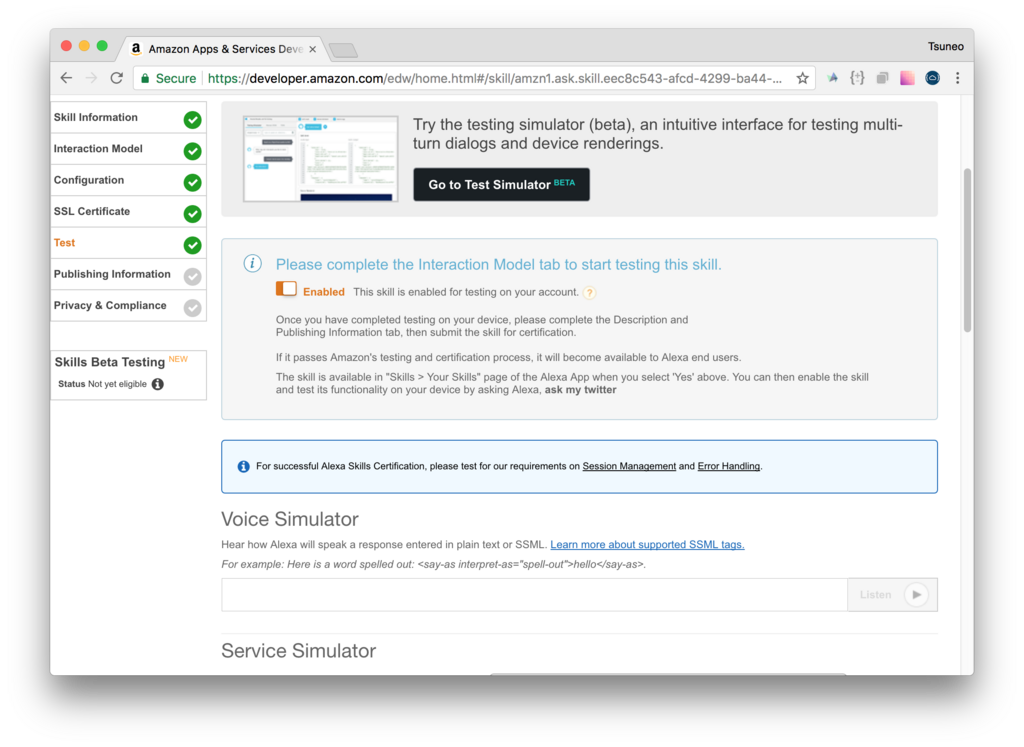
There are some simulators on the page.
On Test Simulator, you can test the dialogue between user and Alexa. But, it looks not working for other than US account.
On Service Simulator, you can test the endpoint and see the request and response JSON message. Let's use the Service Simulator for now.
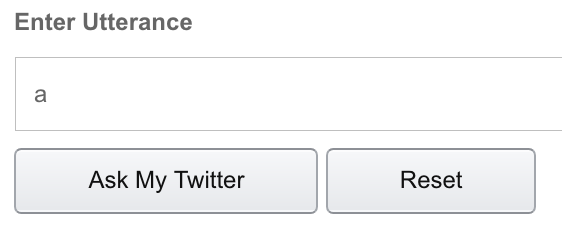
On the Service Simulator, input something to "Enter Utterance" input box, and click "Ask My Twitter" button.
 You got the response.
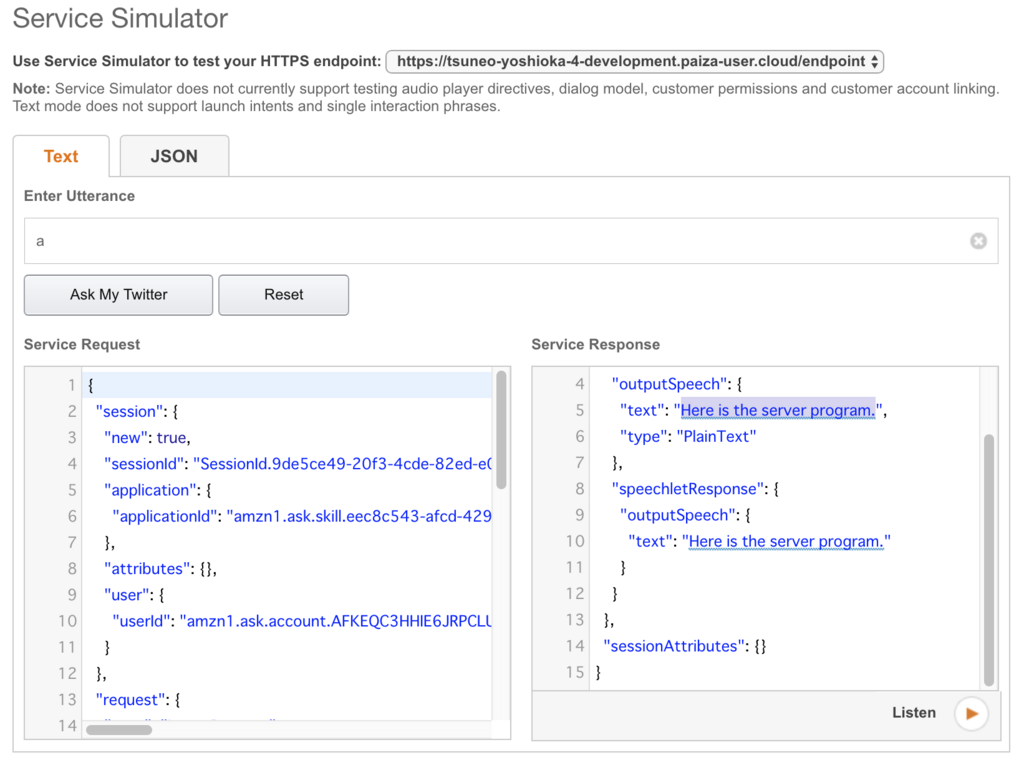
Service Request is the JSON data sent to your Ruby server program that you just created. Service Response is the response from the server program.
You see the message from the server. "Here is the server program". You got the reply!
Then, let's talk to Amazon Echo.
You: "Alexa, ask My Twitter".
Alexa: "Here is the server program".
Yeah! It is succeeded! Your Alexa application works!
Retrieving tweets on Twitter
Then, let's the application read tweets on Twitter.
To read tweets from Twitter on the program, we need Twitter API key. Create the Twitter API key following the article below.
http://paiza.hatenablog.com/entry/paizacloud_twitter_bot_ruby/2018/01/10#twitter_apikey
Then, create a configuration file(twitter-config.rb) on PaizaCloud, and set API keys like below.
Here, replace YOUR_CONSUMER_KEY / YOUR_CONSUMER_SECRET / YOUR_ACCESS_TOKEN / YOUR_ACCESS_SECRET to your application's API key you just created.
twitter-config.rb:
require 'twitter'

config = {
    consumer_key: "YOUR_CONSUMER_KEY",
    consumer_secret: "YOUR_CONSUMER_SECRET",
    access_token: "YOUR_ACCESS_TOKEN",
    access_token_secret: "YOUR_ACCESS_SECRET",
}

$twitterRestClient = Twitter::REST::Client.new(config)
$twitterStreamingClient = Twitter::Streaming::Client.new(config)
Then, change the server program to read tweets.
server.rb:
require 'sinatra/json'
require './twitter-config'

post '/endpoint' do
    tweets = $twitterRestClient.home_timeline
    text = tweets[0].text
    return json({
        "version": "1.0",
        "response": {
            "outputSpeech": {
                "type": "PlainText",
                "text": "I'm reading the latest tweet. " + text,
            },
        }
    })
end

get '/' do
    return "Hello World"
end
Let's see the program. "$twitterRestClient.home_timeline" is to get the latest tweets from your time line using Twitter API. The tweet text can get using "text" method of the Twitter object, it read the latest tweet text using "tweets[0].text". Then, return the message in JSON format.
Exit the running server program(server.rb) by typing Ctrl-C, and re-run.
$ sudo ruby ./server.rb -o 0 -p 80
Let's test the application.
On service simulator, type "ask to My Twitter".
You got the latest tweet message!
Then, let's talk to Amazon Echo.
You: "Alexa, ask My Twitter".
Alexa: "I'm reading the latest tweet. xxx... "
Alexa read the latest tweet. It is succeeded!
Search Tweet on Twitter
Next, let's the application search tweet on Twitter. So, the application will response to the message "Search by xxx".
On developer console(https://developer.amazon.com/edw/home.html#/skills), choose your skill to open Skill settings page.
From the menu on the left side of the page, choose "Interaction Model".
On Intent Schema, set the intents.
Here, we create an intent "SearchIntent" for searching. To handle the variable message like "Search by xxx", we use "slot".
The "slot" is like the variable in programming. The value of the slot is set based on user's saying. Here, we create a slot named "Keyword". The slot requires type. Here, we create a type with name "KEYWORD_TYPE".
{
  "intents": [
     {
      "intent": "SearchIntent",
      "slots": [
        {
          "name": "Keyword",
          "type": "KEYWORD_TYPE"
        }
      ]
    }
  ]
}
Next, on Custom Slot Type, we set slot type. For KEYWORD_TYPE slot, we set the list of possible words user say. By setting the possible user's words, Alexa recognize user's voice accurately. (On English, you can also use type AMAZON.LITERAL to accept all the saying.)
Here, we set the list of sports.
Football
Baseball
Tennis
Swimming
Skiing
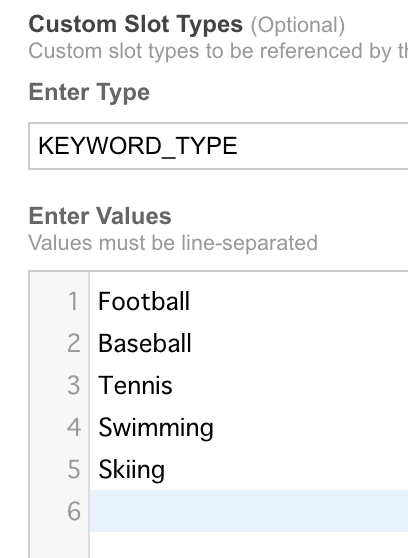
After the saving, click "Update" button.

Next, set Sample Utterance. Here, we assign the message "Search by xxx" to KeywordIntent intent. So, let's input like below. {Keyword} is for the slot to accept variable words. (Note: You need white space before the {Keyword}).
SearchIntent Search by {Keyword}
Change the server program "server.rb" like below.
server.rb:
require 'sinatra'
require 'sinatra/reloader'
require 'sinatra/json'
require './twitter-config'

post '/endpoint' do
    obj = JSON.parse(request.body.read)
    puts "REQUEST:", JSON.pretty_generate(obj)
    message = 'Say "search by something"'
    if obj['request']['intent'] && obj['request']['intent']['slots']['Keyword']
        keyword = obj['request']['intent']['slots']['Keyword']['value']

        tweets = $twitterRestClient.search(keyword).take(5)
        if tweets[0]
            text = tweets[0].text
            message = "I read the tweet for keyword #{keyword}." + text
        else
            message = "I could not find any tweet for keyword #{keyword}."
        end
    end

    return json({
        "version": "1.0",
        "response": {
            "outputSpeech": {
                "type": "PlainText",
                "text": message,
            },
            "shouldEndSession": false,
        }
    })
end

get '/' do
    return "Hello World"
end
Let's see the program. For user's saying "Search by xxx", the part "xxx" is sent in HTTP request body by JSON format. So, use JSON.parse() to parse the request body. Set the initial message to 'Say "search by something"'. The search keyword is stored in request/intent/slots/Any field, retrieve "Keyword" parameter. Use $twitterRestClient.search method to search from Twitter, and return the tweet in JSON format.
Exit the server program with Ctrl-C, and re-run the program(server.rb).
$ sudo ruby ./server.rb -o 0 -p 80
Let's test the program.
Open Service simulator and, type "Search by Football". Do you get the answer?
Then, let's talk with Amazon Echo.
You: "Alexa, ask My Twitter".
Alexa: Say "search by something".
You: "Search by football".
Alexa: I read the tweet for keyword football. xxx..."
Yeah! You are talking with Alexa! You created your Alexa application!
Note that on PaizaCloud free plan, the server will be suspended. To run the bot continuously, please upgrade to the BASIC plan.
Summary
We created an Amazon Echo(Alexa) application on PaizaCloud using Ruby, and run it on the same environment.
We can create Amazon Echo(Alexa) applications without implementing speech recognition. It is fascinating that everyone can easily use the voice application. It is quite fun to create the application thinking what to response to the user's message. Now, it is the time to create your own application!
With「PaizaCloud Cloud IDE」, you can flexibly and easily develop your web application or server application, and publish it, just in your browser.

