 Hello I'm Tsuneo!(@yoshiokatsuneo)
PHP is a language for Web development, and can runs on HTML by embedding the code. As PHP program can build and run from the small part, it fits for the Web development beginner.
But, if you want to build a full-fledged application, you probably need to use a Web Application Framework on the PHP.
There are several Web Application Frameworks like Laravel, CakePHP, Symfony, Zend Framework, or CodeIgniter. Among those, Laravel is the most popular and growing PHP framework, nowadays.
We can see the popularity from Google Trends below.

Laravel has features for web development like routing, MVC, ORM, generator. By building the application following Laravel rules, you can naturally create readable and extensible Web Applications.
But, to develop Laravel application in practice, you need to install and setup PHP, Laravel, or databases. These installation and setting up can be a frustrating. Just following the installation instruction does not work or cause errors because of OS, versions, other software dependencies, etc.
Also, if you publish the service, feedbacks from your friends or others will motivate you. But, this requires "deployment" of the service. The "deployment" also frustrates us...
So, here comes PaizaCloud Cloud IDE, a browser-based online web and application development environment.
As PaizaCloud have Laravel application development environment, you can just start coding for the Laravel application program in your browser.
And, as you can develop in the cloud, you can just run the Laravel application on the same machine without setting up another server and deploying to it.
Here, we develop a Task List application using Laravel on the PaizaCloud Cloud IDE.
Following the instruction below, you'll create and run the Laravel application just in 10 minutes.
Getting started with PaizaCloud Cloud IDE
So, here is the website of PaizaCloud Cloud IDE.
Just sign up with email and click a link in the confirmation email. You can also sign up with GitHub or Google.
Create new server
Let's create a new server for the development workspace.
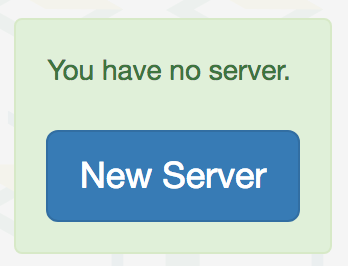
Click "new server" to open a dialog to set up the server.
Here, you can choose "PHP", "phpMyAdmin", and "MySQL", and click "New Server" button.

Just in 3 seconds, you'll get a browser-based development environment for Laravel.
You'll see editor or browser windows in the page, but we can close those for now.
Create an application
Then, let's create your Laravel application.
You can use "laravel new" command to create Laravel application.
On PaizaCloud Cloud IDE, you can use PaizaCloud's "Terminal" application to run the commands in your browser.
Let's click the "Terminal" button at the left side of the page.

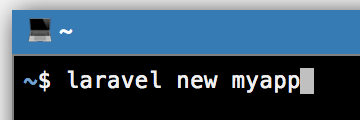
Now, the "Terminal" application launch. So, let's type "laravel new [application name]" command in the Terminal.
The '[application name]' is the name of the application you are creating. You can choose whatever you want, like "music-app" or "game-app".
Here, I'll choose the application name "myapp", where I can manage the Task List.
So, lets type:
$ laravel new myapp
In the file manager view at the left side of the page, you'll see the "myapp" directory. Click the folder to open it to see inside the directory.
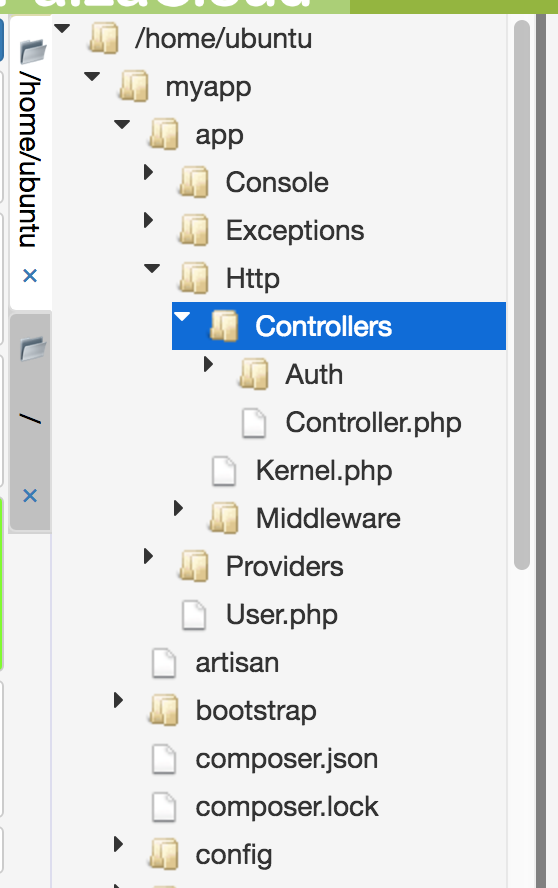
You'll see a bunch of files for the Laravel application.
Note that you can also create the Laravel project by using composer command below.
$ composer create-project laravel/laravel myapp --prefer-dist
And, by running the command below, your "laravel new" command will be faster.
$ composer config -g repositories.packagist composer 'https://packagist.jp'
$ composer global require hirak/prestissimo
Start Laravel server
Now, you can already run the application. Let's start the application.
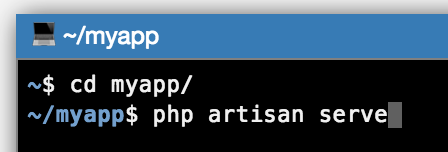
Change the directory by typing "cd myapp" command, and type "php artisan serve" command to start the server!
$ cd myapp
$ php artisan serve
You'll get a new button with text "8000" on the left side of the page.
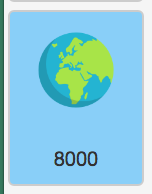
Laravel server runs on port 8000. PaizaCloud Cloud IDE detects the port number(8000), and automatically adds the button to open a browser for the port.
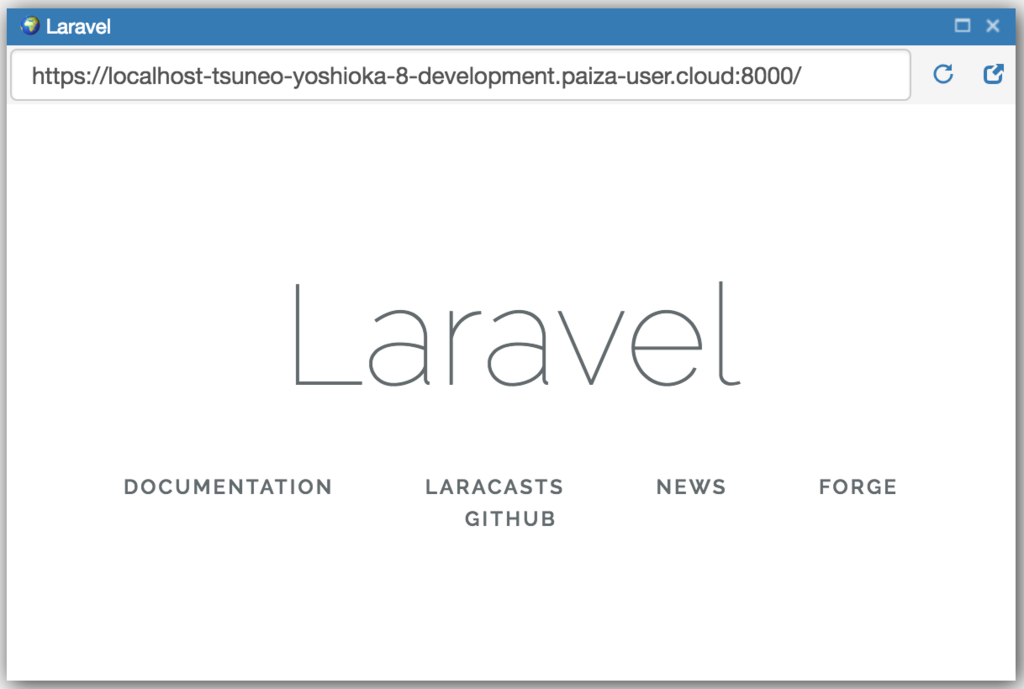
Click the button, and you'll get Browser application(a Browser application in the PaizaCloud). Now, you'll see web page about the Laravel, that is your application!
Editing file
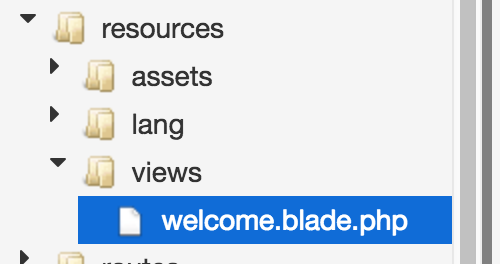
What you see on the application page is a PHP file "resources/view/welcome.blade.php" under the project directory("myapp"). Let's try to change the title by editing the file.
On file manager view, double click the file "myapp/resources/view/welcome.blade.php" for editing.
Edit the title part inside '<div class="title m-b-md">' tag
myapp/resources/view/welcome.blade.php:
                <div class="title m-b-md">
                    Hello Laravel on PaizaCloud!
                </div>
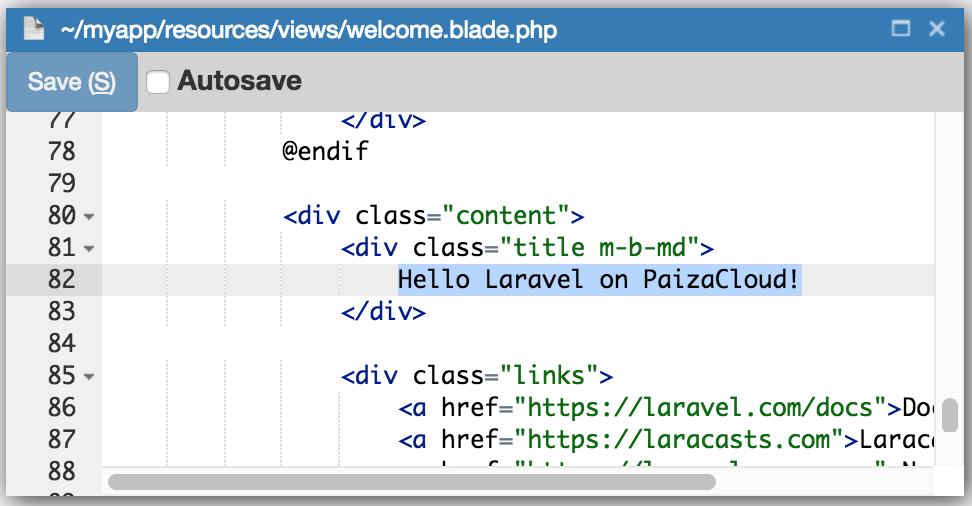
After the editing, click "Save" button or type "Command-S", or "Ctrl-S" to save the file.
Create database
You'll already have a MySQL server running because you checked it on the server setting. But if not, you can always manually start like:
$ sudo systemctl enable mysql
$ sudo systemctl start mysql
On PaizaCloud Cloud IDE, you can install packages on root privilege.
Next, create a database for the application. Here, we create a database "mydb" using "mysql" command. Type the command below to create the "mydb" database.
$ mysql -u root
create database mydb;

You created the database.
Then, set the application to use the database. Database configuration file is ".env" under the project directory. Files begin with a dot('.') is hidden files that are not visible in the file manager view by default. To make it visible, right click on file manager view and choose "Show Hidden files..." menu.
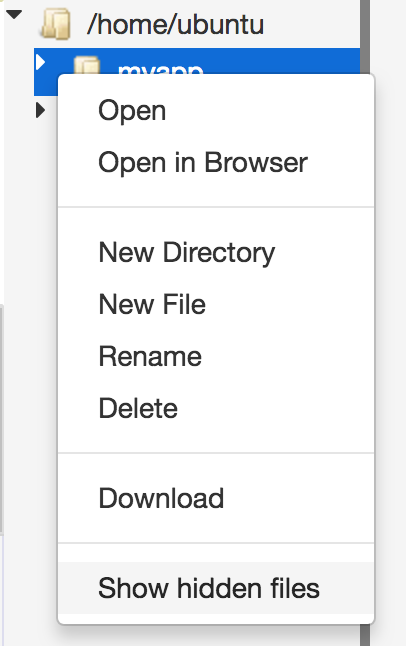
Then, open the ".env" file and edit 3 lines for "DB_DATABASE"、"DB_USERNAME"、"DB_PASSWORD" settings. As there is no password for the MySQL, comment out for "DB_PASSWORD" setting.
myapp/.env:
DB_DATABASE=mydb
DB_USERNAME=root
# DB_PASSWORD=secret
Create table, model, etc.
Now, let's make application to use the database.
On Laravel, we can create a database table, a model class, and a controller class with "php artisan make:model" command.
Run the command below. The "-m" option is for creating a migration file, the "-c" option is for creating a controller file, and the "-r" option is for creating controller methods related to resource handling.
$ php artisan make:model Task -m -c -r
The command creates following files.
| Filename | Role |
|---|---|
| database/migrations/2018_xx_xx_xxxxxxxx_create_tasks_table | Migration file |
| app/Task.php | Model |
| app/Http/Controllers/TaskController.php | Controller |
The migration file has settings to create a table. Now, let's add a column "name" for the task name. Add "$table->string('name')" to Schema::create() calling like below.
database/migrations/2018_xx_xx_xxxxxxxx_create_tasks_table:
    public function up()
    {
        Schema::create('tasks', function (Blueprint $table) {
            $table->increments('id');
            $table->string('name');
            $table->timestamps();
        });
    }

After editing the file, run migration to create the table.
$ php artisan migrate
Now, the "tasks" table is created. If you want to re-run all migration from scratch, you can run "php artisan migrate:refresh" command. We can browse the table using "phpMyAdmin".
On PaizaCloud, open a browser(in browser) and type "http://localhost/phpmyadmin" to the URL field.

Routing settings
The Task List application has 3 actions: listing tasks, adding a task, or deleting a task. We set 3 routing for those like below.
| Method | Path | Action |
|---|---|---|
| GET | /tasks | List tasks |
| POST | /tasks | Add a task |
| DELETE | /tasks/{id} | Delete a task |
We set routing on "routes/web.php" file. At first, remove all the default routings on the file. For about top page "/", set to redirect to "/tasks".
Set "routes/web.php" file like below.
routes/web.php:
Route::get('/', function(){return redirect('/tasks');});
Route::get('/tasks', 'TaskController@index');
Route::post('/tasks', 'TaskController@store');
Route::delete('/tasks/{id}', 'TaskController@destroy');
\URL::forceScheme('https');
Let's see the code. Rout::get is for GET method. The second argument is for setting action using the callback function, or the controller class and action name. For about 'GET /' request, redirect to '/tasks' using the redirect() function. For about 'GET /tasks' request, set the action to call TaskController's index() method. For about 'POST /tasks' request, set the action to call TaskController's store() method. And for about 'DELETE /tasks/{id}' request, set the action to call TaskController's destroy() method. By writing like "{id}", we can get the part from the PHP code. For example, for about "/task/1" request, we get "1" as $id .
And, as PaizaCloud uses HTTPS protocol to access the server, add "\URL::forceScheme('https')". Without this setting, redirect() does not work.
To make sure, let's set to use HTTPS in the application settings. As we can set application wide settings on "AppServiceProvider.php"'s boot() method, add "\URL::forceScheme('https')" to the file like below.
Providers/AppServiceProvider.php;
class AppServiceProvider extends ServiceProvider
{
    ...
    public function boot()
    {
        \URL::forceScheme('https');
    }
    ...
}
Controller settings
Create controller methods code called from the routing.
Write index()、store()、destroy() method for listing tasks, creating a task, or deleting a task like below,
app/Http/Controllers/TaskController.php:
<?php

namespace App\Http\Controllers;

use App\Task;
use Illuminate\Http\Request;

class TaskController extends Controller
{
    public function index()
    {
        $tasks = Task::all();
        return view('tasks', ['tasks' => $tasks]);
    }

    public function store(Request $request)
    {
        $task = new Task;

        $task->name = request('name');
        $task->save();
        return redirect('/tasks');
    }

    public function destroy(Request $request, $id, Task $task)
    {
        $task = Task::find($id);
        $task->delete();
        return redirect('/tasks');
    }
}
Let's see the code.
"use App\Task" is written to use Task class. Without the "use", we need to write "Task" as "\App\Task".
On index() method for listing tasks, use Task model's Task::all() method to retrieve all the tasks from the database table. Call view() function to render the page. The first argument is setting view file, and the second argument is to set variable names referred on the view file. We set the retrieved tasks to the value of 'tasks' key on the associated array so that the view file can refer tasks as $tasks variable.
On store() method for adding a task, create a Task object and set the submitted name parameter to name property of the Task object, and call $task->save() to save the task to the database. Then, redirect to '/tasks' to show the Task listing page.
On destroy() method for deleting a task, call Task model's Task::find() method to retrieve a task for the task id($id). Call $task->delete() to delete the task, and redirect to '/tasks' to show the Task listing page.
Create view(HTML)
Next, let's create view files. The views are HTML files with embedded PHP code. Laravel uses Blade template engine to make the PHP code more concise.
The view can be just one file. But, as we can have a shared layout for multiple view files, let's create the layout file for now.
Now, we create the layout file with the filename "resources/views/layout.blade.php". To create the file, right-click on the "resources/views" folder and choose "New file" menu, then set filename to "layout.blade.php".
Write the code below on the layout file.
resources/views/layout.blade.php:
<!DOCTYPE html>
<html>
    <head>
        <title>Task List</title>
        <!-- CSS And JavaScript -->
        <link rel="stylesheet" href="//fonts.googleapis.com/css?family=Roboto:300,300italic,700,700italic">
        <link rel="stylesheet" href="//cdn.rawgit.com/necolas/normalize.css/master/normalize.css">
        <link rel="stylesheet" href="//cdn.rawgit.com/milligram/milligram/master/dist/milligram.min.css">
    </head>
    <body>
        <div class="container">
            @yield('content')
        </div>
    </body>
</html>
On the file, we use simple CSS framework "Milligram". Milligram makes HTML files beautiful without writing additional class names. On "body" tag, there is a line "@yield('content')", here is the place to replace with the page content.
Then, create a file for listing tasks, creating or deleting a task with the filename "resources/views/tasks.blade.php".
Right-click the "resources/views" folder and choose "New file" menu to create a "tasks.blade.php" file.
resources/views/task.blade.php:
@extends('layout')
@section('content')
<h1>Task List</h1>
<form action="/tasks" method="POST" class="form-horizontal">
{{ csrf_field() }}
<!-- Task Name -->
<div class="form-group">
<label for="task" class="col-sm-3 control-label">Task</label>
<div class="col-sm-6">
<input type="text" name="name" id="task-name" class="form-control">
</div>
</div>
<!-- Add Task Button -->
<div class="form-group">
<div class="col-sm-offset-3 col-sm-6">
<button type="submit" class="btn btn-default">
<i class="fa fa-plus"></i> Add Task
</button>
</div>
</div>
</form>
<!-- Current Tasks -->
<h2>Current Tasks</h2>
<table class="table table-striped task-table">
<thead>
<th>Task</th><th> </th>
</thead>
<tbody>
@foreach ($tasks as $task)
<tr>
<!-- Task Name -->
<td>
<div>{{ $task->name }}</div>
</td>
<td>
<form action="/tasks/{{ $task->id }}" method="POST">
{{ csrf_field() }}
{{ method_field('DELETE') }}
<button>Delete Task</button>
</form>
</td>
</tr>
@endforeach
</tbody>
</table>
@endsection
After editing the file, click "Save" button to save the file.
Let's see the file. The line "@content('layout')" is to specify to use the layout file('layout.blade.php'). The area between "@section('content')" and "@endsection" is for the content of the page. The layout file's "@yield('content')" part will be replaced with this content.
The first form is to create a task. On Laravel, we need to add "{{ csrf_field() }}" for CSRF prevention.
On the "input" tag, we set the name to "name" for the task name. The form is set to submit to "POST /tasks".
On the task list, we can refer the task list object as $tasks array. "@foreach ($tasks as $task)" is Blade syntax. It can be written in PHP as "<?php foreach($task as $task){ %>" where we can get each task as $task variable from $tasks array.
The "{{ $task->name }}" is also Blade syntax. "{{...}}" is to show the value inside braces. It can be written in PHP as "<?= $task->name ?>". Here, we refer name property of the $task object to access the "name" column of the "tasks" table on the database.
On "Delete Task" button, set the form to call "DELETE /tasks/{id}" to delete the task. As HTML cannot handle the DELETE method directly, we use "method_field('DELETE')" to emulate the DELETE method.
Model file
Let's see the model file. The model class is empty like below.
Actually, we don't need to set anything. Laravel provides ORM called Eloquent, where table column can be referred as model's property automatically. Isn't it cool?
app/Task.php:
<?php

namespace App;

use Illuminate\Database\Eloquent\Model;

class Task extends Model
{
    //
}
Run the application
Now, we wrote all the code. Let's see.
Click the browser icon(8000) to open the browser in PaizaCloud.
We see the "Task List" page with the empty task.
Let's add or delete the tasks.
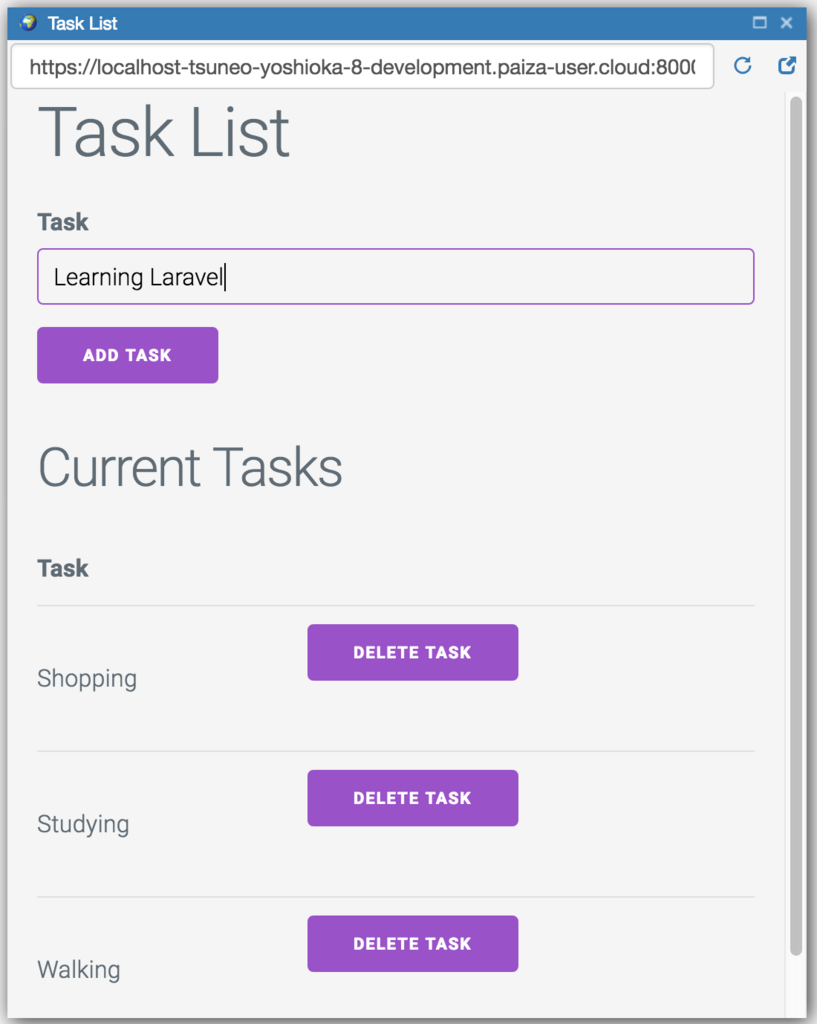
It works! We successfully created the Task List application with Laravel!
Note that on PaizaCloud free plan, the server will be suspended. To run the bot continuously, please upgrade to the BASIC plan.
Summary
With PaizaCloud Cloud IDE, we created a Laravel application just in your browser, without installing or setting up any development environments. Now, let's create your own Laravel application!
With「PaizaCloud Cloud IDE」, you can flexibly and easily develop your web application or server application, and publish it, just in your browser.

