
 Hello I'm Tsuneo!(@yoshiokatsuneo)
Are you writing codes in PHP?
PHP is a programming language for web development. PHP is released in 1995, when the Internet just starts spreading.
Now, PHP is widely used. For example, Facebook or WordPress is written in PHP. As it is widely used for web development, there are many opening job positions for PHP.
But, to develop PHP application in practice, you need to install and set up PHP or databases. These installations and setting up can be frustrating. Just following the installation instruction does not work or cause errors because of OS, versions, other software dependencies, etc.
Also, if you publish the service, feedback from your friends or others motivates you. However, this requires "deployment" of the service. The "deployment" also frustrates us...
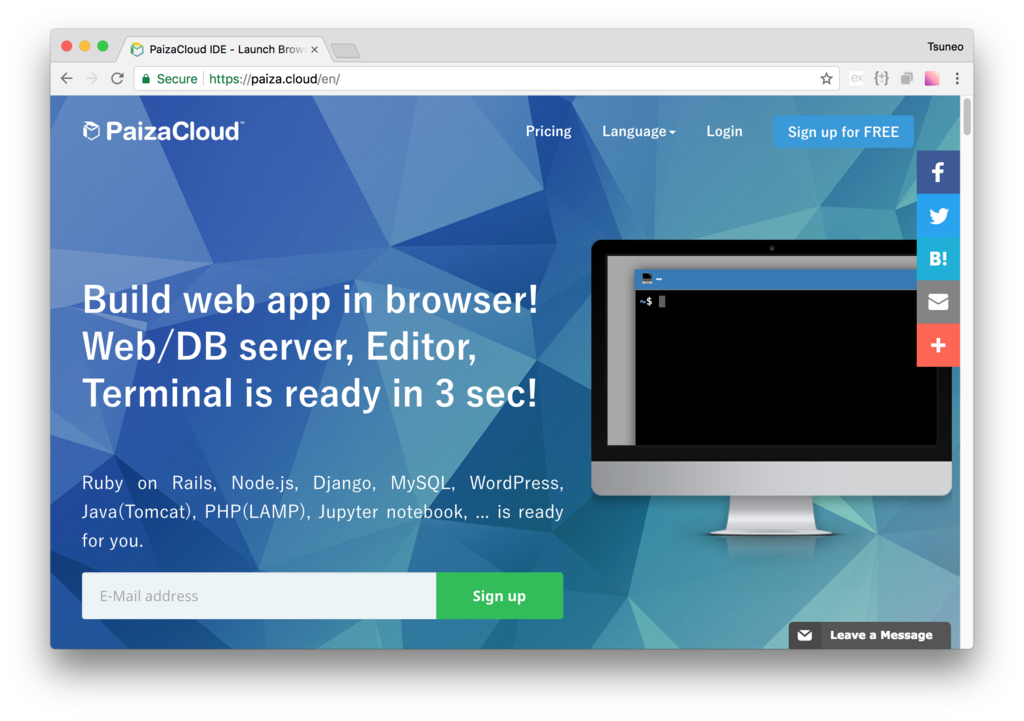
So, here comes PaizaCloud Cloud IDE, a browser-based online web and application development environment.
As PaizaCloud have PHP application development environment, you can just start coding for the PHP application program in your browser.
And, as you can develop in the cloud, you can just run the PHP application on the same machine without setting up another server and deploying to it.
Here, we develop a Todo List application using PHP7.2 and MySQL on the PaizaCloud Cloud IDE.
Following the instruction below, you'll create and run the PHP application just in 10 minutes.
About PHP
Before PHP, Web development was only for the geeks who can handle Perl or CGI, magically. It is not for the beginner or creators who actually want to create services in a timely manner.
PHP enables us to develop web service just by embedding PHP code in the simple HTML file. It makes many people build their own web service. At some point, PHP is almost synonym of the web development.
There is data that about 30% of websites are built on WordPress with PHP(Historical trends in the usage of content management systems, September 2018), and about 80% of websites use PHP. (Usage Statistics and Market Share of Server-side Programming Languages for Websites, September 2018) PHP can be the one of the most used languages for web development.

As we have more language or frameworks for web development, like Ruby on Rails. PHP may have some bad reputations like "slow" or "obsoleted".
But, actually, PHP is continuously evolving. Now, PHP is getting faster, with modern features like classes. A full stack modern PHP framework Laravel is getting popular in the web development.
Getting started with PaizaCloud Cloud IDE
So, here is the website of PaizaCloud Cloud IDE.
Just sign up with email and click a link in the confirmation email. You can also sign up with GitHub or Google.
Create new server
Let's create a new server for the development workspace.

Click "new server" to open a dialog to set up the server.
Here, you can choose "PHP", "phpMyAdmin", and "MySQL", and click "New Server" button.

Just in 3 seconds, you'll get a browser-based development environment for PHP and MySQL.
You'll see editor or browser windows in the page, but we can close those for now.
Getting started with PHP
Now, let's run and show some PHP code.
On the left-side of PaizaCloud, you can see a file management view. There is a file "public_html/index.php", so double-click to open it.

The file contains default code. Remove and replace with the following text.
public_html/index.php:
<h1>Hello</h1>

After the editing, click "Save" button or type "Command-S", or "Ctrl-S" to save the file.
Then, open the file in the browser on PaizaCloud.
On the file management view, right-click the "public_html/index.php" file to show the context menu. Choose "Run in Browser". (Or, click the browser icon on the left side to open browser view, and type "http://localhost/~ubuntu/" in the URL bar on the browser.)


You see the text large "Hello". The text is just handled as HTML file.
Next, let's write some PHP code, edit the "public_html/index.php" file like below.
<h1>Hello</h1>
<?php
    echo 'Hello ' . 'PHP';
?>
 After the editing, click "Save" button or type "Command-S", or "Ctrl-S" to save the file.
On PHP, we embed the PHP code in the HTML file. To embed the PHP code, write the PHP code between "<?php" and "?>". Here, we use "echo" command to output a string. The string is concatenated using "'Hello ' . 'PHP'", as "." operator concatenates the strings.
So, reload the browser view to update the web page. (Or, if you close the browser view, on the file management view, right-click the "public_html/index.php" file to show the context menu, and choose "Run in the Browser". Or, click the browser icon on the left side to open browser view, and type "http://localhost/~ubuntu/" in the URL bar on the browser.)

Now, you see a text "Hello PHP", on the browser view. The PHP code was successfully run. As this, the output of the PHP code can be seen as HTML.
Note that we can also write the PHP code on using "<?=" syntax so that we can output the PHP output with more simple code.
<h1>Hello</h1>
<?=
    'Hello ' + 'PHP';
?>
Let's try to calculate and output by changing the code, like "1+2", "3*3", "2**10"(10th power of 2).
Create database
You'll already have a MySQL server running because you checked it on the server setting. But if not, you can always manually start like:
$ sudo systemctl enable mysql
$ sudo systemctl start mysql
On PaizaCloud Cloud IDE, you can install packages on root privilege.
Next, create a database for the application. Here, we create a database "mydb" using "mysql" command.
On PaizaCloud Cloud IDE, you can use PaizaCloud's "Terminal" application to run the commands in your browser.
Let's click the "Terminal" button at the left side of the page.

Now, the "Terminal" application launch.
Type the command below to create the "mydb" database.
$ mysql -u root
create database mydb;

You created the database.
Create table
Next, let's create a table in the database.
On the terminal view, run the commands below to create a "todos" table.
$ mysql -u root mydb;
create table todos(id int auto_increment primary key not null, name text);
exit
The table is created.
Using phpMyAdmin
We can browse the database table using phpMyAdmin, a web-based database management tool.
On PaizaCloud, open a browser(in browser) and type "http://localhost/phpmyadmin" to the URL field.

Here, we can show or edit the database. It is helpful if we see the database when developing the web application.
Create Todo list application
Now, let's create a Todo list application.
Open and edit the "public_html/index.php" like below.
<?php
    $pdo = new PDO("mysql:host=localhost;dbname=mydb;charset=utf8","root","");

    if(isset($_POST['submit']) ){
        $name = $_POST['name'];
        $sth = $pdo->prepare("INSERT INTO todos (name) VALUES (:name)");
        $sth->bindValue(':name', $name, PDO::PARAM_STR);
        $sth->execute();
    }elseif(isset($_POST['delete'])){
        $id = $_POST['id'];
        $sth = $pdo->prepare("delete from todos where id = :id");
        $sth->bindValue(':id', $id, PDO::PARAM_INT);
        $sth->execute();
    }
?>

<!DOCTYPE HTML>
<html lang="ja">
<head>
    <title>Todo List</title>
    <link rel="stylesheet" href="//fonts.googleapis.com/css?family=Roboto:300,300italic,700,700italic">
    <link rel="stylesheet" href="//cdn.rawgit.com/necolas/normalize.css/master/normalize.css">
    <link rel="stylesheet" href="//cdn.rawgit.com/milligram/milligram/master/dist/milligram.min.css">
</head>

<body class="container">
    <h1>Todo List</h1>
    <form method="post" action="">
        <input type="text" name="name" value="">
        <input type="submit" name="submit" value="Add">
    </form>
    <h2>Current Todos</h2>
    <table class="table table-striped">
        <therad><th>Task</th><th></th></therad>
        <tbody>
<?php
    $sth = $pdo->prepare("SELECT * FROM todos ORDER BY id DESC");
    $sth->execute();

    foreach($sth as $row) {
?>
            <tr>
                <td><?= htmlspecialchars($row['name']) ?></td>
                <td>
                    <form method="POST">
                        <button type="submit" name="delete">Delete</button>
                        <input type="hidden" name="id" value="<?= $row['id'] ?>">
                        <input type="hidden" name="delete" value="true">
                    </form>
                </td>
            </tr>
<?php
    }
?>
        </tbody>
    </table>
</body>
</html>
After the editing, click "Save" button or type "Command-S", or "Ctrl-S" to save the file.
Let's see the code.
On "$pdo = new PDO()", create a PDO object to use database. On the parameter, set MySQL server name("localhost"), database name("mydb"), username("root") and password("").
"isset($_POST['submit'])" test whether the code is run when the "Add" button is clicked, as the "Add" button form have a submit form with name "submit". Set the name of the todo to "$name" by fetching a value of the submitted text input form with name "name" as "$_POST['name'];".
On the "if" clause, create and run the SQL to insert the data into the database. To do that, we use prepare(), bindValud(), and execute() function of the PDO object. "prepare()" is to set the SQL to manipulate the database, here we use "INSERT INTO todos" syntax to insert the row to the database. "bindValue()" is to replace the placeholder(":NAME") on the SQL with the value. By not directly writing SQL with value, we can safely escape the value on the SQL statement. Then, "execute()" to run the SQL command.
"if(isset($_POST['delete']))" is the clause for deleting the todo item. As the "Delete" button have a hidden input field with the name "delete", the condition is true when the todo item needs to be deleted. Retrieve the id of the todo as "$_POST['id'];", and run SQL statement "DELETE FROM todos" to delete the todo item with the id.
On the ”<head>" tag, load stylesheets for a simple CSS framework "milligram" using "<link>" tag.
On the "<body>", create an input form to add the item. Create a text input field with the name "name", and a submit form with the name "submit".
Show the todo list using "<table>" tag. "table" and "table-striped" class is a milligram class name to beautify the table.
Retrieve the table using PHP code inside "<?php" and "?>". "prepare("SELECT * FROM todos")" is a SQL to retrieve the todo list.
On "foreach($sth as $row)", scan all the row on the todos table by setting each row to "$row" variable. On each table row, output todo item by using "<?=" tag and "$row['name']" todo item value. As the value may contain HTML tags, we need to escape the value using htmlspecialchars() to avoid security issues.
Then, on each table row, add a form with "delete" button, and hidden input field with value "$row['id']" to distinguish each item.
Don't forget to add "<?php } ?>" to close the "foreach".
Run the application
Now, we wrote all the code. Let's see.
Reload the browser view to update the web page. (Or, if you close the browser view, on the file management view, right-click the "public_html/index.php" file to show the context menu, and choose "Run in the Browser". Or, click the browser icon on the left side to open browser view, and type "http://localhost/~ubuntu/" in the URL bar on the browser.)
We see the "Todo List" page with the empty task.
Let's add or delete the tasks.

It works! We successfully created the Task List application with PHP and MySQL!
Note that on PaizaCloud free plan, the server will be suspended. To run the bot continuously, please upgrade to the BASIC plan.
Summary
With PaizaCloud Cloud IDE, we created a PHP application with MySQL database just in your browser, without installing or setting up any development environments. Now, let's create your own Ruby on Rails application!
With「PaizaCloud Cloud IDE」, you can flexibly and easily develop your web application or server application, and publish it, just in your browser.
