
 Hello, I'm Tsuneo!(@yoshiokatsuneo)
What web application frameworks do you choose?
Now, there are 3 major web application frameworks: Ruby on Rails, Django, Laravel.
All of those are full-stack frameworks having all the major features to build web applications. But, each has their own feature, structure, philosophy, or programming language.
You may hear the name of those frameworks, but not so many developers actually have used all those frameworks.
Even if you are comfortable with your favorite framework, other frameworks will show you the web application development from different angles.
At the same time, you may not understand the features and feel the atmosphere just by browsing the list of features. So, I'll show the features and differences of those web application frameworks by actually creating ToDo list applications with Ruby on Rails, Django, and Laravel.
Here, we'll create the web application using cloud IDE PaizaCloud so that we don't need to install and set up the development environment for all the frameworks. So, let's build the application together!
Trend of Web application frameworks
At first, let's see the trends of Ruby on Rails, Django, and Laravel on Google trends and Stackoverflow Trends.

(Google Trends より)
 ( Stack Overflow Trends より )
All of Ruby on Rails, Django, and Laravel have quite similar popularity, at now.
I can say that Ruby on Rails go over the fever, Django is stable, and Laravel is growing.
Comparison
Next, let's see the strength of each framework on the comparison sheet.
Ruby on Rails and Django was released on the similar date, but Laravel is newer.
Ruby on Rails and Laravel have many features like code generation, and allow you to build the applications by writing only a little codes. But, Django have less "magic" and ask you to write code explicitly so that you code can be more readable.
 |
 |
 |
|
|---|---|---|---|
| Language | Ruby | Python | PHP |
| Release | 13 Dec 2005 | 21 July 2005 | June 2011 |
| Latest version (in 2018/5) |
5.2 | 2.0 | 5.6 |
| Popularity | ★★★ | ★★ | ★★ |
| Features | ★★★ | ★★ | ★★★ |
| Code generations | ★★★ | ★ | ★★ |
| Readable | ★★ | ★★★ | ★★ |
| AI, Machine Learning | ★★ | ★★★ | ★ |
| Use cases | Airbnb, GitHub, etc. | Instagram, etc. | STARTUPS.CO, LaravelIO, etc. |
| Philosophy | - Convention over Configuration(CoC) - Don't Repeat Yourself(DRY) |
- Explicit is better than implicit - loose coupling and tight cohesion |
- Happy developers make the best code. - expressive, elegant syntax |
Getting started with PaizaCloud Cloud IDE
As it is a bit of cumbersome to set up development environments for Ruby on Rails, Django, and Laravel, we'll use PaizaCloud, a cloud-based web development environment. PaizaCloud is a browser-based web development environment supporting Ruby on Rails, Django, Laravel. So, you don't need to locally install and set up your development environment.
So, let's start.
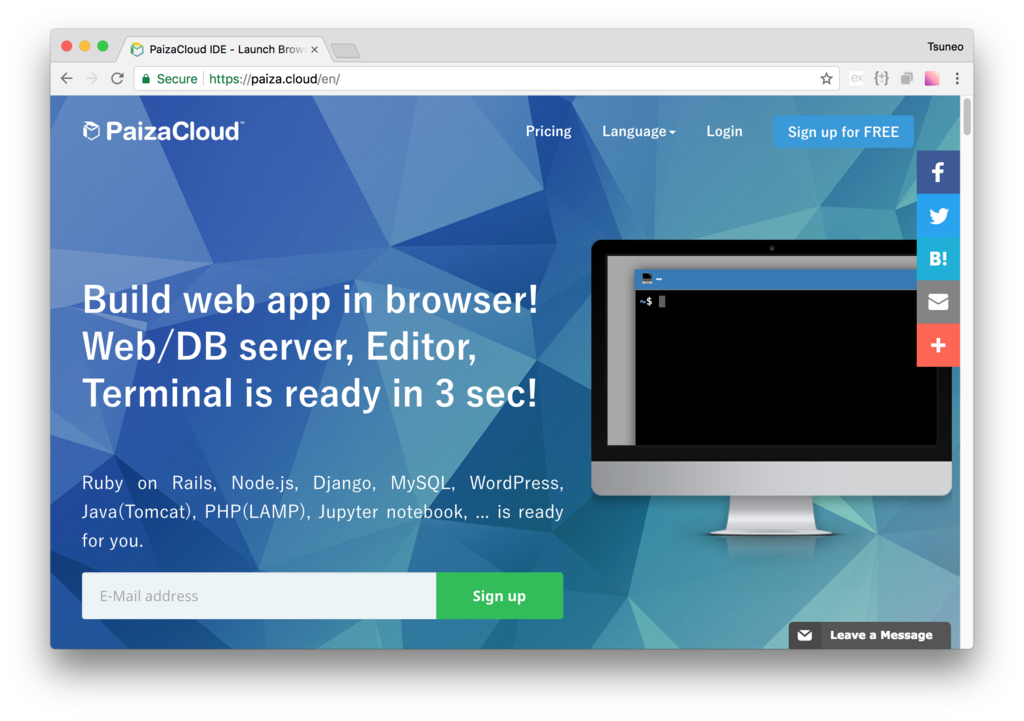
Here is the website of PaizaCloud Cloud IDE.
Just sign up with email and click a link in the confirmation email. You can also sign up with GitHub or Google.
Then, let's create a new server for the development workspace.

Click "new server" to open a dialog to set up the server.
Here, you can choose "phpMyAdmin", and "MySQL", and click "New Server" button.

Just in 3 seconds, you'll get a browser-based development environment for Ruby on Rails, Django, or Laravel.
You'll see editor or browser windows in the page, but we can close those for now.
Now, let's see those frameworks!
Ruby on Rails - Convention over Configuration. Don't Repeat Yourself.
Language: Ruby
Release: 13 Dec 2005
Latest version: 5.2
Popularity: ★★★
Features: ★★★
Code generation: ★★★
Readability: ★★
AI, machine learning: ★★
Use cases: AirBnb, GitHub, etc.
Philosophy: Convention over Configuration(CoC), Don't Repeat Yourself(DRY)
If there is a King of the web application framework, it is Ruby on Rails.
Before the Ruby on Rails comes, only available options are PHP for basic web applications, or Java-based frameworks for Enterprise web applications with complex many configuration files.
Individual developer and small startup cannot create large scale web applications in a timely manner.
Then, Ruby on Rails comes with the message "Creating blog engine in 15 minutes"!
Ruby on Rails is an opinionated framework with philosophies: Don't Repeat Yourself(DRY), Convention over Configuration(CoC). Just by following the "rails", you can build the well-structured large scale web application naturally.
Ruby on Rails has many smart features for web developments. MVC, scaffolding, generator, migration, routing, model, controller, ORM(Active Record) changes the way to develop web applications. "Ruby" as an object-oriented scripting language and "Ruby on Rails" is the best partner for web developments that require speedy and flexible development.
The development of Ruby on Rails is quite active. Recent release added webpack for front-end development.
Now, let's create a Ruby on Rails application!
Click the Terminal icon on the left-side of PaizaCloud.

Create the "myapp" project with database "MySQL".
$ rails new myapp --database=mysql
Then, run "rails generate scaffold" command to create database migration, controller, view, model, routing.
$ cd myapp
$ rails generate scaffold todo body:text
Run "rake db:migrate" to execute the migration file to create the database table.
$ rake db:migrate
Run "rails server" command to start the Rails server on the default port 3000.
$ rails server
Click the browser icon with "3000" on the left-side of PaizaCloud to open the browser on PaizaCloud.
Type "http://localhost/todos/" and you'll see the ToDo list application!

Let's see the file structure on the file manager view. The "app" directory have controller, model, view subdirectories.

Let's see the model file. There is almost no code on the file. Ruby on Rails have ActiveRecord that allows you to access database table as Ruby class, so you don't need to write code to access the database.
myapp/app/models/todo.rb:
class Todo < ApplicationRecord
end
Let's see the controller. It has CRUD actions(creating, reading, updating and deleting). As the instance variable "@NAME" can be referred from view, you can set those variables to show in the browser.
myapp/app/controllers/todos_controller.rb:
class TodosController < ApplicationController
  before_action :set_todo, only: [:show, :edit, :update, :destroy]

  # GET /todos
  # GET /todos.json
  def index
    @todos = Todo.all
  end

  # GET /todos/1
  # GET /todos/1.json
  def show
  end

  # GET /todos/new
  def new
    @todo = Todo.new
  end

  # GET /todos/1/edit
  def edit
  end

  # POST /todos
  # POST /todos.json
  def create
    @todo = Todo.new(todo_params)

    respond_to do |format|
      if @todo.save
        format.html { redirect_to @todo, notice: 'Todo was successfully created.' }
        format.json { render :show, status: :created, location: @todo }
      else
        format.html { render :new }
        format.json { render json: @todo.errors, status: :unprocessable_entity }
      end
    end
  end

  # PATCH/PUT /todos/1
  # PATCH/PUT /todos/1.json
  def update
    respond_to do |format|
      if @todo.update(todo_params)
        format.html { redirect_to @todo, notice: 'Todo was successfully updated.' }
        format.json { render :show, status: :ok, location: @todo }
      else
        format.html { render :edit }
        format.json { render json: @todo.errors, status: :unprocessable_entity }
      end
    end
  end

  # DELETE /todos/1
  # DELETE /todos/1.json
  def destroy
    @todo.destroy
    respond_to do |format|
      format.html { redirect_to todos_url, notice: 'Todo was successfully destroyed.' }
      format.json { head :no_content }
    end
  end

  private
    # Use callbacks to share common setup or constraints between actions.
    def set_todo
      @todo = Todo.find(params[:id])
    end

    # Never trust parameters from the scary internet, only allow the white list through.
    def todo_params
      params.require(:todo).permit(:body)
    end
end
Let's see the view file. It is an HTML file with ERB with "<% %>"、"<%= %>" blocks. "<% %>" syntax allows you to run the ruby code inside, and "<%= %>" allows you to embed the result of the ruby code to show in the browser.
myapp/app/views/todos/index.html.erb
<p id="notice"><%= notice %></p>

<h1>Todos</h1>

<table>
  <thead>
    <tr>
      <th>Body</th>
      <th colspan="3"></th>
    </tr>
  </thead>

  <tbody>
    <% @todos.each do |todo| %>
      <tr>
        <td><%= todo.body %></td>
        <td><%= link_to 'Show', todo %></td>
        <td><%= link_to 'Edit', edit_todo_path(todo) %></td>
        <td><%= link_to 'Destroy', todo, method: :delete, data: { confirm: 'Are you sure?' } %></td>
      </tr>
    <% end %>
  </tbody>
</table>

<br>

<%= link_to 'New Todo', new_todo_path %>
The details of Ruby on Rails development tutorial is available here:
Django - Explicit is better than implicit.
Language: Python
Release: 21 July 2005
Latest version: 2.0
Popularity: ★★
Features: ★★
Code generation: ★
Readability: ★★★
AI, machine learning: ★★★
Use cases: Instagram, etc.
Philosophy: Loose coupling and tight cohesion, Expicit is better than implicit.
Django is the most popular web application framework in Python. Python is getting more popular for AI and machine learning.
As Django does not magically generate so many codes like Ruby on Rails, you need to explicitly write more code by yourself. But, it means, you can write lean and readable code.
Django is a full-stack framework with many features for web development. You can also utilize a bunch of Python libraries including libraries for machine learning.
Django also has a feature for admin pages, so you can easily create admin pages for browsing or editing database tables.
Django development is active, and the latest Django2.0 was just released in December 2017. In Python, it is often a controversial topic to choose whether Python2 or Python3. But, as Django2.0 only support Python3, you don't need to care about it and just use Python3 with Django2.0.
So, let's start building a web application in Django.
At first, click Terminal button on the left-side of PaizaCloud.
$ django-admin startproject mysite
$ python3 manage.py startapp todo
In Django, you can have multiple application in one project. Here, let's create a project "mysite", and an application "todo" inside the project.
Then, edit the created files.
On the site level routing, set path for the ToDo application.
mysite/urls.py:
from django.urls import include, path
from django.contrib import admin
from django.views.generic import RedirectView

urlpatterns = [
    path('todo/', include('todo.urls')),
    path('admin/', admin.site.urls),
    path('',  RedirectView.as_view(url='/todo/')),
]
On the application level routing, set action for "/todo" to "views.index" function.
mysite/todo/urls.py:
from django.urls import path
from . import views

urlpatterns = [
    path('', views.index, name='index'),
]
On the database setting, change and set to use MySQL. (You can also use SQLite that is default setting). Don't forget to add "pymysql.install_as_MySQLdb()" to use MySQL.
mysite/mysite/settings.py:
# Database
# https://docs.djangoproject.com/en/2.0/ref/settings/#databases
import pymysql
pymysql.install_as_MySQLdb()

DATABASES = {
#    'default': {
#        'ENGINE': 'django.db.backends.sqlite3',
#        'NAME': os.path.join(BASE_DIR, 'db.sqlite3'),
#    }
    'default': {
        'ENGINE': 'django.db.backends.mysql',
        'NAME': 'mydb',
        'USER': 'root',
        'PASSWORD': '',
        'HOST': '127.0.0.1',
        'PORT': '3306',
    }
}
Then, on the site level settings, add 'todo.apps.ToDoConfig' to INSTALLED_APPS to use our ToDo app.
mysite/mysite/settings.py:
INSTALLED_APPS = [
    'todo.apps.TodoConfig',
    'django.contrib.admin',
    'django.contrib.auth',
    'django.contrib.contenttypes',
    'django.contrib.sessions',
    'django.contrib.messages',
    'django.contrib.staticfiles',
]
Create a model. On the model class, define variable associated to the column on the database.
mysite/todo/models.py:
from django.db import models


class Post(models.Model):
    body = models.CharField(max_length=200)
Django can create the migration file from the model.
$ python3 manage.py makemigrations todo
Run the migration file.
$ python3 manage.py migrate
Create a view code. (This is called "controller" in Ruby on Rails.) In Django, variables used in HTML templates are explicitly passed as the render() functions argument.
mysite/todo/views.py:
from django.shortcuts import render, get_object_or_404
from django.http import HttpResponseRedirect, HttpResponse
from django.urls import reverse
from .models import Post
from .forms import PostForm

# Create your views here.
def index(request):
    posts = Post.objects.all()
    form = PostForm()
    context = {'posts': posts, 'form': form, }
    return render(request, 'todo/index.html', context)

def create(request):
    form = PostForm(request.POST)
    form.save(commit=True)
    return HttpResponseRedirect(reverse('todo:index'))

def delete(request, id=None):
    post = get_object_or_404(Post, pk=id)
    post.delete()
    return HttpResponseRedirect(reverse('todo:index'))
Create a template file. Here, we'll use Milligram CSS framework.
On the template file, as we cannot use the Python's indent style, we use the specific syntax for the Django template.
On the Django template, we can use "{% %}" for writing the Python code, and "{{ }}" for showing the result of the code.
Write the layout file.(base.html)
mysite/todo/templates/todo/base.html:
{% load staticfiles %}
<!DOCTYPE html>
<html>
    <head>
        <title>Todo List</title>
        <!-- CSS And JavaScript -->
        <link rel="stylesheet" href="//fonts.googleapis.com/css?family=Roboto:300,300italic,700,700italic">
        <link rel="stylesheet" href="//cdn.rawgit.com/necolas/normalize.css/master/normalize.css">
        <link rel="stylesheet" href="//cdn.rawgit.com/milligram/milligram/master/dist/milligram.min.css">
        <link rel="stylesheet" href="{% static 'css/todo.css' %}">
    </head>
    <body>
        <div class="container">
            {% block content %}
            {% endblock %}
        </div>
    </body>
</html>
Then, write the HTML template file to show.(index.html).
mysite/todo/templates/todo/index.html:
{% extends 'todo/base.html' %}
{% block content %}
<h1>Todo List</h1>
{% if error_message %}<p><strong>{{ error_message }}</strong></p>{% endif %}
<form action="{% url 'todo:create' %}" method="post">
{% csrf_token %}
<!-- Todo Name -->
<div class="form-group">
<label for="todo" class="col-sm-3 control-label">Todo</label>
<div class="col-sm-6">
{{ form.body }}
</div>
</div>
<!-- Add Todo Button -->
<div class="form-group">
<div class="col-sm-offset-3 col-sm-6">
<button type="submit" class="btn btn-default">
<i class="fa fa-plus"></i> Add Todo
</button>
</div>
</div>
</form>
<!-- Current Todos -->
<h2>Current Todos</h2>
<table class="table table-striped todo-table">
<thead>
<th>Todos</th><th> </th>
</thead>
<tbody>
{% for post in posts %}
<tr>
<!-- Todo Name -->
<td>
<div>{{ post.body }}</div>
</td>
<td>
<form action="{% url 'todo:delete' post.id %}" method="post">
{% csrf_token %}
<button>Delete</button>
</form>
</td>
</tr>
{% endfor %}
</tbody>
</table>
{% endblock %}
In Django, HTML form can be defined as form class as python code, and the HTML form can be generated from the class. Let's define the Post form class.
mysite/todo/forms.py:
from django import forms

from .models import Post

class PostForm(forms.ModelForm):
    class Meta:
        model = Post
        fields = ('body',)
That's it !
Start the server on port 8000.
$ python3 manage.py runserver
Browser icon with text "8000" will appear on the left-side of PaizaCloud. Click it to open the page in the browser on PaizaCloud.

The details of Django development tutorial is available here:
Laravel - Happy developers make the best code.
Language: PHP
Release: June 2011
Latest version: 5.6
Popularity: ★★
Features: ★★★
Code generation: ★★
Readability: ★★
AI, machine learning: ★
Use cases: STARTUPS.CO, LaravelIO, etc.
Philosophy: Expressive, elegant syntax., Happy developers make the best code.
PHP did not have the definitive web application framework like Ruby on Rails in Ruby. There were many frameworks like CakePHP, Zend Framework, Code Igniter, Symfony...
And, Laravel appeared as a modern framework by importing good parts of other frameworks like Ruby on Rails.
Laravel has grown rapidly with active communities, and become the most popular framework in PHP. Google Trends shows the growth of Laravel's popularity.
 (Google Trends より)
PHP itself was created as an HTML template engine, and one of the oldest web development language. While you can easily start writing web applications, it is often difficult to create large web applications.
But, Laravel utilized modern features like object-oriented syntax, the package manager(composer), MVC, generator, model, migration, ORM(Eloquent), the template engine(Blade) or DI, and make it possible to build readable large-scale applications in PHP.
PHP is widely used on many web sites or tools like WordPress, Laravel have the advantage to use PHP based resource and knowledge.
Now, let's create a web application in Laravel.
Click Terminal icon on the left-side of PaizaCloud.
Create a project with name "myapp".
$ laravel new myapp
$ cd myapp
$ php artisan serve
Create a database "mydb".
$ mysql -u root
create database mydb;
Edit the database configuration file. Right-click on file manager to open context menu, choose "Show Hidden files" to show files begun with a dot('.').
myapp/.env:
DB_DATABASE=mydb
DB_USERNAME=root
# DB_PASSWORD=secret
Create model, controller, and migration file with one command.
$ php artisan make:model Task -m -c -r
In the migration file, add "$table->string('name');" to add "name" column to the database table.
database/migrations/2018_xx_xx_xxxxxxxx_create_tasks_table:
    public function up()
    {
        Schema::create('tasks', function (Blueprint $table) {
            $table->increments('id');
            $table->string('name');
            $table->timestamps();
        });
    }
Run the migration.
$ php artisan migrate
Edit routing file by setting actions for "GET /tasks", "POST /tasks", "DELETE /tasks/{id}" to call TaskController functions.
routes/web.php:
Route::get('/', function(){return redirect('/tasks');});
Route::get('/tasks', 'TaskController@index');
Route::post('/tasks', 'TaskController@store');
Route::delete('/tasks/{id}', 'TaskController@destroy');
\URL::forceScheme('https');
In the controller, write actions showing web pages. Thanks to Eloquent model, we can refer the database columns as object's instance variables like "$task->name".
app/Http/Controllers/TaskController.php:
<?php

namespace App\Http\Controllers;

use App\Task;
use Illuminate\Http\Request;

class TaskController extends Controller
{
    public function index()
    {
        $tasks = Task::all();
        return view('tasks', ['tasks' => $tasks]);
    }

    public function store(Request $request)
    {
        $task = new Task;

        $task->name = request('name');
        $task->save();
        return redirect('/tasks');
    }

    public function destroy(Request $request, $id, Task $task)
    {
        $task = Task::find($id);
        $task->delete();
        return redirect('/tasks');
    }
}
Create a view file.
Although PHP itself is a template engine, it sometimes lengthy and not so readable.
Laravel uses Blade template engine to run codes or show results in the HTML file concisely.
Let's see the model file.
app/Task.php:
<?php

namespace App;

use Illuminate\Database\Eloquent\Model;

class Task extends Model
{
    //
}
There is only an empty class extended from Model class.
By using Eloquent ORM engine, we can refer the database column as the property of the objects.
That's it!
Let's run the server.
$ cd ~/myapp
$ php artisan serve
The server runs on port 8000. Click browser icon with text "8000", and we see the web application!

The details of Laravel development tutorial is available here:
Summary
We compared the big 3 web application frameworks: Ruby on Rails, Django, Laravel, by building the real application with database. All of those are full-stack frameworks with many features.
With PaizaCloud, We could build the real application without installing and setting up the development environment. I believe that the best way to know about the frameworks is to create applications by our hands. Let's try by yourself!
With「PaizaCloud Cloud IDE」, you can flexibly and easily develop your web application or server application, and publish it, just in your browser.
