 Hello I'm Tsuneo(@yoshiokatsuneo).
Now, Slack is one of the most major communication tools. And, by creating a Slack bot program, the bot program can communicate with people using text message.
As Slack bot program only handle text messages, it is easy to write code for the Slack bot program. And, as people can easily use the Slack bot just by sending text messages, the bot developer can easily get feedback from the user and it motivates us to improve the Slack bot. So, for the programming beginner, developing Slack bot will be the good practice.
But, creating and running the Slack bot requires installing and setting up the development environment, and a server to run the Slack bot. Those can be annoying when we just want to create a simple Slack bot program.
So, here comes PaizaCloud Cloud IDE, a browser-based online web and application development environment.
As PaizaCloud have Slack bot development environment, you can just start coding for the Slack bot program in your browser.
And, as you can develop in the cloud, you can just run the Slack bot on the same machine without setting up another server and deploying to it.
Here, we develop a Slack bot using Ruby on the PaizaCloud Cloud IDE.
Following the instruction below, you'll create and run the Slack bot just in 5 minutes.
Getting started with PaizaCloud Cloud IDE
Let's start!
Here is the website of PaizaCloud Cloud IDE.
Just sign up with email and click a link in the confirmation email. You can also sign up with GitHub or Google.
Create new server
Let's create a new server for the development workspace.
Click "new server" to open a dialog to set up the server. Just click "New Server" button in the dialog without any settings.
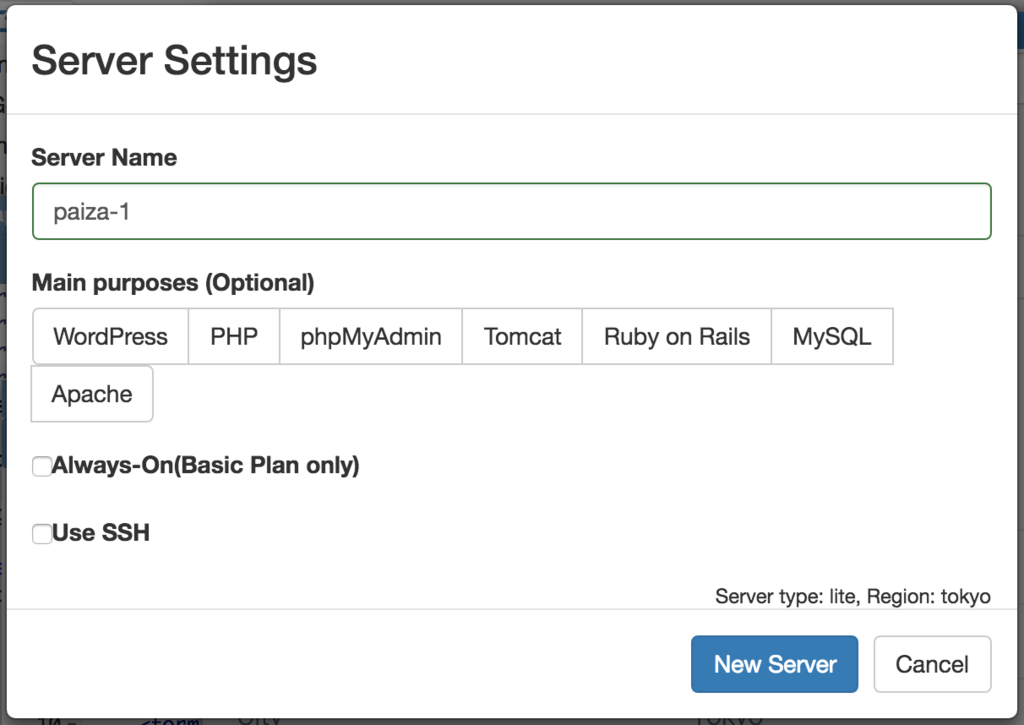
Just in 3 seconds, you'll get a browser-based online development environment for creating Slack bot using Ruby.

Create Slack application
We need to create a Slack application to run a Slack bot. So, let's create the Slack application.
Open the Slack application page below.
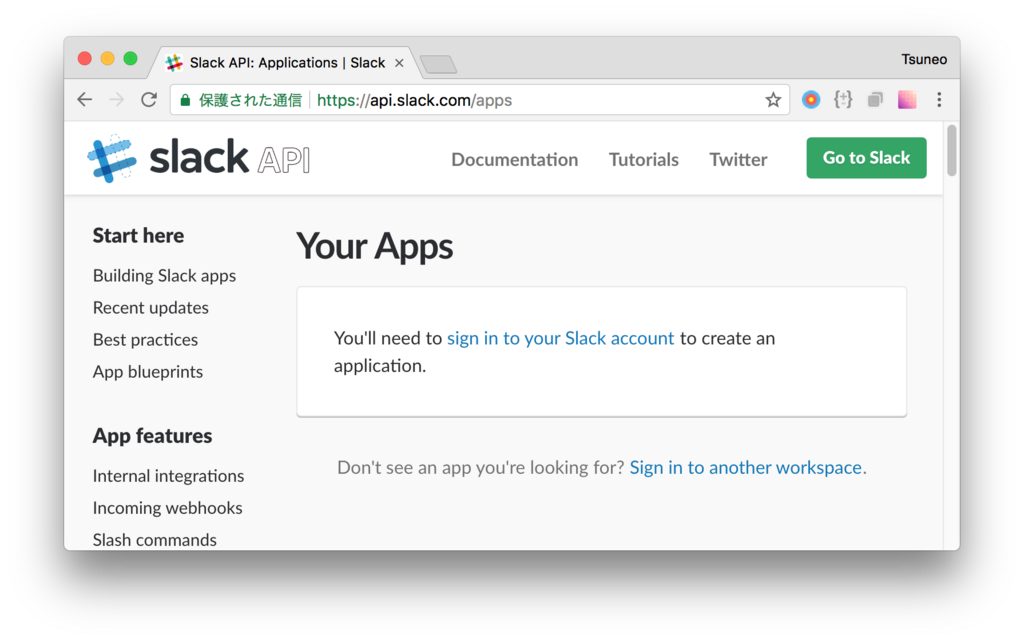
If you have not signed up, click a "sign in to your Slack account" link, and open "https://api.slack.com/apps", again.
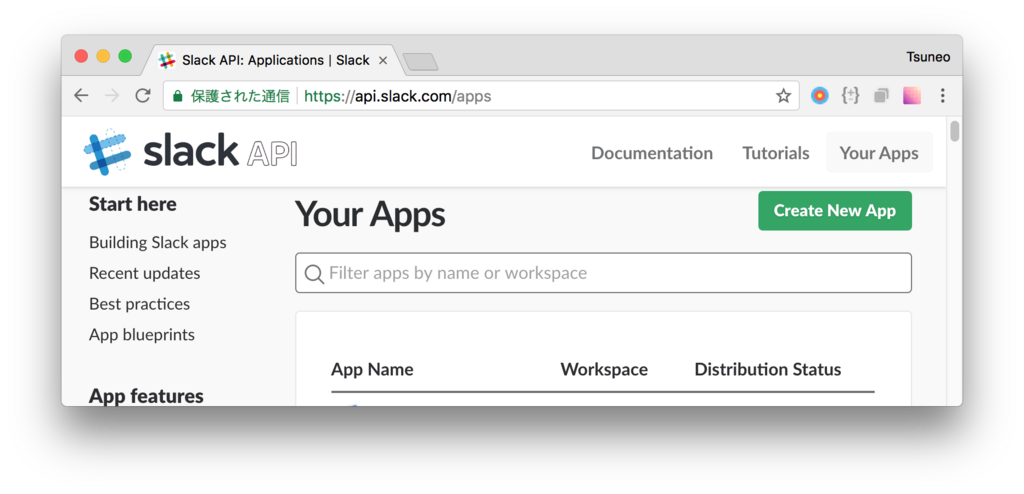
You'll see the list of application. To create an application, click "Create New App" button.
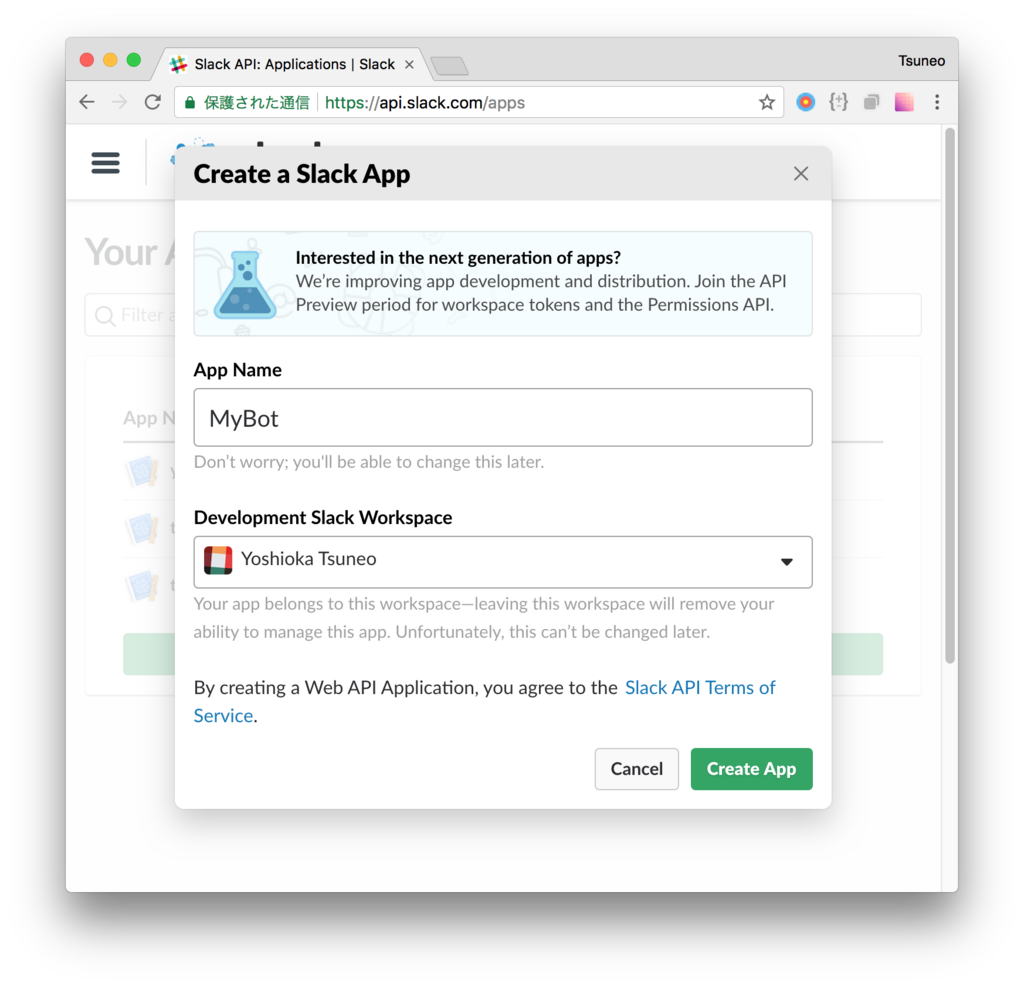
You'll see a dialog box to create the Slack application. Put your application name and select your Slack workspace. Here, we set the application name "MyBot" as an example. And, click a "Create App" button to create the application.
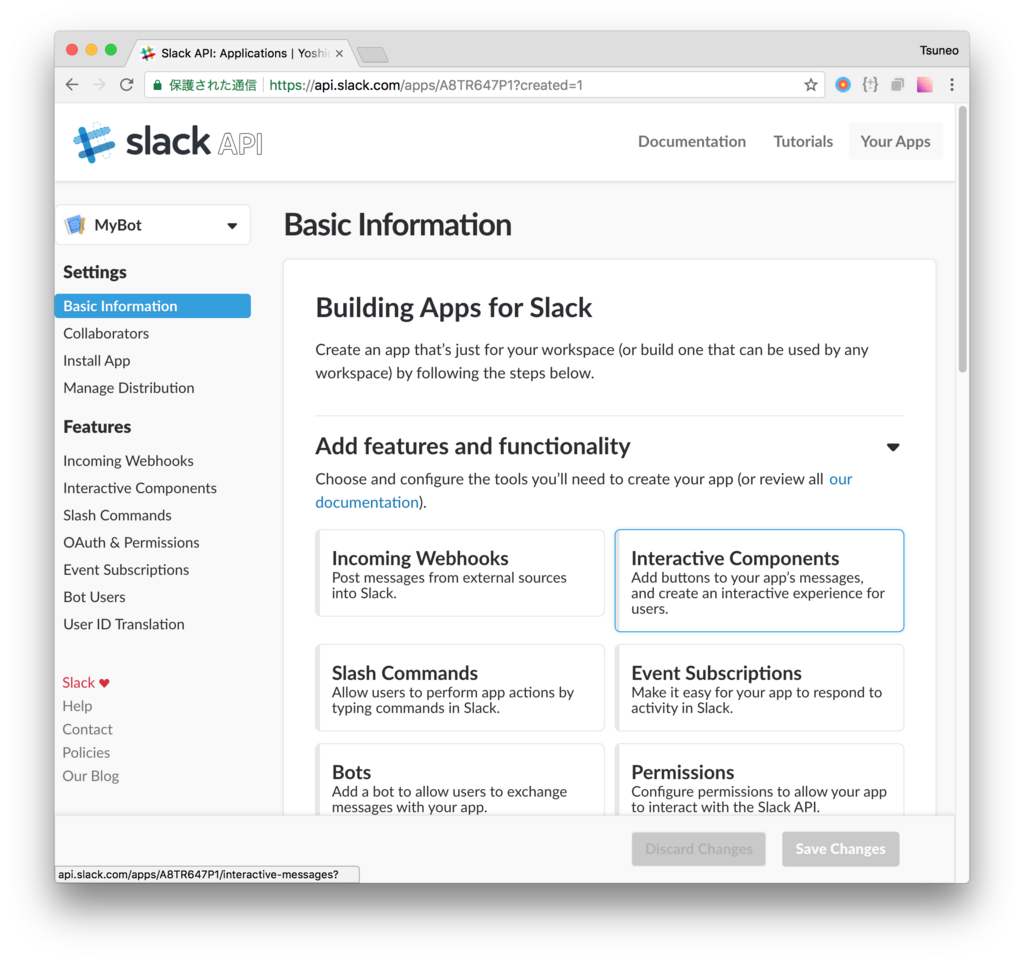
Now, the Slack application is created, you'll see the Slack application page below.
Create Slack command
At first, let's create a Slack command. Slack command is a command text begin with a slash('/'). For example, if you type a Slack command "/who" in the channel, you'll see the list of users in the channel.
Here, we create a Slack command "/time" to display the date and time.
On application page, in the "Add features and functionality", click "Slash Commands".
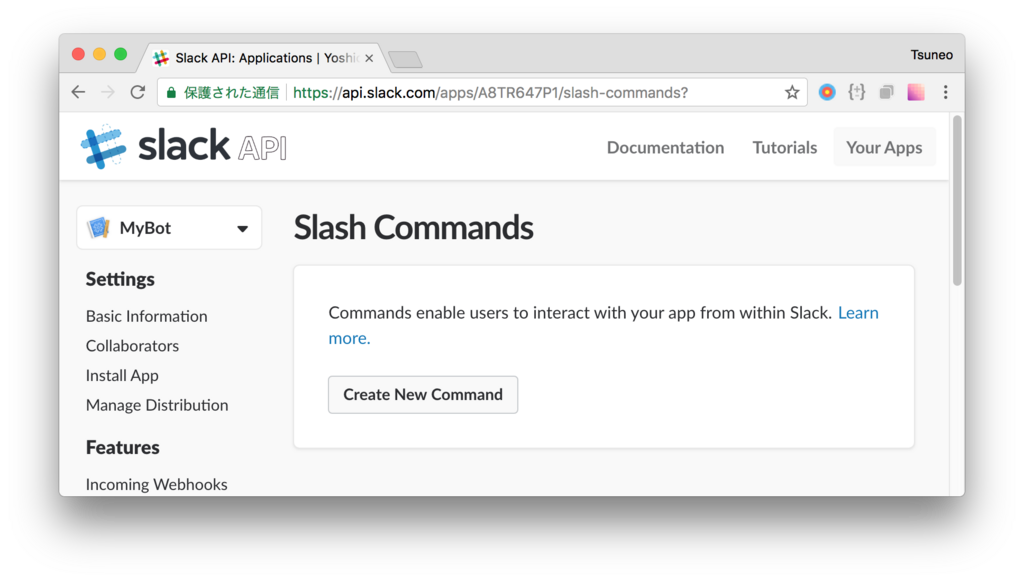
Click "Create New Command" button.
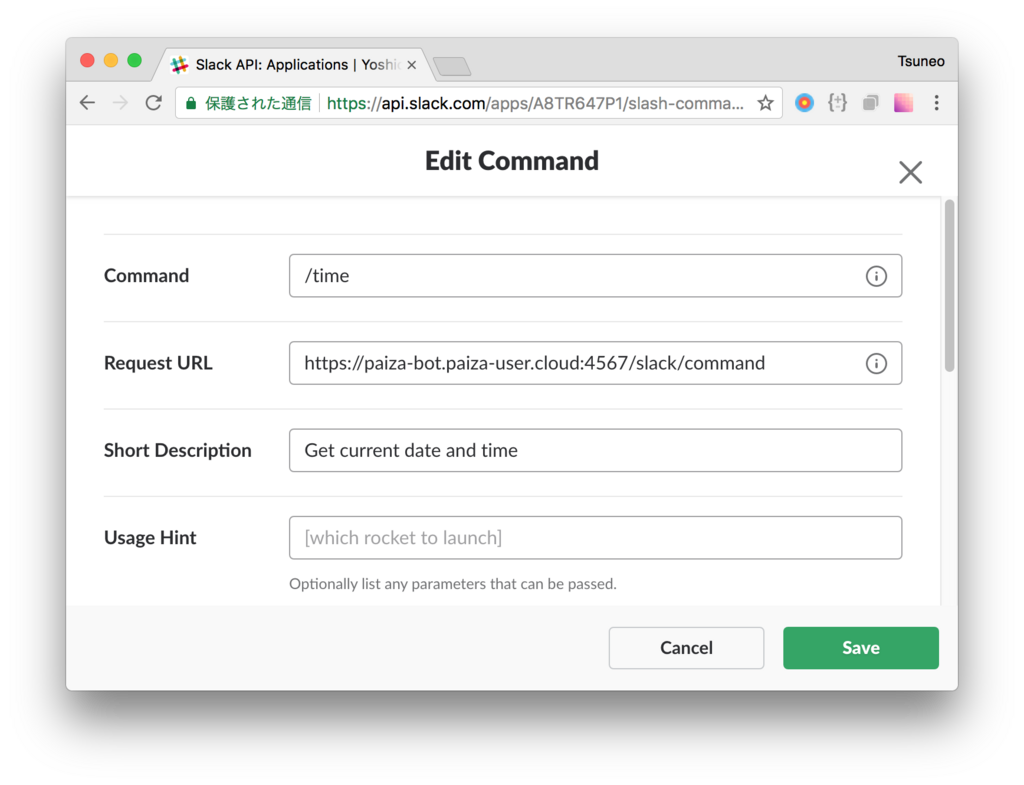
As a command creation page is shown, put a command name "/time" to the "Command" field.
Put a URL for the server program we will create on PaizaCloud to the "Request URL" field.
On PaizaCloud, the server name is "[SERVER NAME].paiza-user.cloud". The port number of "Sinatra" application we'll create is "4567". As you can automatically use HTTPS instead of HTTP on PaizaCloud, the protocol of the URL is HTTP.
So, the URL is " https://[SERVER-NAME].paiza-user.cloud:4567/ "(Replace "[SERVER-NAME]" to your server name on PaizaCloud).
Put the description of your bot to "Short Description" field, and put your command's usage to "Usage Hint" field.
Then, click "Save" button to save the settings.
Now, you have created the Slack command. You'll see the list of commands like below.
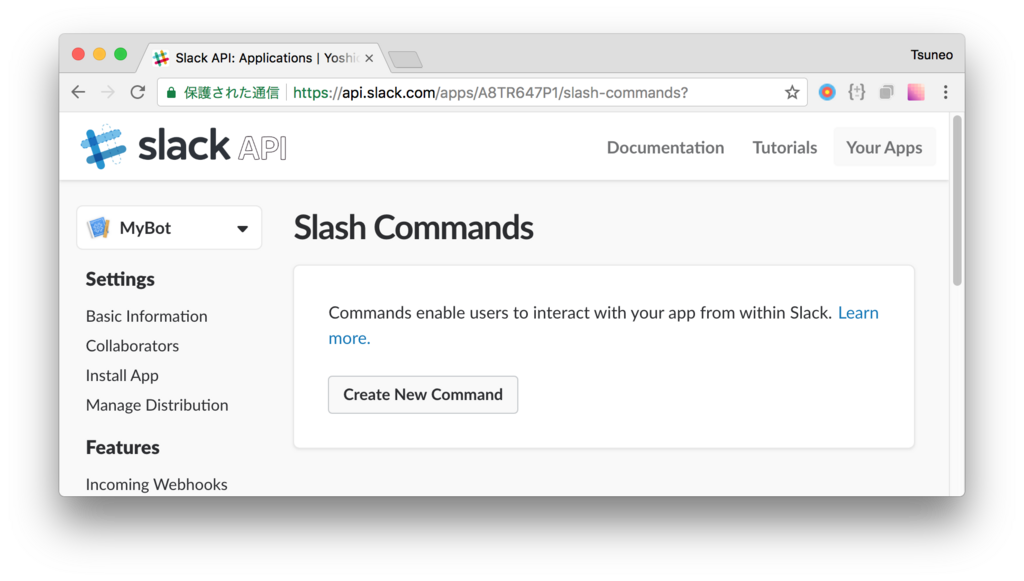
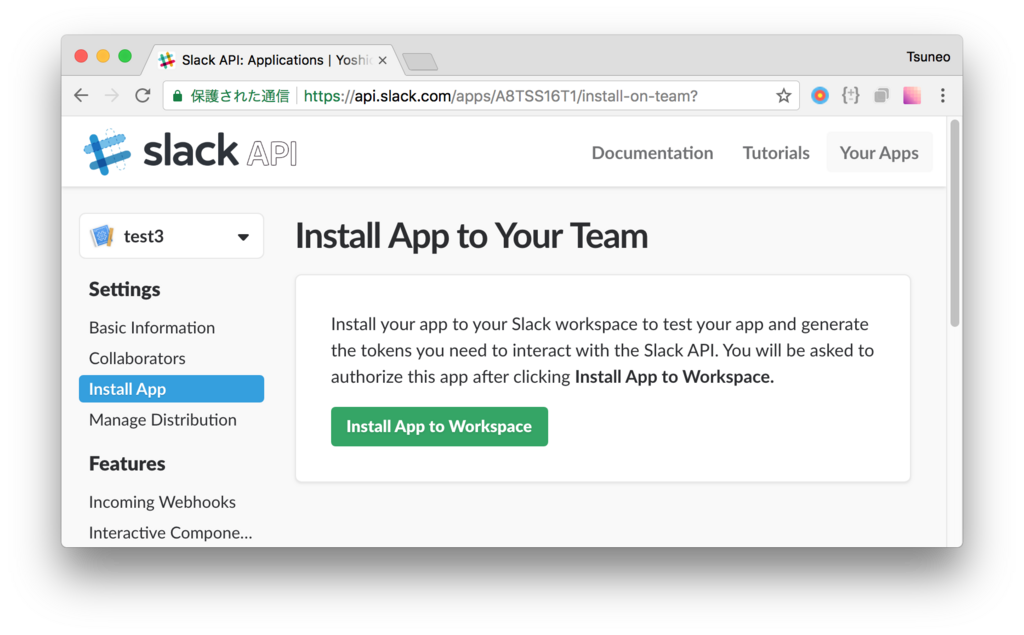
Then, to use the Slack application, install the Slack application to your Slack workspace.
Select "Install App" from the menu. On the installation page, click "Install App to Workspace" button.
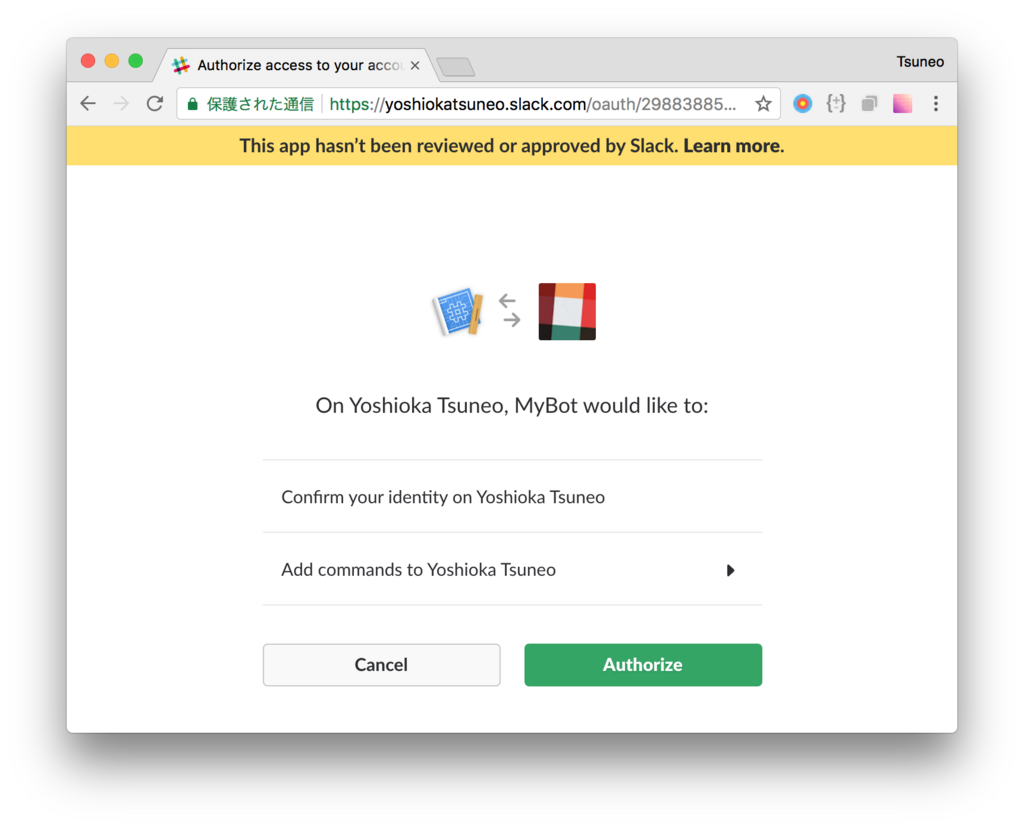
You see the authorization page. Click "Authorize" button to authorize the Slack application.
Now, create a Ruby program to run when the Slack command is sent.
On PaizaCloud, you can create and edit the file in the browser. On PaizaCloud, click "New File" button at the left-side of the page.

As a dialog box to put filename is shown, type a filename "command.rb" and click "Create" button.
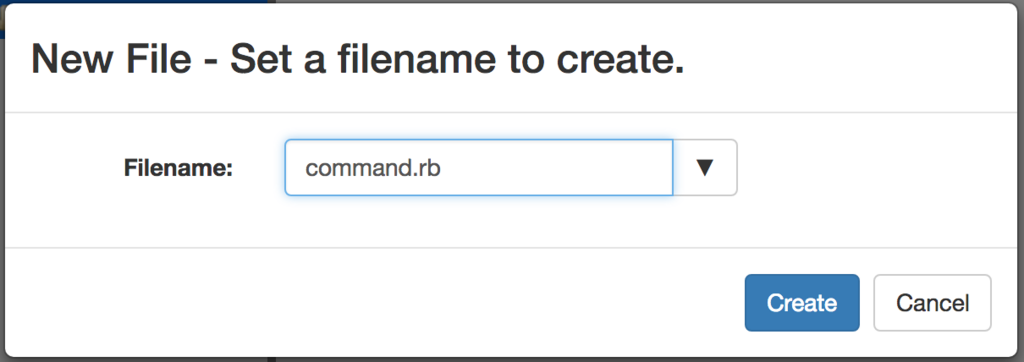 The file is created!
Let's write a simple Slack command program using Ruby and Sinatra. Write a program like below.
command.rb:
require 'sinatra'
require 'sinatra/reloader'
require 'sinatra/json'

post '/slack/command' do
    text = params['text']
    return json({
        text: "The command succeeded! The command parameter is #{text}.",
        response_type: 'in_channel',
    })
end

get '/' do
  return "Hello World"
end
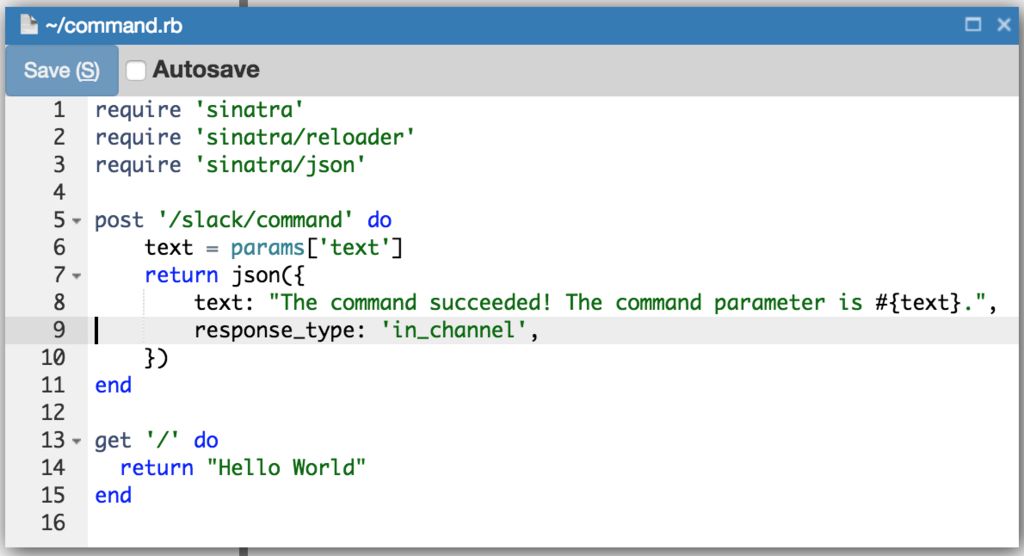 Click "Save" button to save the file.
Let's see the program. The "post '/slack/command'" block define an action for POST "/slack command" requests. You see the request parameter as "params". For the Slack command message, you can get the parameter text following the command by "params['text']".
The object returned in the block will be the response to the request. Put reply message to "text" field, and put 'in_channel' to the "response_type" field to show the message to not only you but also the members of the channel.
Here, we set the reply message to "The command succeeded! The command parameter is #{text}".("#{text}" is the command message's parameter text). Add an action to GET '/' request to check that the service is running.
Then, let's run the Slack bot program we created. To run the program, run a command "ruby ./command.rb -o 0". As Sinatra listen only on localhost and does not accept connection from out of the server by default, we add "-o 0"(or, "-o 0.0.0.0") option to listen on the global address to accept connection from the clients.
On PaizaCloud, you can use a Terminal application in the browser to run the command.
Click "Terminal" button at the left side of the PaizaCloud page.

The Terminal launched. Type the command "ruby ./command.rb -o 0", and type enter key.
$ ruby ./command.rb -o 0
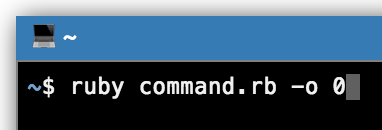
The command started. The text "tcp://0:4567" means that the server running on port 4567.
Now, you see a button with a label "4567" at the left-side of the PaizaCloud page.
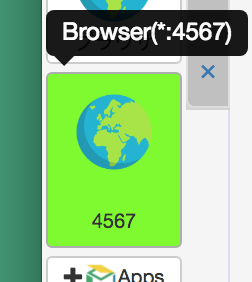
Sinatra listens on port 4567. PaizaCloud detects the port number 4567, and add the button for the port 4567 to launch browser automatically.
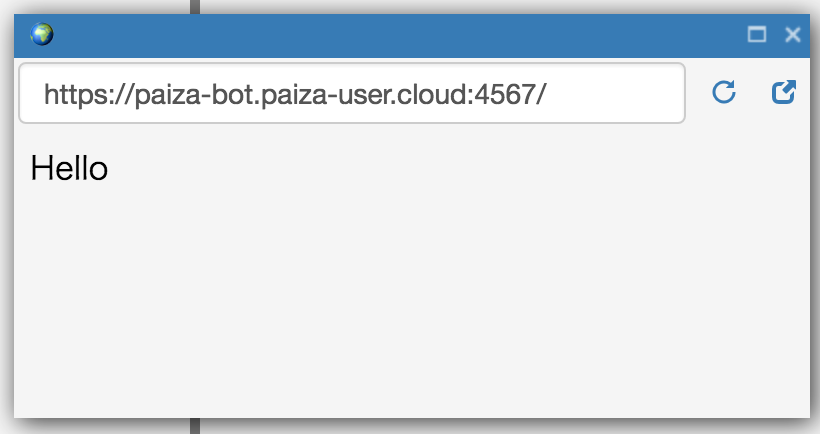
By clicking the button, browser(a browser on PaizaCloud) launch and you see the message from the server "Hello World".
Then, let's send a Slack command. Type "/time TestTest" message on the Slack.

You got the response for the command! Slack command works!
Next, change the program to reply the date and time like below.
command.rb:
require 'sinatra'
require 'sinatra/reloader'
require 'sinatra/json'

ENV['TZ'] = 'JST-9'  # Timezone

post '/slack/command' do
    text = params['text']
    if text =~ /now/i
        now = Time.now
        responseText = "Now is #{now.hour}:#{now.min}:#{now.sec} ."
    elsif text =~ /today/i
        today = Time.now
        responseText = "Today is #{today.year}-#{today.month}-#{today.day} ."
    elsif text =~ /tomorrow/i
        tomorrow = Time.now + (60*60*24)
        responseText = "Tomorrow is #{today.year}-#{today.month}-#{today.day} ."
    else
        responseText = "Example: Now/Today/Tomorrow"
    end
    json({
        text: responseText,
        response_type: 'in_channel',
    })
end

get '/' do
  return "Hello World"
end
The code checks whether the message text contains strings(now/today/tomorrow) using regular expressions, and send reply message by returning a object with the replying text message.
Exit the command("ruby ./command.rb -o 0") by typing Ctrl-C, and re-run the command.
Let's see. Type the Slack commands like below on Slack.
/time What time is it now ?
/time What date is it today ?
/time How about tomorrow ?
You got the reply! You successfully created a Slack command to reply date and time.

Create Slack bot
While the program can answer for the Slack command, you need to send the specific Slack command as a message.
To make the bot program to handle other than Slack command, we can create Slack bot.
To create the Slack bot, go to Slack application page(https://api.slack.com/apps), and choose the Slack application, and choose "Basic information" from the menu.
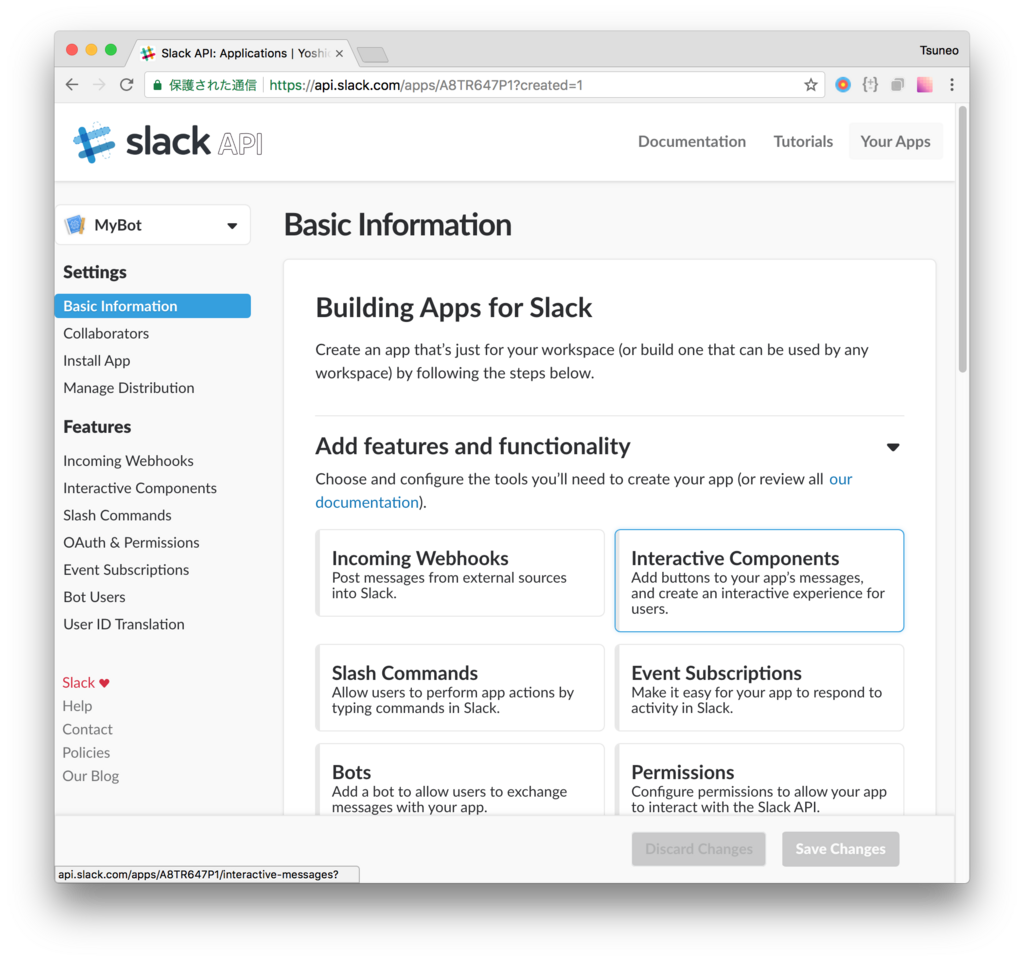
Click "Add features and functionality", and choose "Bots" from the list.
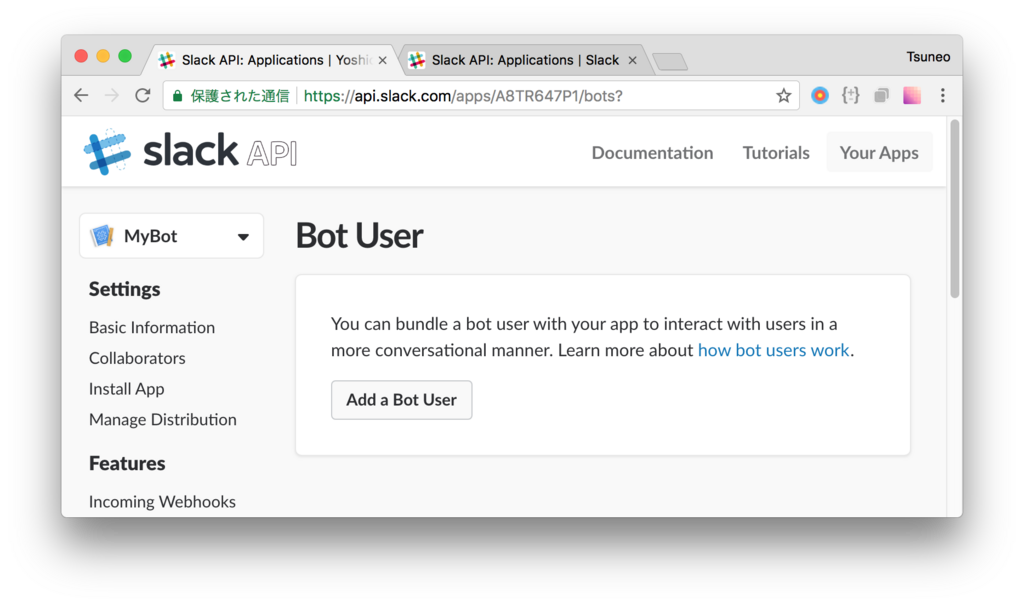
On the Bot User creation page, click "Add Bot User" button.
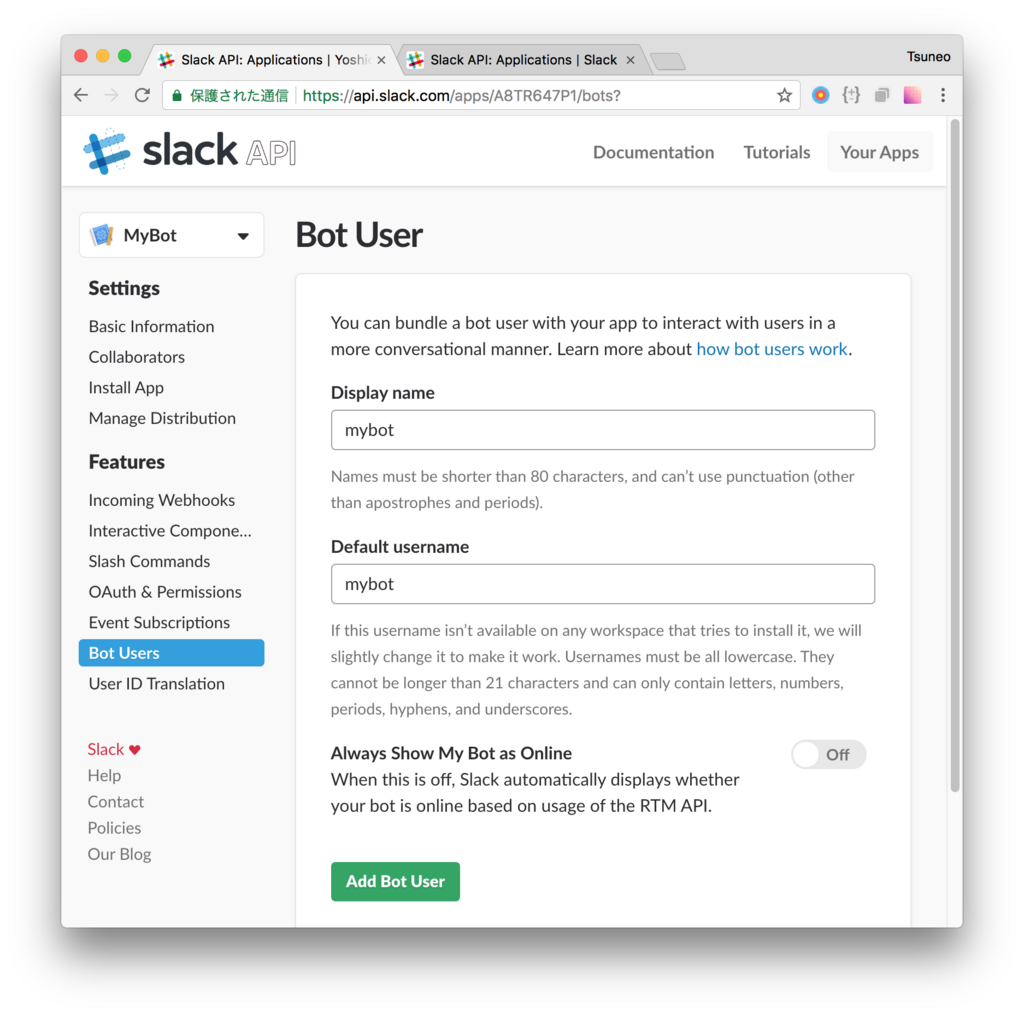
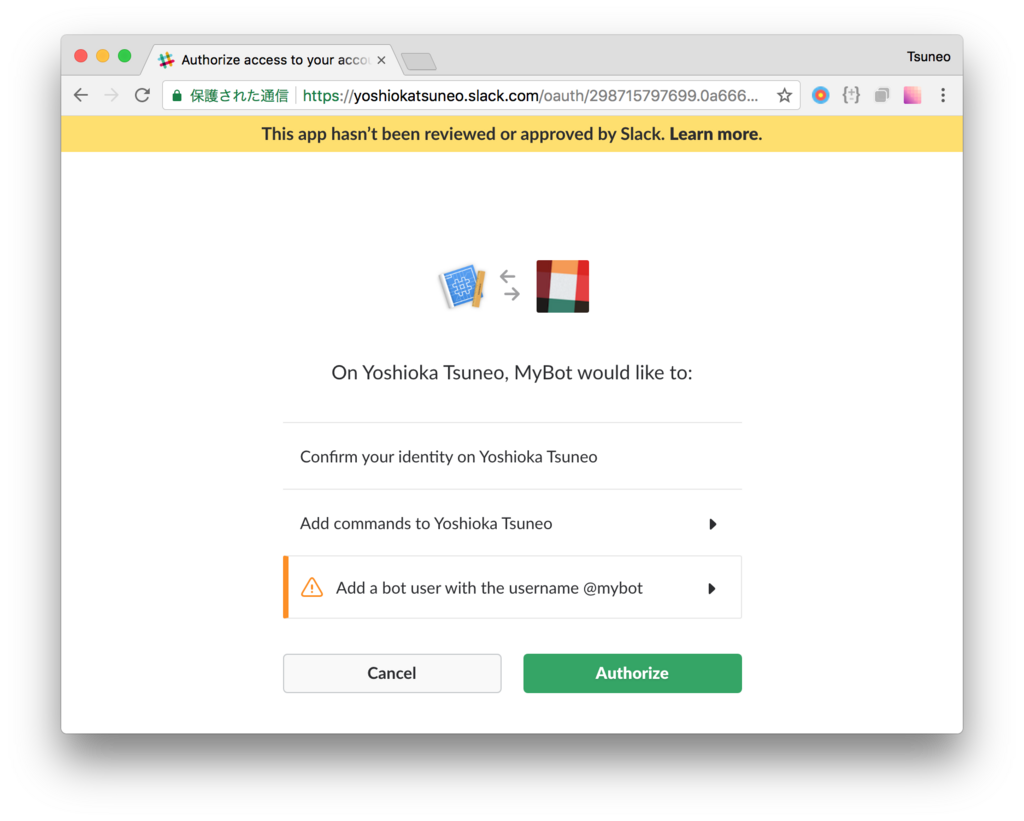
If permission changing is requested, click "Click Here" link, and on the next page, click "Authorize" button to allow changing the permission.

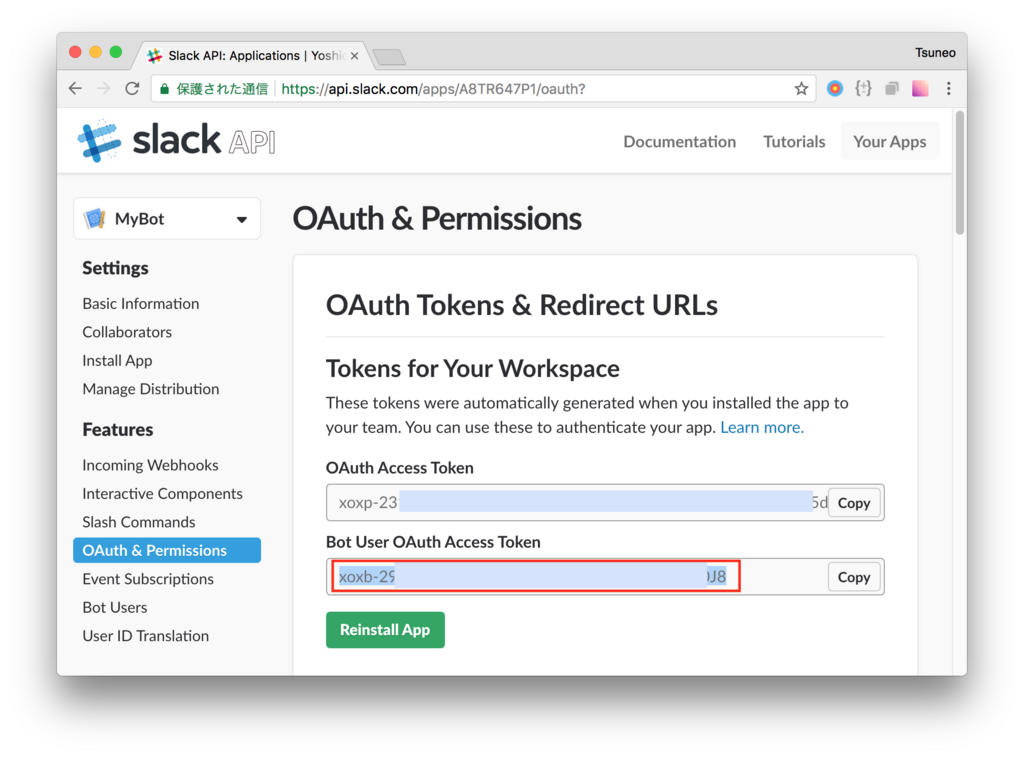
To create a Slack bot, we need Bot User OAuth Access Token.
On application page menu, click "Auth & Permission" on "Features", and notes the "Bot User OAuth Access Token" string begin with "xoxb-".
Now, let's write a Slack bot program in Ruby.
Slack bot requires WebSocket. So, we use a Ruby gem library called "faye-websocket". Run the command below to install the "faye-websocket" Ruby gem.
$ sudo gem install faye-websocket

Create a file "bot.rb", and write Ruby code like below. The program reply date and time, as the Slack command we just created.
Here, replace "OAUTH-TOKEN" to the "Bot User OAuth Access Token" string that begins with "xoxb-".
bot.rb:
require 'http'
require 'json'
require 'eventmachine'
require 'faye/websocket'

TOKEN='***OAUTH-TOKEN***'

ENV['TZ'] = 'JST-9' # Timezone

response = HTTP.get("https://slack.com/api/rtm.connect", params: {token: TOKEN})
resposeObj = JSON.parse(response.body)

url = resposeObj['url']

EM.run do
  puts "Connecting to #{url}..."
  ws = Faye::WebSocket::Client.new(url)

  ws.on :open do |event|
    p [:open]
  end

  ws.on :message do |event|
    msg = JSON.parse(event.data)
    p [:message, JSON.parse(event.data)]

    if msg["type"] != 'message'
        next
    end
    text = msg["text"]

    if text =~ /now/i
        now = Time.now
        responseText = "Now is #{now.hour}:#{now.min}:#{now.sec} ."
    elsif text =~ /today/i
        today = Time.now
        responseText = "Today is #{today.year}-#{today.month}-#{today.day} ."
    elsif text =~ /tomorrow/i
        tomorrow = Time.now + (60*60*24)
        responseText = "Tomorrow is #{tomorrow.year}-#{tomorrow.month}-#{tomorrow.day} ."
    end

    reply = {
        type: 'message',
        text: responseText,
        channel: msg['channel'],
    }
    puts "Replying: #{reply}"
    ws.send(reply.to_json)
  end

  ws.on :close do |event|
    p [:close, event.code, event.reason]
    ws = nil
    EM.stop
  end

end
Let's see the code. It accesses to "https://slack.com/api/rtm.connect" with the TOKEN parameter to retrieve WebSocket URL, and assign the URL to "url" variable.
It connects to the WebSocket URL using eventmachine(EM) and faye-weboskcket(Faye::WebSocket::Client).
"ws.on :message" block handles WebSocket messages. We only handle the message with type 'message'. msg["text"] is the message text. It checks whether the message text contains strings(now/today/tomorrow) using regular expressions, and send reply message using "ws.send" method. On the "ws.send" parameter, set 'message' to the "type" field, message text to the "text" field, and the channel to response(here, the channel of the sent message) to the "channel" field.
Now, let's run the Slack bot! Run a command "ruby ./bot.rb" on the Terminal on PaizaCloud.
$ ruby ./bot.rb
As the Slack bot can only read message on the channel it joined, invite the bot user to the channel.
Now, let's send the message !
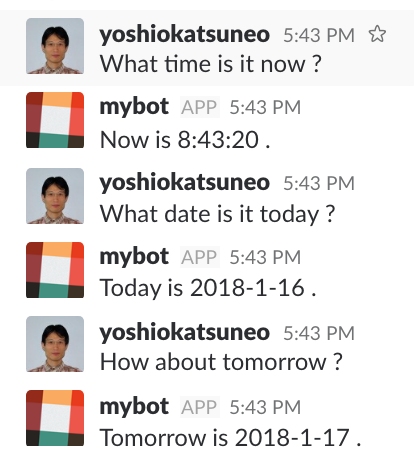
Yay! We got the message from the Slack bot we created!
We successfully create the Slack bot using Ruby on PaizaCloud!
Note that on PaizaCloud free plan, the server will be suspended. To run the bot continuously, please upgrade to the BASIC plan.
Summary
We created and ran a Slack bot using Ruby on PaizaCloud. It is quite simple to create and run the Slack bot. It is fun to think how the Slack bot works, and improve the bot. Now, let's create your own Slack bot on PaizaCloud!
With「PaizaCloud Cloud IDE」, you can flexibly and easily develop your web application or server application, and publish it, just in your browser.

