 (by Yoshioka Tsuneo, @yoshiokatsuneo at https://paiza.IO/)
Nowadays, it is getting hard to build web services because we need to use full-stack environment: browser(client) code for interactive UI, server code for shared data or logic, and WebSockets for real-time communication.
MEAN stack package frameworks from client side to server side, making web service development much simpler, easier, and faster.
In this article, I'll introduce one of MEAN stack implementation, AngularJS Full-Stack generator(generator-angular-fullstack), and actually run, edit, and deploy an application.
There are many articles about development only for client, or only for server. But, few mention how to mash up those individual tools. Thanks to MEAN stack, now we have a best practice to build full stack applications without bothering mashing up these components. Let's try for the cool environment !
In the following articles, based on this article, I'll also introduce how to build more practical applications.

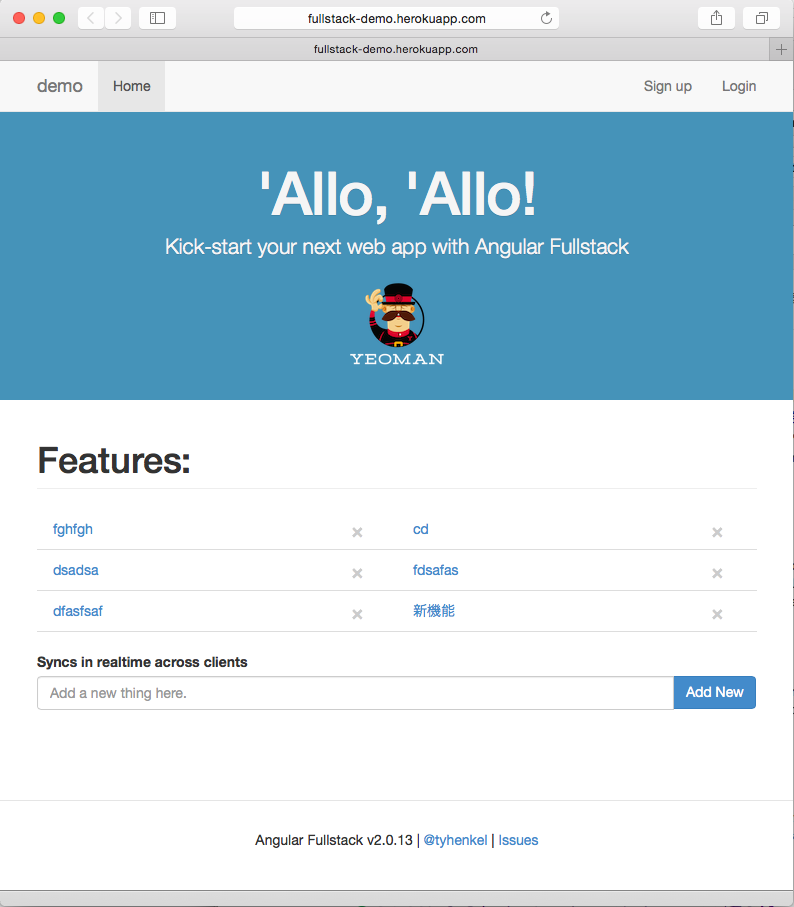
AngularJS Full-stack generator Demo:http://fullstack-demo.herokuapp.com
Contents
- What is MEAN stack ?
- MEAN stack features
- Install
- Create a new project
- Start server
- Edit code
- Debug
- Deployment
- SNS integration
- Summary
- Reference
What is MEAN stack ?
MEAN stack is a package of frameworks, MongoDB, Express, AngularJS, and Node.js, to build full-stack web services.
In the past, web service frameworks, such as CakePHP and Ruby on Rails, provided best practices to build web services easily, quickly, and securely.
But, those frameworks are based on the basic HTTP flow in which clients send requests to servers, servers generate and send HTML pages to clients, and clients render the HTML in browsers. Form action or following links completely discards the current page and renders new pages generated on the servers.
However, this request-response-based architecture causes delays in every action, and clear all states(inputs, selection scrolling, etc...), and does not provide interactive UI.
So, to make web more interactive, web services like Google Maps started using JavaScript-based Ajax technology.
At first, JavaScript was used only on specific UI parts. But, more and more parts were built using JavaScript, and eventually JavaScript framework is demanded to build web application. AngularJS is one of the most widely-used (client side) JavaScript framework.
Furthermore, request-response style architecture prevents web services from actively sending notifications to users. There are few ways to send new message notifications on chat applications, or display other players' moves in the multiplayer games, for example. WebSocket technology solves such restrictions on the web with full-duplex persistent connections. With WebSocket, because browser and server applications are persistently connected, server applications need to handle a bunch of connections at the same time. Node.js manages multiple clients(browsers) on a single thread, utilizing asynchronous operations JavaScript have.
So now, we can use JavaScript for both client side, and server side. Now, it is time to introduce JavaScript database, MongoDB! MongoDB is schema-less, so it's the best fit for rapid development.
MEAN stack is such a JavaScript based full-stack environment combining the client side framework AngularJS, server side framework Node.js/Express.JS, and database MongoDB.
MEAN stack itself is a name for combination. Actual implementation includes MEAN.IO or MEAN.JS. In this article, I'll introduce AngularJS Full-stack generator(generator-angular-stack) that is easy to start with sophisticated generators and templates.
MEAN stack features(generator-angular-fullstack)
Full-stack
Full-stack web development environments provides a best practice for clients, servers and databases. That makes easy to understand whole project structure. It is especially convenient to have preconfigured combinations among clients, servers, databases, etc...
Only one language: JavaScript
We can use one language, JavaScript, to develop whole projects including clients, servers and databases. It makes development quite stress-free because you don't no need to switch context between languages.
Based on common tools
Frameworks used in MEAN stack, MongoDB, Node.js, Express, or AngularJS, are not used solely for MEAN stack. Individual frameworks are just as widely used. Tools used in AngularJS Full-stack generator, Yeoman, Bower, npm, Grunt, Karma are also commonly-used tools.
These common frameworks or tools introduce development environment stablity, use cases, and knowledges. Web development environments changes from time to time, so it is important to use common tools in order to be flexible and catch up the latest technologies.
Generator
AngularJS Full-stack generator can generate project templates using a menu-style interface. AngularJS Full-stack generator supports the following configurations:
Client
- Scripts: JavaScript, CoffeeScript, Babel
- Markup: HTML, Jade
- Stylesheets: CSS, Stylus, Sass, Less
- AnguarJS Routers: ngRoute, ui-router
Server
- Database: None, MongoDB
- Authentication boilerplate: Yes, No
- oAuth integrations: Facebook, Twitter, Google
- Socket.io integrations: Yes, No
AngularJS Full-Stack generator also provides generators for client-side and server-side code modules. These generators make it easy to start development. Heroku or OpenShift deployment commands are also provided to release products easily.
Install
So, let's install the MEAN stack implementation, AngularJS Full-Stack generator. MEAN stack works on Mac OS X, Linux, or Windows. In this article, I'm using Mac OS X, but most of the following commands works just as well on other OS.
- Install Node.js (If not installed)
Browse https://nodejs.org, and click "Install" to download, then install Node.js package.
- Install Yeoman, Bower, Grunt, Gulp (If not installed)
% sudo npm install -g yo bower grunt-cli gulp
- Install AngularJS Full-Stack generator(generator-angular-fullstack)
% sudo npm install -g generator-angular-fullstack
- Install Homebew (If not installed)
% ruby -e "$(curl -fsSL https://raw.githubusercontent.com/Homebrew/install/master/install)"
- Install MongoDB(If not installed)
% brew update
% brew install mongodb
% ln -fs /usr/local/opt/mongodb/homebrew.mxcl.mongodb.plist ~/Library/LaunchAgents/
launchctl load ~/Library/LaunchAgents/homebrew.mxcl.mongodb.plist
- Test MongoDB
MongoDB has a flexible schema, and does not have a "create" statement to declare schema, but you can just insert data directly into the database.
In MongoDB, each data("record" in SQL) is called a "document" which stores any JSON objects, and the collection of data("table" in SQL) is just called "collection".
So now, let's try to insert, find, or delete documents.
~$ /usr/local/bin/mongo
MongoDB shell version: 3.0.2
connecting to: test
> db.my_collection.save( { 'hello' : 'world' } )
WriteResult({ "nInserted" : 1 })
> db.my_collection.find()
{ "_id" : ObjectId("558b92df5eed5e30d6c9c84f"), "hello" : "world" }
> db.my_collection.remove({})
WriteResult({ "nRemoved" : 1 })
GUI tools like MongoHub on Mac OS X also exist to make database operation easy.

Create a new project
Now, let's create a new project.
- Make project directory
% mkdir sample
% cd sample
- Generate project files using AngularJS Full-Stack generator
% yo angular-fullstack sample
You will encounter the following question (below). You can just choose the default options, but maybe nice to enable oAuth integration. For now, let's enable all social networks.
- Would you like to include additional oAuth strategies?
 ◉ Google
 ◉ Facebook
❯◯ Twitter
After you answer all questions, project files are generated, and modules are installed. It may take some time for the first time. Just have a cup of coffee.
- Updating npm packages Default npm packages on Angular Full-stack generator is a bit old, so let's update to the latest versions using npm-check-updates .
% npm install -g npm-check-updates
% npm-check-updates -u
% npm install
Start server
It is time to start the server. Just type a command like this:
% grunt serve
This will setup all tasks, and start the Node.js server, and opens the browser with URL: http://localhost:9000 .
At this point, the following features are already implemented:
- Twitter Bootstrap based UI
- Listing, adding, and removing items.
- Real-time listing update on other user's adding or removing items.
- User authentication(Sign Up, Login, SNS integration(with API key))
Now, type some words in the input box, and click "Add New". The item listing will then be updated. If you opens multiple browsers and add item, other browsers listing is automatically updated without manually reloading browser.
Edit code
Change the file contents(Keeping "grunt serve" running).
app/main/main.html:
<h1>How's it going ?</h1>
Just after saving the file, (without manually reloading the browser) the browser content is updated in real time.
Debug
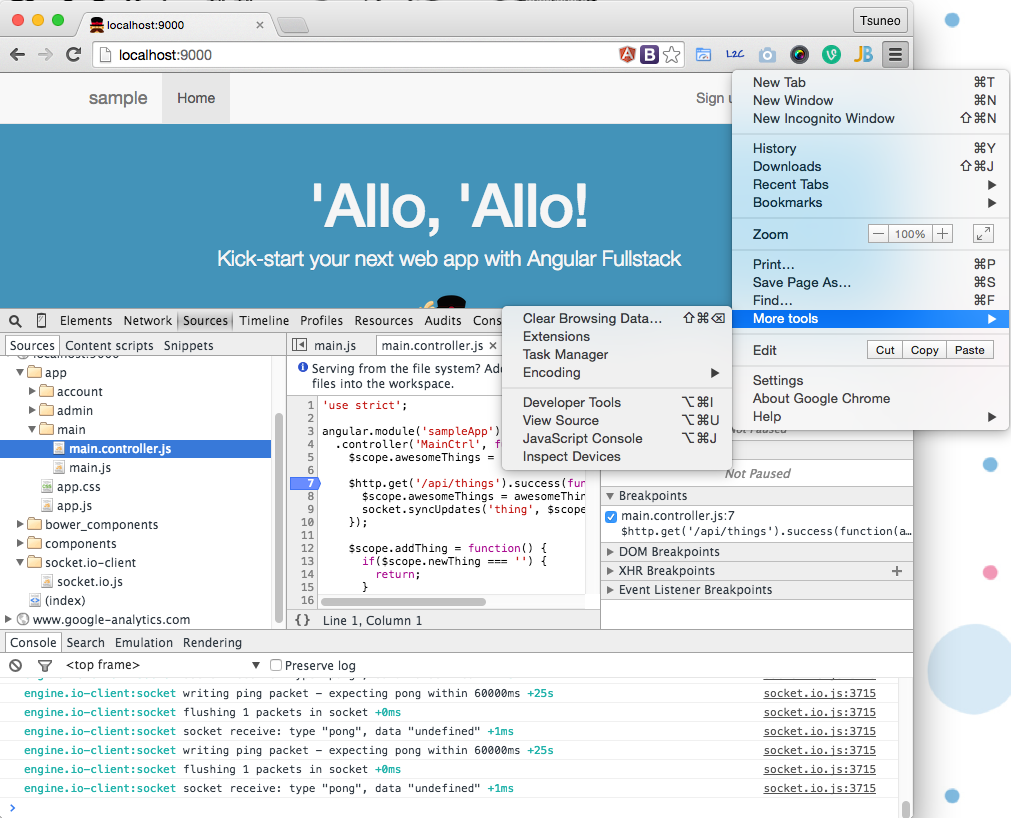
Client-side debugging
You can use web browser development tools for debugging.
On Chrome, click the Chrome menu icon at the right of URL base, and choose [More tools][Developer tools]. Then you'll see the "Developer Tools" window.

On Safari, go Safari menu's Preference, check "Show development menu" to enable the development menu. Open a page to debug, go to main menu and choose "Development" - "Show error console" to access development tools.
In the development tools, you can see console logs, set breakpoints in JavaScript code, or print variables.
Server-side debugging
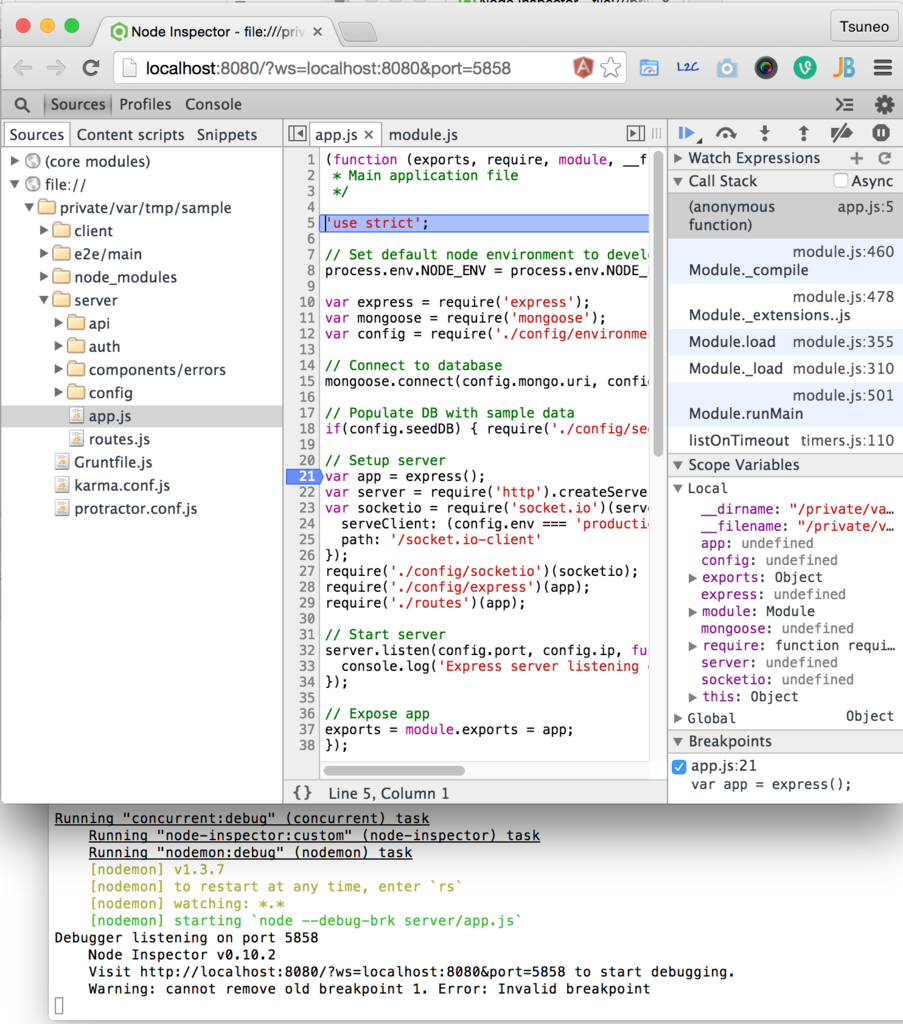
Let's try Node.js debugger(Node Inspector) for server-side code. Node Inspector runs on Chrome. So, update the "open" function on "Gruntfile.js" as shown below to specify the browser application as "Google Chrome.app".
Gruntfile.js:
            // opens browser on initial server start
            nodemon.on('config:update', function () {
              setTimeout(function () {
                require('open')('http://localhost:8080/debug?port=5858', '/Applications/Google Chrome.app');
              }, 500);
            });
Then, run Node.js server on debug mode:
% grunt serve:debug
Now, chrome developer tools will start debugging the Node.js application. The debugger is suspended on the first line of the Node.js application. Just click the "Resume" button(or "F8") to restart the application.
In this window, you can set the breakpoint, step in/over, or see variables.

Deployment
Because "grunt serve" starts the server on the local machine, other users cannot use your web service. To make it public, deploy the application on the public server.
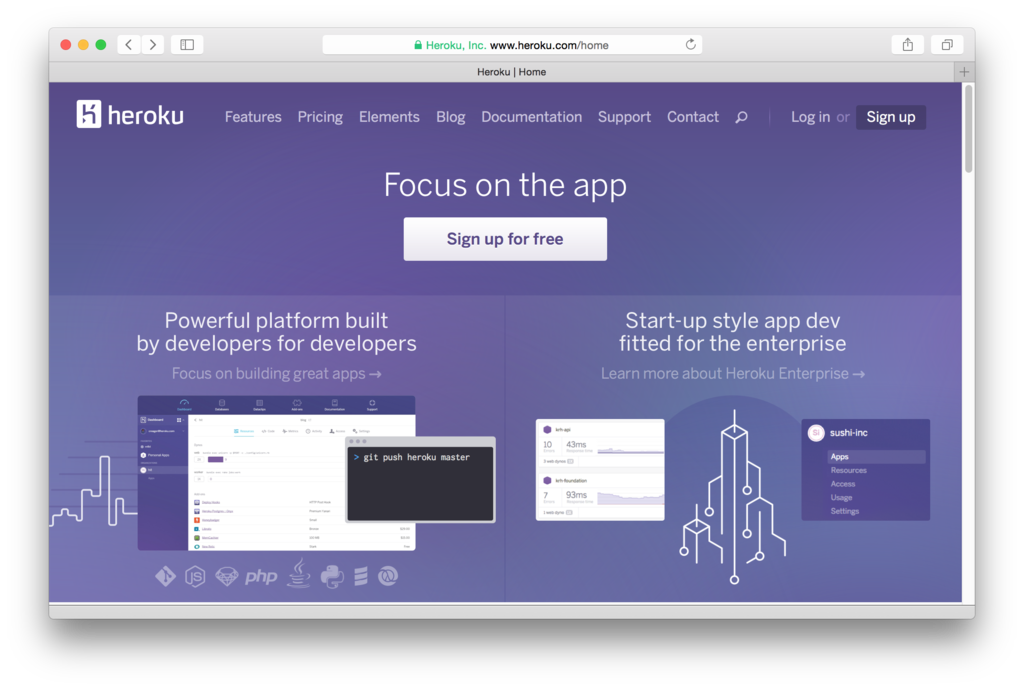
Angular Full-Stack generator supports Heroku deployment.
Create Heroku account
Heroku provides a free plan to deploy one application. Just browse Heroku and click "Sign up for free" to create a new account.

Install Heroku Toolbelt
To manage application on Heroku, you will use the Heroku Toolbelt command line toolkit. Download and install the toolkit from the URL below.
Now, login using the "heroku" command.
% heroku login
Type your Heroku username and password.
Set up application deployment environment for Heroku
To set up the Heorku application deployment environment, use the Angular Full-stack generator command "yo angular-fullstack:heroku".
Type the application name when prompted. The application URL is http://APPLICATION.herokuapp.com .
You'll also need to install the MongoDB module. Heroku supports MongoHQ and MongoLab. For now, let's use MongoLab because of its free plan.
% yo angular-fullstack:heroku
% cd dist
% heroku addons:add mongolab
From now on, you can build and deploy the application using the "grunt" and "grunt buildcontrol:heroku" commands.
% grunt
% grunt buildcontrol:heroku
Done !
Let's access the application URL with your browser.
http://APPLICATION.herokuapp.com/
In case you encounter any errors, review log messages.
% heroku logs
SNS integration
Although Sign Up and Login are already implemented, you need to set up both API key and SECRET key to integrate SNS authentication.
On https://apps.twitter.com , click "Create New App" to create a new application. Specify the application URL to "Callback URL"(Ex: http://paizatter.herokuapp.com ).
On the application page, see "Keys and Access Tokens" to access "Consumer Key (API Key)" and "Consumer Secret (API Secret)".

On https://developers.facebook.com/apps/ , click "Add a New App". Choose "Website" and input your application name and choose the category like "Utilities" under "Choose a Category". Then click "Create App ID" to create.
Choose your application from the "My Apps" menu. Choose the "Advanced" tab and specify the application URL on "Valid OAuth redirect URIs" (Ex: http://APPLICATION.herokuapp.com ). You can specify multiple URLs, so adding "http://localhost:9000/" will be convenient for testing on local environment.

From application's "Settings" menu, input "Contact Email". Choose "Status & Review" and answer "Yes" on "Do you want to make this app and all its live features available to the general public?" to enable application. Now, you can get access Dashboard to get "App ID" and "App Secret".
On https://console.developers.google.com/project , click "Create project". Choose your created project. From the menu on the left, choose "APIs&auth"/"Credentials". On the OAuth page, click "Create new Client ID" and choose "Web application" and click "Configure consent screen".
After the consent, type the application URL under "Authorized redirect URIs" (Ex: http://APPLICATION.herokuapp.com/auth/google/callback ), and click "Create Client ID".

From "APIs&auth"-"API" menu, choose "Google+ API" and enable "Google+ API". Now, you can see "APIs&auth"/"Credentials" to access Client ID(API key) and Client secret(SECRET key).
Set up API key on Heroku
After retrieving API keys and SECRET keys, use the "heroku config set" command to set keys on environment variables.
% cd dist
% heroku config set FACEBOOK_ID=xxx
% heroku config set FACEBOOK_SECRET=xxx
% heroku config set TWITTER_ID=xxx
% heroku config set TWITTER_SECRET=xxx
% heroku config set GOOGLE_ID=xxx
% heroku config set GOOGLE_SECRET=xxx
% heroku config
% heroku restart
Summary
In this article, I introduced how you can use the AngularJS Full-Stack generator to build, run, and deploy MEAN stack web services. MEAN stack makes it easy to build full-stack web services quickly. So, it is especially convenient for project startup or prototyping. Let's try it !
Note: This article just runs asample application. The following articles will provides more practical applications.
Reference
AngularJS Full-Stack generator
https://github.com/DaftMonk/generator-angular-fullstack
MEAN stack development articles |
|
| * | |
| Building Twitter-like full-stack web service in 1 hour - MEAN stack development (2) | |
| Building a QA web service in an hour - MEAN stack development(3) | |


