Paiza Engineering Blog

Engineering blog of browser-based web development environment PaizaCloud Cloud IDE ( https://paiza.cloud/ ), online compiler and editor Paiza.IO( https://paiza.IO/ )

Laravel5.6: How to create Laravel app in browser with PaizaCloud Cloud IDE

f:id:paiza:20180216002650p:plain
(Japanese article is here)

f:id:paiza:20151217152725j:plainHello I'm Tsuneo!(@)

PHP is a language for Web development, and can runs on HTML by embedding the code. As PHP program can build and run from the small part, it fits for the Web development beginner.

But, if you want to build a full-fledged application, you probably need to use a Web Application Framework on the PHP.

There are several Web Application Frameworks like Laravel, CakePHP, Symfony, Zend Framework, or CodeIgniter. Among those, Laravel is the most popular and growing PHP framework, nowadays.

We can see the popularity from Google Trends below.

f:id:paiza:20180216013143p:plain

Laravel has features for web development like routing, MVC, ORM, generator. By building the application following Laravel rules, you can naturally create readable and extensible Web Applications.

But, to develop Laravel application in practice, you need to install and setup PHP, Laravel, or databases. These installation and setting up can be a frustrating. Just following the installation instruction does not work or cause errors because of OS, versions, other software dependencies, etc.

Also, if you publish the service, feedbacks from your friends or others will motivate you. But, this requires "deployment" of the service. The "deployment" also frustrates us...

So, here comes PaizaCloud Cloud IDE, a browser-based online web and application development environment.

As PaizaCloud have Laravel application development environment, you can just start coding for the Laravel application program in your browser.

And, as you can develop in the cloud, you can just run the Laravel application on the same machine without setting up another server and deploying to it.

Here, we develop a Task List application using Laravel on the PaizaCloud Cloud IDE.

Following the instruction below, you'll create and run the Laravel application just in 10 minutes.

Getting started with PaizaCloud Cloud IDE

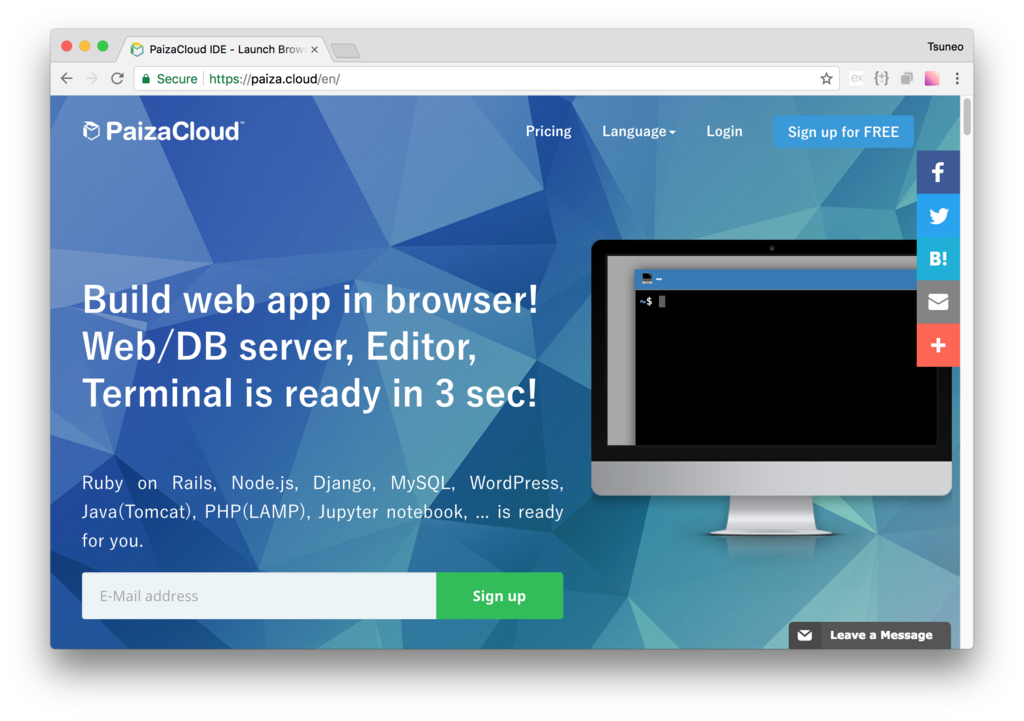
So, here is the website of PaizaCloud Cloud IDE.

https://paiza.cloud/

Just sign up with email and click a link in the confirmation email. You can also sign up with GitHub or Google.

Create new server

Let's create a new server for the development workspace.

f:id:paiza:20171214154558p:plain

Click "new server" to open a dialog to set up the server.

Here, you can choose "PHP", "phpMyAdmin", and "MySQL", and click "New Server" button.

f:id:paiza:20171214154330p:plain

Just in 3 seconds, you'll get a browser-based development environment for Laravel.

You'll see editor or browser windows in the page, but we can close those for now.

Create an application

Then, let's create your Laravel application.

You can use "laravel new" command to create Laravel application.

On PaizaCloud Cloud IDE, you can use PaizaCloud's "Terminal" application to run the commands in your browser.

Let's click the "Terminal" button at the left side of the page.

f:id:paiza:20171214154805p:plain

Now, the "Terminal" application launch. So, let's type "laravel new [application name]" command in the Terminal.

The '[application name]' is the name of the application you are creating. You can choose whatever you want, like "music-app" or "game-app".

Here, I'll choose the application name "myapp", where I can manage the Task List.

So, lets type:

$ laravel new myapp

f:id:paiza:20180216003112p:plain

In the file manager view at the left side of the page, you'll see the "myapp" directory. Click the folder to open it to see inside the directory.

f:id:paiza:20180216005011p:plain

You'll see a bunch of files for the Laravel application.

Note that you can also create the Laravel project by using composer command below.

$ composer create-project laravel/laravel myapp --prefer-dist

And, by running the command below, your "laravel new" command will be faster.

$ composer config -g repositories.packagist composer 'https://packagist.jp'
$ composer global require hirak/prestissimo

Start Laravel server

Now, you can already run the application. Let's start the application.

Change the directory by typing "cd myapp" command, and type "php artisan serve" command to start the server!

$ cd myapp
$ php artisan serve

f:id:paiza:20180216005150p:plain

You'll get a new button with text "8000" on the left side of the page.

f:id:paiza:20180216005220p:plain

Laravel server runs on port 8000. PaizaCloud Cloud IDE detects the port number(8000), and automatically adds the button to open a browser for the port.

Click the button, and you'll get Browser application(a Browser application in the PaizaCloud). Now, you'll see web page about the Laravel, that is your application!

f:id:paiza:20180216005704p:plain

Editing file

What you see on the application page is a PHP file "resources/view/welcome.blade.php" under the project directory("myapp"). Let's try to change the title by editing the file.

On file manager view, double click the file "myapp/resources/view/welcome.blade.php" for editing.

f:id:paiza:20180216005750p:plain

Edit the title part inside '<div class="title m-b-md">' tag

myapp/resources/view/welcome.blade.php:

                <div class="title m-b-md">
                    Hello Laravel on PaizaCloud!
                </div>

f:id:paiza:20180216181250p:plain

After the editing, click "Save" button or type "Command-S", or "Ctrl-S" to save the file.

Create database

You'll already have a MySQL server running because you checked it on the server setting. But if not, you can always manually start like:

$ sudo systemctl enable mysql
$ sudo systemctl start mysql

On PaizaCloud Cloud IDE, you can install packages on root privilege.

Next, create a database for the application. Here, we create a database "mydb" using "mysql" command. Type the command below to create the "mydb" database.

$ mysql -u root
create database mydb;

f:id:paiza:20180216010049p:plain

You created the database.

Then, set the application to use the database. Database configuration file is ".env" under the project directory. Files begin with a dot('.') is hidden files that are not visible in the file manager view by default. To make it visible, right click on file manager view and choose "Show Hidden files..." menu.

f:id:paiza:20180216181332p:plain

Then, open the ".env" file and edit 3 lines for "DB_DATABASE"、"DB_USERNAME"、"DB_PASSWORD" settings. As there is no password for the MySQL, comment out for "DB_PASSWORD" setting.

myapp/.env:

DB_DATABASE=mydb
DB_USERNAME=root
# DB_PASSWORD=secret

Create table, model, etc.

Now, let's make application to use the database.

On Laravel, we can create a database table, a model class, and a controller class with "php artisan make:model" command.

Run the command below. The "-m" option is for creating a migration file, the "-c" option is for creating a controller file, and the "-r" option is for creating controller methods related to resource handling.

$ php artisan make:model Task -m -c -r

The command creates following files.

Filename Role
database/migrations/2018_xx_xx_xxxxxxxx_create_tasks_table Migration file
app/Task.php Model
app/Http/Controllers/TaskController.php Controller

The migration file has settings to create a table. Now, let's add a column "name" for the task name. Add "$table->string('name')" to Schema::create() calling like below.

database/migrations/2018_xx_xx_xxxxxxxx_create_tasks_table:

    public function up()
    {
        Schema::create('tasks', function (Blueprint $table) {
            $table->increments('id');
            $table->string('name');
            $table->timestamps();
        });
    }

f:id:paiza:20180216010508p:plain

After editing the file, run migration to create the table.

$ php artisan migrate

Now, the "tasks" table is created. If you want to re-run all migration from scratch, you can run "php artisan migrate:refresh" command. We can browse the table using "phpMyAdmin".

On PaizaCloud, open a browser(in browser) and type "http://localhost/phpmyadmin" to the URL field.

f:id:paiza:20180216010802p:plain

Routing settings

The Task List application has 3 actions: listing tasks, adding a task, or deleting a task. We set 3 routing for those like below.

Method Path Action
GET /tasks List tasks
POST /tasks Add a task
DELETE /tasks/{id} Delete a task

We set routing on "routes/web.php" file. At first, remove all the default routings on the file. For about top page "/", set to redirect to "/tasks".

Set "routes/web.php" file like below.

routes/web.php:

Route::get('/', function(){return redirect('/tasks');});
Route::get('/tasks', 'TaskController@index');
Route::post('/tasks', 'TaskController@store');
Route::delete('/tasks/{id}', 'TaskController@destroy');
\URL::forceScheme('https');

Let's see the code. Rout::get is for GET method. The second argument is for setting action using the callback function, or the controller class and action name. For about 'GET /' request, redirect to '/tasks' using the redirect() function. For about 'GET /tasks' request, set the action to call TaskController's index() method. For about 'POST /tasks' request, set the action to call TaskController's store() method. And for about 'DELETE /tasks/{id}' request, set the action to call TaskController's destroy() method. By writing like "{id}", we can get the part from the PHP code. For example, for about "/task/1" request, we get "1" as $id .

And, as PaizaCloud uses HTTPS protocol to access the server, add "\URL::forceScheme('https')". Without this setting, redirect() does not work.

To make sure, let's set to use HTTPS in the application settings. As we can set application wide settings on "AppServiceProvider.php"'s boot() method, add "\URL::forceScheme('https')" to the file like below.

Providers/AppServiceProvider.php;

class AppServiceProvider extends ServiceProvider
{
    ...
    public function boot()
    {
        \URL::forceScheme('https');
    }
    ...
}

Controller settings

Create controller methods code called from the routing.

Write index()、store()、destroy() method for listing tasks, creating a task, or deleting a task like below,

app/Http/Controllers/TaskController.php:

<?php

namespace App\Http\Controllers;

use App\Task;
use Illuminate\Http\Request;

class TaskController extends Controller
{
    public function index()
    {
        $tasks = Task::all();
        return view('tasks', ['tasks' => $tasks]);
    }

    public function store(Request $request)
    {
        $task = new Task;
        
        $task->name = request('name');
        $task->save();
        return redirect('/tasks');
    }

    public function destroy(Request $request, $id, Task $task)
    {
        $task = Task::find($id);
        $task->delete();
        return redirect('/tasks'); 
    }
}

Let's see the code.

"use App\Task" is written to use Task class. Without the "use", we need to write "Task" as "\App\Task".

On index() method for listing tasks, use Task model's Task::all() method to retrieve all the tasks from the database table. Call view() function to render the page. The first argument is setting view file, and the second argument is to set variable names referred on the view file. We set the retrieved tasks to the value of 'tasks' key on the associated array so that the view file can refer tasks as $tasks variable.

On store() method for adding a task, create a Task object and set the submitted name parameter to name property of the Task object, and call $task->save() to save the task to the database. Then, redirect to '/tasks' to show the Task listing page.

On destroy() method for deleting a task, call Task model's Task::find() method to retrieve a task for the task id($id). Call $task->delete() to delete the task, and redirect to '/tasks' to show the Task listing page.

Create view(HTML)

Next, let's create view files. The views are HTML files with embedded PHP code. Laravel uses Blade template engine to make the PHP code more concise.

The view can be just one file. But, as we can have a shared layout for multiple view files, let's create the layout file for now.

Now, we create the layout file with the filename "resources/views/layout.blade.php". To create the file, right-click on the "resources/views" folder and choose "New file" menu, then set filename to "layout.blade.php".

Write the code below on the layout file.

resources/views/layout.blade.php:

<!DOCTYPE html>
<html>
    <head>
        <title>Task List</title>
        <!-- CSS And JavaScript -->
        <link rel="stylesheet" href="//fonts.googleapis.com/css?family=Roboto:300,300italic,700,700italic">
        <link rel="stylesheet" href="//cdn.rawgit.com/necolas/normalize.css/master/normalize.css">
        <link rel="stylesheet" href="//cdn.rawgit.com/milligram/milligram/master/dist/milligram.min.css">
    </head>
    <body>
        <div class="container">
            @yield('content')
        </div>
    </body>
</html>

On the file, we use simple CSS framework "Milligram". Milligram makes HTML files beautiful without writing additional class names. On "body" tag, there is a line "@yield('content')", here is the place to replace with the page content.

Then, create a file for listing tasks, creating or deleting a task with the filename "resources/views/tasks.blade.php".

Right-click the "resources/views" folder and choose "New file" menu to create a "tasks.blade.php" file.

resources/views/task.blade.php:

@extends('layout')

@section('content')
    <h1>Task List</h1>
    <form action="/tasks" method="POST" class="form-horizontal">
        {{ csrf_field() }}
        <!-- Task Name -->
        <div class="form-group">
            <label for="task" class="col-sm-3 control-label">Task</label>
            <div class="col-sm-6">
                <input type="text" name="name" id="task-name" class="form-control">
            </div>
        </div>

        <!-- Add Task Button -->
        <div class="form-group">
            <div class="col-sm-offset-3 col-sm-6">
                <button type="submit" class="btn btn-default">
                    <i class="fa fa-plus"></i> Add Task
                </button>
            </div>
        </div>
    </form>

    <!-- Current Tasks -->
    <h2>Current Tasks</h2>
    <table class="table table-striped task-table">
        <thead>
            <th>Task</th><th>&nbsp;</th>
        </thead>

        <tbody>
            @foreach ($tasks as $task)
                <tr>
                    <!-- Task Name -->
                    <td>
                        <div>{{ $task->name }}</div>
                    </td>
                    <td>
                        <form action="/tasks/{{ $task->id }}" method="POST">
                            {{ csrf_field() }}
                            {{ method_field('DELETE') }}                    
                            <button>Delete Task</button>
                        </form>
                    </td>
                </tr>
            @endforeach
        </tbody>
    </table>
@endsection

After editing the file, click "Save" button to save the file.

Let's see the file. The line "@content('layout')" is to specify to use the layout file('layout.blade.php'). The area between "@section('content')" and "@endsection" is for the content of the page. The layout file's "@yield('content')" part will be replaced with this content.

The first form is to create a task. On Laravel, we need to add "{{ csrf_field() }}" for CSRF prevention.

On the "input" tag, we set the name to "name" for the task name. The form is set to submit to "POST /tasks".

On the task list, we can refer the task list object as $tasks array. "@foreach ($tasks as $task)" is Blade syntax. It can be written in PHP as "<?php foreach($task as $task){ %>" where we can get each task as $task variable from $tasks array.

The "{{ $task->name }}" is also Blade syntax. "{{...}}" is to show the value inside braces. It can be written in PHP as "<?= $task->name ?>". Here, we refer name property of the $task object to access the "name" column of the "tasks" table on the database.

On "Delete Task" button, set the form to call "DELETE /tasks/{id}" to delete the task. As HTML cannot handle the DELETE method directly, we use "method_field('DELETE')" to emulate the DELETE method.

Model file

Let's see the model file. The model class is empty like below.

Actually, we don't need to set anything. Laravel provides ORM called Eloquent, where table column can be referred as model's property automatically. Isn't it cool?

app/Task.php:

<?php

namespace App;

use Illuminate\Database\Eloquent\Model;

class Task extends Model
{
    //
}

Run the application

Now, we wrote all the code. Let's see.

Click the browser icon(8000) to open the browser in PaizaCloud.

We see the "Task List" page with the empty task.

Let's add or delete the tasks.

f:id:paiza:20180216181609p:plain

It works! We successfully created the Task List application with Laravel!

Note that on PaizaCloud free plan, the server will be suspended. To run the bot continuously, please upgrade to the BASIC plan.

Summary

With PaizaCloud Cloud IDE, we created a Laravel application just in your browser, without installing or setting up any development environments. Now, let's create your own Laravel application!


With「PaizaCloud Cloud IDE」, you can flexibly and easily develop your web application or server application, and publish it, just in your browser. https://paiza.cloud


Alexa Application Development Tutorial in Ruby and PaizaCloud

f:id:paiza:20180207131334j:plain
(Japanese article is here)

f:id:paiza:20151217152725j:plainHello, I'm Tsuneo(@).

Are you using smart speaker?

I just started using Amazon Echo(Alexa). At first, I thought I don't need such a device. But, once start using Alexa, I cannot go back the life without the Alexa.

With Amazon Echo(Alexa), I don't need to pick up my mobile phone but I can just speak to use it without using hands. As the result of evolving machine learning and AI technology, I feel the speech recognition is practical level.

On a research, 18% of the adults in the US have a smart speaker, and 65% of that wouldn't go back to life without one. (Ref: National Public Media The Smart Audio Report from NPR and Edison Research).

And, we can write programs for the Amazon Echo(Alexa) to extend and add features!

Amazon Echo(Alexa) itself is quite useful, but by adding your own feature, it becomes more fun and useful!

As platform handle speech recognition, you can easily write code just by handling simple string.

Everyone can use the smart speaker just by voice. It is fun that your family, friends, or colleague can use your voice application right away.

But, creating and running the Amazon Echo(Alexa) application requires installing and setting up the development environment, and a server to run the Alexa application. Those can be annoying when we just want to create a simple Alexa program.

So, here comes PaizaCloud Cloud IDE, a browser-based online web and application development environment.

As PaizaCloud have Amazon Echo(Alexa) application development environment, you can just start coding for the Alexa application program in your browser.

And, as you can develop in the cloud, you can just run the Alexa application on the same machine without setting up another server and deploying to it.

Here, we develop an Amazon Echo(Alexa) application reading tweets on Twitter using Ruby on the PaizaCloud Cloud IDE.

Following the instruction below, you'll create and run the Amazon Echo(Alexa) application just in 10 minutes.

Getting started with PaizaCloud Cloud IDE

Let's start!

Here is the website of PaizaCloud Cloud IDE.

https://paiza.cloud/

Just sign up with email and click a link in the confirmation email. You can also sign up with GitHub or Google.

Create new server

Let's create a new server for the development workspace.

f:id:paiza:20171214154558p:plain

Click "new server" to open a dialog to set up the server. Just click "New Server" button in the dialog without any settings.

f:id:paiza:20171219143410p:plain

Just in 3 seconds, you'll get a browser-based online development environment for creating Alexa application using Ruby.

f:id:paiza:20180116171931p:plain

Create Amazon developer account

Alexa's voice conversation application is called as Alexa Skill.

You can create the Alexa Skill on Amazon Developer site.

Open the Amazon Developer site below.

https://developer.amazon.com/

f:id:paiza:20180207182335p:plain

To develop Alexa application, you need the Amazon developer account. So, let's create it.

Click "Sign In" button at the top of the page.

f:id:paiza:20180207182411p:plain

The Sign In page opens. You can see the logo of the page, and find that the page is not for the Amazon shopping site, but for the developer site.

Here, you can sign in using your Amazon account. You can also create the "Create your Amazon Developer account" link, but it will create the Amazon account for your country, but for US(amazon.com).

Input your profile, and agree to the license. You don't need to change payment settings.

Now, you have your Amazon developer account.

Go to Amazon developer site(https://developer.amazon.com), and click "Sign In" to sign in the developer site.

After the sign in, click "Developer Console" on the top of the page, or just go to the URL below to open the developer console.

https://developer.amazon.com/home.html

f:id:paiza:20180207182510p:plain

Create Alexa Skill

Next, let's create the Alexa Skill.

On the developer site, go to tab menu, and click "ALEXA" tab.

f:id:paiza:20180207182544p:plain

Click "Get Started" button in the "Alexa Skill Kit" box.

f:id:paiza:20180207182630p:plain A page "Building Alexa Skills with the Alexa Skills Kit" opens. Click "Add a new skill".

f:id:paiza:20180207182700p:plain A page to create a new Alexa Skill opens. Here, you can create the Alexa Skill.

Skill: Skill information

At first, set the skill information.

On Skill Type, choose "Custom Interaction Model". And set Language to your language. You can choose from English, German, or Japanese.

Set Name to your Alexa application name. Here, we set it to "My Twitter".

Invocation name is the words to launch your application. Here, we set it to "My Twitter", too. Now, we can launch your application by saying "Alexa ask My Twitter.".

f:id:paiza:20180207182756p:plain Click "Save" button, and then click "Next" button.

Skill: Interaction Model

Next, set the Interaction Model. Here, we set how to recognize the user's voice.

f:id:paiza:20180207182925p:plain At first, let's create the interaction model just greeting without doing anything.

On Intent Schema, set the user's intents. Here, we just create one intent for greeting. Input the intents in JSON format with a GreetIntent intent for greeting.

{
  "intents": [
    {
      "intent": "GreetIntent"
    }
  ]
}

f:id:paiza:20180207182952p:plain

On Custom Slot Types, we have nothing to do.

On Sample Utterance, we set the pair of intent and the user's voice. For now, we only have on intent and nothing to recognize, we input one pair with a placeholder word "Hi" below.

GreetIntent Hi

f:id:paiza:20180207183019p:plain

After the settings, click "Save", and "Next" button.

Skill: Configuration

Now, we open the Configuration.

f:id:paiza:20180207183143p:plain

Here, we set the service endpoint which is the program to response to the user's saying. As the program is called in HTTPS, the program needs to run as a web server on the Internet.

We can choose "Service Endpoint Type" from "AWS Lambda" or "HTTPS". As we run the program on PaizaCloud, we choose "HTTPS".

Although AWS Lambda is scalable, there is limitation on the program languages or flexibility, and it may be difficult for debugging the program.

On Default field, we set the service URL.

Alexa's application program need to run on HTTPS default port with the certificate. As PaizaCloud already have HTTPS(SSL) settings and can run on the arbitrary port, you don't need to set up servers.

On PaizaCloud, the server name is "[SERVER NAME].paiza-user.cloud". The port number of "Sinatra" application we'll create is "80". As you can automatically use HTTPS instead of HTTP on PaizaCloud, the protocol of the URL is HTTPS. On PaizaCloud, the server running on HTTP port 80, can also listen on HTTPS port 443, without any settings, on PaizaCloud. And, we'll use path name '/endpoint'.

So, the URL is " https://[SERVER-NAME].paiza-user.cloud/endpoint "(Replace "[SERVER-NAME]" to your server name on PaizaCloud).

f:id:paiza:20180207183213p:plain

After the setting, click "Save" button, and "Next" button.

Skill: SSL certificate

Next, let's set for SSL certificate. As PaizaCloud have the wildcard certificate, choose the second option "My development endpoint is a sub-domain of a domain that has a wildcard certificate from a certificate authority". Choosing other will cause the connection error.

f:id:paiza:20180207183330p:plain

After the setting, click "Next" button.

Now, you see the "Test" page.

Check that the "This skill is enabled for testing on your account" is enabled. By enabling the setting, you can call your application from your Amazon Echo.

Let's talk to Amazon Echo: "Alexa ask My Twitter".

You got the reply "You cannot access the requested skill". Yes, you have not created the program to answer to user's saying.

So, next, let's create your application program.

Create server program

Now, we create a program on PaizaCloud. Here, we use Ruby and Sinatra to create the server.

On PaizaCloud, you can create and edit the file in the browser. On PaizaCloud, click "New File" button at the left-side of the page.

f:id:paiza:20171219143513p:plain

As a dialog box to put filename is shown, type a filename "server.rb" and click "Create" button.

f:id:paiza:20180131175926p:plain

The file is created!

Let's write a simple application just return the fixed message. Write a Ruby program like below.

server.rb:

require 'sinatra'
require 'sinatra/reloader'
require 'sinatra/json'

post '/endpoint' do
    return json({
        "version": "1.0",
        "response": {
            "outputSpeech": {
                "type": "PlainText",
                "text": "Here is the server program.",
            },
        }
    })
end

get '/' do
    return "Hello World"
end

f:id:paiza:20180207184132p:plain

After writing the code, click "Save" button to save the file.

Let's see the code. On "post /endpoint'" block, we write the action for the POST "/endpoint" request. The return value for the block will be the HTTP response.

As Alexa endpoint requires the response message on JSON format, we use json() method here.

"speech" field of the return object is the message the application speech. Here, we set the fixed message "Here is the server program.".

Also, to test the program, we write the action for GET '/' request to "get '/'" block. Here, we just return a text "Hello World".

Then, let's run the Slack bot program we created. To run the program, run a command "sudo ruby ./server.rb -o 0 -p 80". As Sinatra listen only on localhost and does not accept connection from out of the server by default, we add "-o 0"(or, "-o 0.0.0.0") option to listen on the global address to accept connection from the clients. And, as you need to run the server on the default port, we add "-p 80" option to listen on the port 80. On PaizaCloud, the server listening on HTTP on the default port(80) can also accept connections from HTTPS on the default port(443). To run the server on the port 80, you need to run the program on root privilege.

On PaizaCloud, you can use a Terminal application in the browser to run the command.

Click "Terminal" button at the left side of the PaizaCloud page.

f:id:paiza:20171214154805p:plain

The Terminal launched. Type the command "sudo ruby ./server.rb -o 0 -p 80", and type enter key.

$ sudo ruby ./server.rb -o 0 -p 80

f:id:paiza:20180115171054p:plain

The command started. The text "tcp://0:80" means that the server is running on port 80.

Now, you see a button with a label "80" at the left-side of the PaizaCloud page.

f:id:paiza:20180207183549p:plain

Sinatra listens on port 80. PaizaCloud detects the port number 80, and add the button for the port 80 to launch browser automatically. On PaizaCloud, you can also connect to the server running on HTTP port 80 with HTTPS port 443.

By clicking the button, browser(a browser on PaizaCloud) launch and you see the message from the server "Hello World".

f:id:paiza:20180115171236p:plain

Now, let's test the program.

Skill: Test

You can test using Amazon Echo. But, on the Amazon developer site, there are simulators where you can test your application in the browser. So, let's use the simulator.

Go to the Amazon developer site below.

https://developer.amazon.com/edw/home.html#/skills

Click "Getting Start" button in "Alexa Skills Kit" box, and choose your application("My Twitter") from the list to open the Skill settings page. From the menu on the left side of the page, choose "Test".

f:id:paiza:20180207183647p:plain

There are some simulators on the page.

On Test Simulator, you can test the dialogue between user and Alexa. But, it looks not working for other than US account.

On Service Simulator, you can test the endpoint and see the request and response JSON message. Let's use the Service Simulator for now.

On the Service Simulator, input something to "Enter Utterance" input box, and click "Ask My Twitter" button.

f:id:paiza:20180207183813p:plain You got the response.

f:id:paiza:20180207183857p:plain

Service Request is the JSON data sent to your Ruby server program that you just created. Service Response is the response from the server program.

You see the message from the server. "Here is the server program". You got the reply!

Then, let's talk to Amazon Echo.

You: "Alexa, ask My Twitter".

Alexa: "Here is the server program".

Yeah! It is succeeded! Your Alexa application works!

Retrieving tweets on Twitter

Then, let's the application read tweets on Twitter.

To read tweets from Twitter on the program, we need Twitter API key. Create the Twitter API key following the article below.

http://paiza.hatenablog.com/entry/paizacloud_twitter_bot_ruby/2018/01/10#twitter_apikey

Then, create a configuration file(twitter-config.rb) on PaizaCloud, and set API keys like below.

Here, replace YOUR_CONSUMER_KEY / YOUR_CONSUMER_SECRET / YOUR_ACCESS_TOKEN / YOUR_ACCESS_SECRET to your application's API key you just created.

twitter-config.rb:

require 'twitter'

config = {
    consumer_key: "YOUR_CONSUMER_KEY",
    consumer_secret: "YOUR_CONSUMER_SECRET",
    access_token: "YOUR_ACCESS_TOKEN",
    access_token_secret: "YOUR_ACCESS_SECRET",
}

$twitterRestClient = Twitter::REST::Client.new(config)
$twitterStreamingClient = Twitter::Streaming::Client.new(config)

Then, change the server program to read tweets.

server.rb:

require 'sinatra/json'
require './twitter-config'

post '/endpoint' do
    tweets = $twitterRestClient.home_timeline
    text = tweets[0].text
    return json({
        "version": "1.0",
        "response": {
            "outputSpeech": {
                "type": "PlainText",
                "text": "I'm reading the latest tweet. " + text,
            },
        }
    })
end

get '/' do
    return "Hello World"
end

Let's see the program. "$twitterRestClient.home_timeline" is to get the latest tweets from your time line using Twitter API. The tweet text can get using "text" method of the Twitter object, it read the latest tweet text using "tweets[0].text". Then, return the message in JSON format.

Exit the running server program(server.rb) by typing Ctrl-C, and re-run.

$ sudo ruby ./server.rb -o 0 -p 80

Let's test the application.

On service simulator, type "ask to My Twitter".

You got the latest tweet message!

Then, let's talk to Amazon Echo.

You: "Alexa, ask My Twitter".

Alexa: "I'm reading the latest tweet. xxx... "

Alexa read the latest tweet. It is succeeded!

Search Tweet on Twitter

Next, let's the application search tweet on Twitter. So, the application will response to the message "Search by xxx".

On developer console(https://developer.amazon.com/edw/home.html#/skills), choose your skill to open Skill settings page.

From the menu on the left side of the page, choose "Interaction Model".

On Intent Schema, set the intents.

Here, we create an intent "SearchIntent" for searching. To handle the variable message like "Search by xxx", we use "slot".

The "slot" is like the variable in programming. The value of the slot is set based on user's saying. Here, we create a slot named "Keyword". The slot requires type. Here, we create a type with name "KEYWORD_TYPE".

{
  "intents": [
     {
      "intent": "SearchIntent",
      "slots": [
        {
          "name": "Keyword",
          "type": "KEYWORD_TYPE"
        }
      ]
    }
  ]
}

Next, on Custom Slot Type, we set slot type. For KEYWORD_TYPE slot, we set the list of possible words user say. By setting the possible user's words, Alexa recognize user's voice accurately. (On English, you can also use type AMAZON.LITERAL to accept all the saying.)

Here, we set the list of sports.

Football
Baseball
Tennis
Swimming
Skiing

f:id:paiza:20180207184025p:plain

After the saving, click "Update" button.

f:id:paiza:20180207184044p:plain

Next, set Sample Utterance. Here, we assign the message "Search by xxx" to KeywordIntent intent. So, let's input like below. {Keyword} is for the slot to accept variable words. (Note: You need white space before the {Keyword}).

SearchIntent Search by {Keyword}

Change the server program "server.rb" like below.

server.rb:

require 'sinatra'
require 'sinatra/reloader'
require 'sinatra/json'
require './twitter-config'

post '/endpoint' do
    obj = JSON.parse(request.body.read)
    puts "REQUEST:", JSON.pretty_generate(obj)
    message = 'Say "search by something"'
    if obj['request']['intent'] && obj['request']['intent']['slots']['Keyword']
        keyword = obj['request']['intent']['slots']['Keyword']['value']
        
        tweets = $twitterRestClient.search(keyword).take(5)
        if tweets[0]
            text = tweets[0].text
            message = "I read the tweet for keyword #{keyword}." + text
        else
            message = "I could not find any tweet for keyword #{keyword}."
        end        
    end

    return json({
        "version": "1.0",
        "response": {
            "outputSpeech": {
                "type": "PlainText",
                "text": message,
            },
            "shouldEndSession": false,
        }
    })
end

get '/' do
    return "Hello World"
end

Let's see the program. For user's saying "Search by xxx", the part "xxx" is sent in HTTP request body by JSON format. So, use JSON.parse() to parse the request body. Set the initial message to 'Say "search by something"'. The search keyword is stored in request/intent/slots/Any field, retrieve "Keyword" parameter. Use $twitterRestClient.search method to search from Twitter, and return the tweet in JSON format.

Exit the server program with Ctrl-C, and re-run the program(server.rb).

$ sudo ruby ./server.rb -o 0 -p 80

Let's test the program.

Open Service simulator and, type "Search by Football". Do you get the answer?

Then, let's talk with Amazon Echo.

You: "Alexa, ask My Twitter".

Alexa: Say "search by something".

You: "Search by football".

Alexa: I read the tweet for keyword football. xxx..."

Yeah! You are talking with Alexa! You created your Alexa application!

Note that on PaizaCloud free plan, the server will be suspended. To run the bot continuously, please upgrade to the BASIC plan.

Summary

We created an Amazon Echo(Alexa) application on PaizaCloud using Ruby, and run it on the same environment.

We can create Amazon Echo(Alexa) applications without implementing speech recognition. It is fascinating that everyone can easily use the voice application. It is quite fun to create the application thinking what to response to the user's message. Now, it is the time to create your own application!


With「PaizaCloud Cloud IDE」, you can flexibly and easily develop your web application or server application, and publish it, just in your browser. https://paiza.cloud


Google Home Development Tutorial with Ruby, PaizaCloud

f:id:paiza:20180119011449j:plain
(Japanese article is here)

f:id:paiza:20151217152725j:plainHello, I'm Tsuneo(@).

Are you using smart speaker?

I just started using Google Home. At first, I thought I don't need such a device. But, once start using Google Home, I cannot go back the life without the Google Home.

With Google home, I don't need to pick up my mobile phone but I can just speak to use it without using hands. As the result of evolving machine learning and AI technology, I feel the speech recognition is practical level.

On a research, 18% of the adults in the US have a smart speaker, and 65% of that wouldn't go back to life without one. (Ref: National Public Media The Smart Audio Report from NPR and Edison Research).

And, we can write programs for the Google Home to extend and add features!

Google Home itself is quite useful, but by adding your own feature, it becomes more fun and useful!

As platform handle speech recognition, you can easily write code just by handling simple string.

Everyone can use the smart speaker just by voice. It is fun that your family, friends, or colleague can use your voice application right away.

But, creating and running the Google Home application requires installing and setting up the development environment, and a server to run the Google Home application. Those can be annoying when we just want to create a simple Google Home program.

So, here comes PaizaCloud Cloud IDE, a browser-based online web and application development environment.

As PaizaCloud have Google Home application development environment, you can just start coding for the Google Home application program in your browser.

And, as you can develop in the cloud, you can just run the Google Home application on the same machine without setting up another server and deploying to it.

Here, we develop a Google Home application reading tweets on Twitter using Ruby on the PaizaCloud Cloud IDE.

Following the instruction below, you'll create and run the Google Home application just in 10 minutes.

Getting started with PaizaCloud Cloud IDE

Let's start!

Here is the website of PaizaCloud Cloud IDE.

https://paiza.cloud/

Just sign up with email and click a link in the confirmation email. You can also sign up with GitHub or Google.

Create new server

Let's create a new server for the development workspace.

f:id:paiza:20171214154558p:plain

Click "new server" to open a dialog to set up the server. Just click "New Server" button in the dialog without any settings.

f:id:paiza:20171219143410p:plain

Just in 3 seconds, you'll get a browser-based online development environment for creating Google Home application using Ruby.

f:id:paiza:20180116171931p:plain

Create Google Assistant application

We can add features to Google Home by creating a Google Assistant application.

The Google Assistant application can be built on a web site called Actions on Google.

Open the Actions on Google page below:

https://console.actions.google.com/

f:id:paiza:20180119104802p:plain

Click "Add/import project" button.

f:id:paiza:20180119104824p:plain

As "Add project" dialog box is shown, input your project name and the country name. Here, we input "MyTweet" to the project name, and set country to "Japan". Then, click "CREATE PROJECT" button.

f:id:paiza:20180119105027p:plain

A project is created on the Actions on Google. To build speech application for the project, we use Dialogflow.

Click "BUILD" button on "Dialogflow".

f:id:paiza:20180119105054p:plain f:id:paiza:20180119105155p:plain Click "CREATE ACTIONS ON DIALOGFLOW" button to create a Dialogflow action.

If you are required to login or authenticate, login to the service.

f:id:paiza:20180119105117p:plain

Switch "DEFAULT LANGUAGE" to your language(Ex: Japanese), and click "CREATE" button.

f:id:paiza:20180119105330p:plain

An agent for the conversation application is created on the Dialogflow.

The first conversation

At first, let the Google assistant application say something!

On Dialogflow menu, click "Intents".

f:id:paiza:20180131174517p:plain

Click "Default Welcome Intent", which is the place to write action just after the application starts.

Go "Response" section. "Text response" is the place to set what the application says. Click trash icon to remove the default message. Click "ADD MESSAGE CONTENT" button and choose "Text response" to add a message. Here, we set the message to "Welcome to My Twitter".

Then, click "SAVE" button on the top of the page to save the configuration.

f:id:paiza:20180131174714p:plain

Next, we set up Google Assistant application on Actions on Google.

Open https://console.actions.google.com/ , and click the project we created(My Twitter).

f:id:paiza:20180119110016p:plain

We set up the application on "Overview" page. While we need to set up correctly when we publish the application. For now, we just need to put something on the all required fields.

Go "App information" and click "EDIT".

To change the language, you can click "Add Language" to choose the language(Ex: "Japanese").

f:id:paiza:20180119110125p:plain

Set the application name and the pronunciation for that. Here, we can set "My Twitter" to both application name and pronunciation field, and click "NEXT" button.

As we launch the application by talking "OK Google, talk to My Twitter", you need to set the name easy to pronounce.

f:id:paiza:20180131174912p:plain

On "Details" section, set "Assistant app introduction"、"Short description"、"Full description". We can set like "Read tweets on Twitter". Then, click "NEXT" button.

f:id:paiza:20180131175115p:plain

On "Images" section, set the application images. For now, we can set any image files as placeholders.

f:id:paiza:20180119110752p:plain

On "Contact details" section, set your e-mail address.

f:id:paiza:20180119110821p:plain

On "Privacy and consent" section, set the application's privacy policy("Privacy Policy"). you can set something like "https://privaci.policy/" as a placeholder for now.

f:id:paiza:20180119110834p:plain

On "Additional Information", choose the category(Category) for your application. Set "Social & comminication", and click "Save" button.

f:id:paiza:20180119110924p:plain

After setting up everything for the application, click "TEST DRAFT" button. The actions Simulator launches.

f:id:paiza:20180131175612p:plain

Let's type "Talk to My Twitter".

f:id:paiza:20180131175810p:plain

A message "Welcome to My Twitter" we set was written, and was speeched.

Now, we can use the application from your Google Home. Let's talk to your Google Home like "OK Google, talk to My Twitter".

Now, Google Home says the response message!

Call conversation program

Next, let's the application read tweets from Twitter.

Open Dialogflow console( https://console.dialogflow.com/ ).

To call external service from Dialogflow, we use Fulfillment.

On menu, choose Fulfillment.

f:id:paiza:20180119111425p:plain

Now, we set the URL of the external service to the URL field. The service runs on PaizaCloud have hostname "[SERVER-NAME".paiza-user.cloud".

On PaizaCloud, the server name is "[SERVER NAME].paiza-user.cloud". The port number of "Sinatra" application we'll create is "4567". As you can automatically use HTTPS instead of HTTP on PaizaCloud, the protocol of the URL is HTTP. And, we'll use path name '/webhook' .

So, the URL is " https://[SERVER-NAME].paiza-user.cloud:4567/webhook "(Replace "[SERVER-NAME]" to your server name on PaizaCloud).

f:id:paiza:20180119111600p:plain

Click "SAVE" button to save the settings.

Next, on the menu, choose "Intents", and "Default Welcome Intent". Now, we can see "Fulfillment" section, so click the "Fullfillment" to open, and click "User webhook". Now, when the application launch, the Google Home application connect to the server running on the PaizaCloud.

f:id:paiza:20180119111642p:plain

Create server program

Now, we create a program on PaizaCloud. Here, we use Ruby and Sinatra to create the server.

On PaizaCloud, you can create and edit the file in the browser. On PaizaCloud, click "New File" button at the left-side of the page.

f:id:paiza:20171219143513p:plain

As a dialog box to put filename is shown, type a filename "server.rb" and click "Create" button.

f:id:paiza:20180131175926p:plain

The file is created!

Let's write a simple application just return the fixed message. Write a Ruby program like below.

server.rb:

require 'sinatra'
require 'sinatra/reloader'
require 'sinatra/json'

post '/webhook' do
  return json({
      speech: "Here is the server program."
  });
end

get '/' do
  return "Hello World"
end

f:id:paiza:20180131180151p:plain

Then, click "Save" button to save the file.

Let's see the code. On "post /webhook'" block, we write the action for POST "/webhook" request. The return value for the block will be the HTTP response.

As Dialogflow's Fulfillment Webhook requires the response message on JSON format, we use json() method here.

"speech" field of the return object is the message the application speech. Here, we set the fixed message "Here is the server program.".

Also, to test the program, we write the action for GET '/' request to "get '/'" block. Here, we just return a text "Hello World".

Then, let's run the Slack bot program we created. To run the program, run a command "ruby ./server.rb -o 0". As Sinatra listen only on localhost and does not accept connection from out of the server by default, we add "-o 0"(or, "-o 0.0.0.0") option to listen on the global address to accept connection from the clients.

On PaizaCloud, you can use a Terminal application in the browser to run the command.

Click "Terminal" button at the left side of the PaizaCloud page.

f:id:paiza:20171214154805p:plain

The Terminal launched. Type the command "ruby ./server.rb -o 0", and type enter key.

$ ruby ./server.rb -o 0

f:id:paiza:20180115171054p:plain

The command started. The text "tcp://0:4567" means that the server is running on port 4567.

Now, you see a button with a label "4567" at the left-side of the PaizaCloud page.

f:id:paiza:20180115171204p:plain

Sinatra listens on port 4567. PaizaCloud detects the port number 4567, and add the button for the port 4567 to launch browser automatically.

By clicking the button, browser(a browser on PaizaCloud) launch and you see the message from the server "Hello World".

f:id:paiza:20180115171236p:plain

Now, let's test the program.

On Dialogflow, see the right side of the page and click "See how it works in Google Assistant." to run the action Simulator. (Or, on "Actions on Google" project menu, click "Simulator")

f:id:paiza:20180119112015p:plain

Type "talk to My Twitter". The message "Here is the server program." was written. We got the response message from the Ruby server program we just created!

Now, let's talk to Google Home.

Say "talk to My Twitter" to the Google Home.

f:id:paiza:20180131181225p:plain

The Google Home says "Here is the server program"! Yeah, it just works!

Retrieving tweets on Twitter

Then, let's the application read tweets on Twitter.

To read tweets from Twitter on the program, we need Twitter API key. Create the Twitter API key following the article below.

http://paiza.hatenablog.com/entry/paizacloud_twitter_bot_ruby/2018/01/10#twitter_apikey

Then, create a configuration file(twitter-config.rb) on PaizaCloud, and set API keys like below.

Here, replace YOUR_CONSUMER_KEY / YOUR_CONSUMER_SECRET / YOUR_ACCESS_TOKEN / YOUR_ACCESS_SECRET to your application's API key you just created.

twitter-config.rb:

require 'twitter'

config = {
    consumer_key: "YOUR_CONSUMER_KEY",
    consumer_secret: "YOUR_CONSUMER_SECRET",
    access_token: "YOUR_ACCESS_TOKEN",
    access_token_secret: "YOUR_ACCESS_SECRET",
}

$twitterRestClient = Twitter::REST::Client.new(config)
$twitterStreamingClient = Twitter::Streaming::Client.new(config)

Then, change the server program to read tweets.

server.rb:

require 'sinatra'
require 'sinatra/reloader'
require 'sinatra/json'
require './config'

post '/webhook' do
  tweets = $restClient.home_timeline
  text = tweets[0].text
  return json({
      speech: "Reading the latest tweets using API." + text
  });
end

get '/' do
  return "Hello World"
end

Let's test the application.

On Dialogflow, see the right side of the page and click "See how it works in Google Assistant." to run the action Simulator. (Or, on "Actions on Google" project menu, click "Simulator")

Let's type "talk to My Twitter".

You got the latest tweet message!

Then, let's talk to Google Home.

Say "OK Google, talk to My Twitter".

Google Home read the latest tweet on Twitter!

Search tweet on Twitter

Next, let's add a feature to search a tweet from Twitter.

Let's make the application response to the message "search xxx".

Open Dialogflow( https://console.dialogflow.com/ ). On the menu, choose "Intents" and click "CREATE INTENT" button to show the page to create the Intent.

Set expected user's voice to "User says" field.

At first, type "Search foo".

f:id:paiza:20180131180338p:plain

As the part of "foo" is not fixed, set the part as a parameter. Choose the area "foo" and click it. As the list is shown, choose "@sys.any".

f:id:paiza:20180131180502p:plain

Set "keyword" to "PARAMETER NAME". Now, the part of "foo" can be anything and can be referred as "keyword" parameter of the message.

f:id:paiza:20180131180642p:plain

As the parameter is required, check "REQUIRED" checkbox. To set the message for the case user's message doesn't containers the parameter, click "Define prompts...".

f:id:paiza:20180131180759p:plain Here, we set "Set search keyword like: search whatever".

f:id:paiza:20180131180827p:plain As we use the server program on PaizaCloud, click "Fulfillment", and check "Use Fulfillment", and check "Use webhook".

f:id:paiza:20180119111642p:plain

Click "SAVE" button to save the settings.

Change the Ruby server program("server.rb") like below:

server.rb:

require 'sinatra'
require 'sinatra/reloader'
require 'sinatra/json'
require './config'

post '/webhook' do
    obj = JSON.parse(request.body.read)
    keyword = obj['result']['parameters']['keyword']
    puts "keyword=#{keyword}"
    if ! keyword
        tweets = $twitterRestClient.home_timeline
        text = tweets[0].text
        return json({
            speech: "I'm reading the latest tweet on Twitter. " + text
        });
    else
        tweets = $twitterRestClient.search(keyword).take(5)
        if tweets[0]
            text = tweets[0].text
            return json({
                speech: "I'm reading a tweet of the search result for keyword #{keyword}." + text
            });
        else
            return json({
                speech: "I cannot find any tweet for keyword #{keyword}."
            });
        end
            
    end
end

get '/' do
  return "Hello World"
end

Let's see the code. For the user's message "Search for xxx", the keyword part "xxx" is passed to the program as HTTP request body as JSON format. So, convert it to the object using JSON.parse(). As the parameters are passed as "result", "parameters" field, we get the "keyword" parameter from it.

Let's test the program.

On Dialogflow, see the right side of the page, and click "See how it works in Google Assistant." to start action Simulator(Or, on "Actions on Google" project menu, click "Simulator".)

Type "talk to My Twitter". Then input "search by ...".

We got the search result!

Next, let's talks to the Google Home.

Say "OK Google, talk to My Twitter", the say "search by ...".

Google Home says the Twitter search result! It's succeeded!

Now, we created the Google Home application to speech tweets on Twitter!

Note that on PaizaCloud free plan, the server will be suspended. To run the bot continuously, please upgrade to the BASIC plan.

Summary

We created a Google Home application on PaizaCloud using Ruby, and run it on the same environment.

We can create Google Home application without implementing speech recognition. It is fascinating that everyone can easily use the voice application. It is quite fun to create the application thinking what to response to the user's message. Now, it is the time to create your own application!


With「PaizaCloud Cloud IDE」, you can flexibly and easily develop your web application or server application, and publish it, just in your browser. https://paiza.cloud


Create and Run Slack bot with Ruby on PaizaCloud Cloud IDE

f:id:paiza:20180115170315p:plain
(Japanese article is here)

f:id:paiza:20151217152725j:plainHello I'm Tsuneo(@).

Now, Slack is one of the most major communication tools. And, by creating a Slack bot program, the bot program can communicate with people using text message.

As Slack bot program only handle text messages, it is easy to write code for the Slack bot program. And, as people can easily use the Slack bot just by sending text messages, the bot developer can easily get feedback from the user and it motivates us to improve the Slack bot. So, for the programming beginner, developing Slack bot will be the good practice.

But, creating and running the Slack bot requires installing and setting up the development environment, and a server to run the Slack bot. Those can be annoying when we just want to create a simple Slack bot program.

So, here comes PaizaCloud Cloud IDE, a browser-based online web and application development environment.

As PaizaCloud have Slack bot development environment, you can just start coding for the Slack bot program in your browser.

And, as you can develop in the cloud, you can just run the Slack bot on the same machine without setting up another server and deploying to it.

Here, we develop a Slack bot using Ruby on the PaizaCloud Cloud IDE.

Following the instruction below, you'll create and run the Slack bot just in 5 minutes.

Getting started with PaizaCloud Cloud IDE

Let's start!

Here is the website of PaizaCloud Cloud IDE.

https://paiza.cloud/

Just sign up with email and click a link in the confirmation email. You can also sign up with GitHub or Google.

Create new server

Let's create a new server for the development workspace.

f:id:paiza:20171214154558p:plain

Click "new server" to open a dialog to set up the server. Just click "New Server" button in the dialog without any settings.

f:id:paiza:20171219143410p:plain

Just in 3 seconds, you'll get a browser-based online development environment for creating Slack bot using Ruby.

f:id:paiza:20180116171931p:plain

Create Slack application

We need to create a Slack application to run a Slack bot. So, let's create the Slack application.

Open the Slack application page below.

https://api.slack.com/apps

f:id:paiza:20180115170344p:plain

If you have not signed up, click a "sign in to your Slack account" link, and open "https://api.slack.com/apps", again.

f:id:paiza:20180115170402p:plain

You'll see the list of application. To create an application, click "Create New App" button.

f:id:paiza:20180115170417p:plain

You'll see a dialog box to create the Slack application. Put your application name and select your Slack workspace. Here, we set the application name "MyBot" as an example. And, click a "Create App" button to create the application.

Now, the Slack application is created, you'll see the Slack application page below.

f:id:paiza:20180115170432p:plain

Create Slack command

At first, let's create a Slack command. Slack command is a command text begin with a slash('/'). For example, if you type a Slack command "/who" in the channel, you'll see the list of users in the channel.

Here, we create a Slack command "/time" to display the date and time.

On application page, in the "Add features and functionality", click "Slash Commands".

f:id:paiza:20180115170456p:plain

Click "Create New Command" button.

f:id:paiza:20180115170919p:plain

As a command creation page is shown, put a command name "/time" to the "Command" field.

Put a URL for the server program we will create on PaizaCloud to the "Request URL" field.

On PaizaCloud, the server name is "[SERVER NAME].paiza-user.cloud". The port number of "Sinatra" application we'll create is "4567". As you can automatically use HTTPS instead of HTTP on PaizaCloud, the protocol of the URL is HTTP.

So, the URL is " https://[SERVER-NAME].paiza-user.cloud:4567/ "(Replace "[SERVER-NAME]" to your server name on PaizaCloud).

Put the description of your bot to "Short Description" field, and put your command's usage to "Usage Hint" field.

Then, click "Save" button to save the settings.

Now, you have created the Slack command. You'll see the list of commands like below.

f:id:paiza:20180115170938p:plain

Then, to use the Slack application, install the Slack application to your Slack workspace.

Select "Install App" from the menu. On the installation page, click "Install App to Workspace" button.

f:id:paiza:20180115173815p:plain

You see the authorization page. Click "Authorize" button to authorize the Slack application.

f:id:paiza:20180115173829p:plain

Now, create a Ruby program to run when the Slack command is sent.

On PaizaCloud, you can create and edit the file in the browser. On PaizaCloud, click "New File" button at the left-side of the page.

f:id:paiza:20171219143513p:plain

As a dialog box to put filename is shown, type a filename "command.rb" and click "Create" button.

f:id:paiza:20180116172115p:plain The file is created!

Let's write a simple Slack command program using Ruby and Sinatra. Write a program like below.

command.rb:

require 'sinatra'
require 'sinatra/reloader'
require 'sinatra/json'

post '/slack/command' do
    text = params['text']
    return json({
        text: "The command succeeded! The command parameter is #{text}.",
        response_type: 'in_channel',
    })
end

get '/' do
  return "Hello World"
end

f:id:paiza:20180116172209p:plain Click "Save" button to save the file.

Let's see the program. The "post '/slack/command'" block define an action for POST "/slack command" requests. You see the request parameter as "params". For the Slack command message, you can get the parameter text following the command by "params['text']".

The object returned in the block will be the response to the request. Put reply message to "text" field, and put 'in_channel' to the "response_type" field to show the message to not only you but also the members of the channel.

Here, we set the reply message to "The command succeeded! The command parameter is #{text}".("#{text}" is the command message's parameter text). Add an action to GET '/' request to check that the service is running.

Then, let's run the Slack bot program we created. To run the program, run a command "ruby ./command.rb -o 0". As Sinatra listen only on localhost and does not accept connection from out of the server by default, we add "-o 0"(or, "-o 0.0.0.0") option to listen on the global address to accept connection from the clients.

On PaizaCloud, you can use a Terminal application in the browser to run the command.

Click "Terminal" button at the left side of the PaizaCloud page.

f:id:paiza:20171214154805p:plain

The Terminal launched. Type the command "ruby ./command.rb -o 0", and type enter key.

$ ruby ./command.rb -o 0

f:id:paiza:20180115171054p:plain

The command started. The text "tcp://0:4567" means that the server running on port 4567.

Now, you see a button with a label "4567" at the left-side of the PaizaCloud page.

f:id:paiza:20180115171204p:plain

Sinatra listens on port 4567. PaizaCloud detects the port number 4567, and add the button for the port 4567 to launch browser automatically.

By clicking the button, browser(a browser on PaizaCloud) launch and you see the message from the server "Hello World".

f:id:paiza:20180115171236p:plain

Then, let's send a Slack command. Type "/time TestTest" message on the Slack.

f:id:paiza:20180116172521p:plain

You got the response for the command! Slack command works!

Next, change the program to reply the date and time like below.

command.rb:

require 'sinatra'
require 'sinatra/reloader'
require 'sinatra/json'

ENV['TZ'] = 'JST-9'  # Timezone

post '/slack/command' do
    text = params['text']
    if text =~ /now/i
        now = Time.now
        responseText = "Now is #{now.hour}:#{now.min}:#{now.sec} ."
    elsif text =~ /today/i
        today = Time.now
        responseText = "Today is #{today.year}-#{today.month}-#{today.day} ."
    elsif text =~ /tomorrow/i
        tomorrow = Time.now + (60*60*24)
        responseText = "Tomorrow is #{today.year}-#{today.month}-#{today.day} ."
    else
        responseText = "Example: Now/Today/Tomorrow"
    end
    json({
        text: responseText,
        response_type: 'in_channel',
    })
end

get '/' do
  return "Hello World"
end

The code checks whether the message text contains strings(now/today/tomorrow) using regular expressions, and send reply message by returning a object with the replying text message.

Exit the command("ruby ./command.rb -o 0") by typing Ctrl-C, and re-run the command.

Let's see. Type the Slack commands like below on Slack.

/time What time is it now ?
/time What date is it today ?
/time How about tomorrow ?

You got the reply! You successfully created a Slack command to reply date and time.

f:id:paiza:20180116173615p:plain

Create Slack bot

While the program can answer for the Slack command, you need to send the specific Slack command as a message.

To make the bot program to handle other than Slack command, we can create Slack bot.

To create the Slack bot, go to Slack application page(https://api.slack.com/apps), and choose the Slack application, and choose "Basic information" from the menu.

f:id:paiza:20180115174145p:plain

Click "Add features and functionality", and choose "Bots" from the list.

f:id:paiza:20180115172052p:plain

On the Bot User creation page, click "Add Bot User" button.

f:id:paiza:20180115172103p:plain

If permission changing is requested, click "Click Here" link, and on the next page, click "Authorize" button to allow changing the permission.

f:id:paiza:20180115172119p:plain f:id:paiza:20180115172129p:plain

To create a Slack bot, we need Bot User OAuth Access Token.

On application page menu, click "Auth & Permission" on "Features", and notes the "Bot User OAuth Access Token" string begin with "xoxb-".

f:id:paiza:20180115172349p:plain

Now, let's write a Slack bot program in Ruby.

Slack bot requires WebSocket. So, we use a Ruby gem library called "faye-websocket". Run the command below to install the "faye-websocket" Ruby gem.

$ sudo gem install faye-websocket

f:id:paiza:20180115172448p:plain

Create a file "bot.rb", and write Ruby code like below. The program reply date and time, as the Slack command we just created.

Here, replace "OAUTH-TOKEN" to the "Bot User OAuth Access Token" string that begins with "xoxb-".

bot.rb:

require 'http'
require 'json'
require 'eventmachine'
require 'faye/websocket'

TOKEN='***OAUTH-TOKEN***'

ENV['TZ'] = 'JST-9' # Timezone

response = HTTP.get("https://slack.com/api/rtm.connect", params: {token: TOKEN})
resposeObj = JSON.parse(response.body)

url = resposeObj['url']

EM.run do
  puts "Connecting to #{url}..."
  ws = Faye::WebSocket::Client.new(url)

  ws.on :open do |event|
    p [:open]
  end

  ws.on :message do |event|
    msg = JSON.parse(event.data)
    p [:message, JSON.parse(event.data)]
    
    if msg["type"] != 'message'
        next
    end
    text = msg["text"]

    if text =~ /now/i
        now = Time.now
        responseText = "Now is #{now.hour}:#{now.min}:#{now.sec} ."
    elsif text =~ /today/i
        today = Time.now
        responseText = "Today is #{today.year}-#{today.month}-#{today.day} ."
    elsif text =~ /tomorrow/i
        tomorrow = Time.now + (60*60*24)
        responseText = "Tomorrow is #{tomorrow.year}-#{tomorrow.month}-#{tomorrow.day} ."
    end
    
    reply = {
        type: 'message',
        text: responseText,
        channel: msg['channel'],
    }
    puts "Replying: #{reply}"
    ws.send(reply.to_json)
  end

  ws.on :close do |event|
    p [:close, event.code, event.reason]
    ws = nil
    EM.stop
  end

end

Let's see the code. It accesses to "https://slack.com/api/rtm.connect" with the TOKEN parameter to retrieve WebSocket URL, and assign the URL to "url" variable.

It connects to the WebSocket URL using eventmachine(EM) and faye-weboskcket(Faye::WebSocket::Client).

"ws.on :message" block handles WebSocket messages. We only handle the message with type 'message'. msg["text"] is the message text. It checks whether the message text contains strings(now/today/tomorrow) using regular expressions, and send reply message using "ws.send" method. On the "ws.send" parameter, set 'message' to the "type" field, message text to the "text" field, and the channel to response(here, the channel of the sent message) to the "channel" field.

Now, let's run the Slack bot! Run a command "ruby ./bot.rb" on the Terminal on PaizaCloud.

$ ruby ./bot.rb

As the Slack bot can only read message on the channel it joined, invite the bot user to the channel.

Now, let's send the message !

f:id:paiza:20180116174406p:plain

Yay! We got the message from the Slack bot we created!

We successfully create the Slack bot using Ruby on PaizaCloud!

Note that on PaizaCloud free plan, the server will be suspended. To run the bot continuously, please upgrade to the BASIC plan.

Summary

We created and ran a Slack bot using Ruby on PaizaCloud. It is quite simple to create and run the Slack bot. It is fun to think how the Slack bot works, and improve the bot. Now, let's create your own Slack bot on PaizaCloud!


With「PaizaCloud Cloud IDE」, you can flexibly and easily develop your web application or server application, and publish it, just in your browser. https://paiza.cloud


Creating Twitter bot with Ruby on PaizaCloud without setting up server

f:id:paiza:20180110115336p:plain
(Japanese article is here)

f:id:paiza:20151217152725j:plainHello, I'm Tsuneo(@).

When we learned programming, we'll want to build some product and release it! It is actually the best way to learn coding, and feedback from others motivate us.

In the sense, building Twitter bot is the best fit.

Writing Twitter bot program is relatively easy as it only needs to handle text. And, everyone in the world can easily use your Twitter bot.

While it is easy to write code, setting up the development environment or the server environment can be hard.

So, here, we use PaizaCloud.

PaizaCloud is a browser-based development environment. We no longer need to install and set up the development environment. With PaizaCloud, we can just start Twitter bot development in your browser right now.

Here, we'll create a Twitter bot with Ruby on the PaizaCloud.

Following the instruction, you'll create and run your Twitter bot in about 5 minutes.

Getting started with PaizaCloud Cloud IDE

Let's start!

Here is the websites of PaizaCloud Cloud IDE.

https://paiza.cloud/

Just sign up with email and click a link in the confirmation email. You can also sign up with GitHub or Google.

Create new server

Let's create a new server for the development workspace.

f:id:paiza:20171214154558p:plain

Click "new server" to open a dialog and set up the server. Just click "New Server" button in the dialog without any settings.

f:id:paiza:20171219143410p:plain

Just in 3 seconds, you'll get a browser-based development environment for the Twitter bot.

Creating Twitter API Key

You'll use Twitter API to use Twitter from programs like the Twitter bot. Twitter API requires API Key to be used. So, let's create the API Key.

To create the API key, you'll create an application on the Twitter application management web page.

After logging in the Twitter, open "Twitter Apps" page below.

apps.twitter.com

f:id:paiza:20180110102619p:plain

Then, click "Crete New App" button to create the Twitter application.

f:id:paiza:20180110102655p:plain f:id:paiza:20180110102712p:plain

Put the program name to "Name", program's description to "Description". And, put your web site to "Website", but if you don't have it, you can put placeholder like "https://example.com/".

Read and check the "Developer Agreement", then, click "Create your Twitter application" button to create the application.

If you have not registered your mobile phone number, you'll get following error message.

f:id:paiza:20180110102738p:plain

In this case, you can go to phone setting page ( https://twitter.com/settings/add_phone ), and add your phone number, then put the verification code sent by SMS.

f:id:paiza:20180110154229p:plain

Now, you have created the application.

Next, create the API Key for the application. Choose your application and select "Keys and Access Tokens" tab.

f:id:paiza:20180110104343p:plain f:id:paiza:20180110104354p:plain

If the "Access Level" is "Read-only", click "modify app permissions" link and change it to "Read and Write".

Next, you'll also need to change the Access Level of "Access Token" to Read-Write mode.

At "Application Actions", click "Regenerate Consumer Key and Secret" link, check that "Access level" in the "Your Access Token" is "Read-Write".

That's it for creating the API Key!

Now, you have 4 strings to access Twitter API, so note those.

  • Consumer Key (API Key)
  • Consumer Secret (API Secret)
  • Access Token
  • Access Token Secret

Writing code

Next, let's create your Twitter bot program.

At first, to set the API Key, create a file named "config.rb".

On PaizaCloud, you can create and edit the file in your browser.

On PaizaCloud, click "New File" at the left side of the page.

f:id:paiza:20171219143513p:plain

You'll see the dialog box, so put the filename "config.rb", and click the "Create" button.

f:id:paiza:20180110154442p:plain As you got "config.rb" file, let's write Twitter bot configuration for the API Key like below.

You need to replace "YOUR_CONSUMER_KEY" / "YOUR_CONSUMER_SECRET" / "YOUR_ACCESS_TOKEN" / "YOUR_ACCESS_SECRET" with your API Key you just created.

config.rb:

require 'twitter'

config = {
    consumer_key: "YOUR_CONSUMER_KEY",
    consumer_secret: "YOUR_CONSUMER_SECRET",
    access_token: "YOUR_ACCESS_TOKEN",
    access_token_secret: "YOUR_ACCESS_SECRET",
}

@restClient = Twitter::REST::Client.new(config)
@streamingClient = Twitter::Streaming::Client.new(config)

f:id:paiza:20180110154706p:plain

Then, click "Save" button to save the file. As you use "twitter" ruby gem to read or write tweets, write "require 'twitter'" to load the "twitter" gem. And, create objects with API Key to read-write the tweets.

As the "twitter" gem uses different classes for REST API and Streaming API, you'll create "Twitter::REST::Client", and "Twitter::Streaming::Client" object with API Key respectively.

Your first tweet

Now, let's tweet something.

We use "irb" command to use Ruby interactively.

On PaizaCloud, we can use "Terminal" in the browser to run commands.

At the left-side of the page, click "Terminal" button.

f:id:paiza:20171214154805p:plain

The Terminal application starts. Write command like "irb -r ./config.rb" and push Enter key.

$ irb -r ./config.rb

f:id:paiza:20180110105842p:plain

"irb" command starts. Now, let's tweet. You can use "@restClient.update" method to tweet.

@restClient.update("My tweet from Ruby on https://paiza.cloud/ !")

f:id:paiza:20180110162851p:plain

Open Twitter in your browser and see what happens.

You can see that you tweeted from Ruby on PaizaCloud!

f:id:paiza:20180110162942p:plain

Creating Bot

Now, let's create the Twitter bot response to the mention.

Here, we'll create a Bot answering current time, today's date, and tomorrow's date.

At the left-side of the page, click "New File" button to create a file "bot.rb".

Here replace "USERNAME" with your twitter username (without '@').

bot.rb:

require 'twitter'
require './config'

ENV['TZ'] = 'JST-9'
username = "USERNAME"

@streamingClient.user do |tweet|
    if tweet.class == Twitter::Tweet && tweet.text.include?("@#{username}") && !tweet.in_reply_to_status_id
        puts "Found tweet: #{tweet}"
        if tweet.text.downcase.include?("time")
            now = Time.now
            @restClient.update("@#{tweet.user.screen_name} Now is #{now.hour}:#{now.min}:#{now.sec}.", in_reply_to_status_id: tweet.id)
        end
        if tweet.text.downcase.include?("today")
            today = Time.now
            @restClient.update("@#{tweet.user.screen_name} Today is #{today.year}-#{today.month}-#{today.day}.", in_reply_to_status_id: tweet.id)
        end
        if tweet.text.downcase.include?("tomorrow")
            tomorrow = Time.now + (60*60*24)
            @restClient.update("@#{tweet.user.screen_name} Tomorrow is #{tomorrow.year}-#{tomorrow.month}-#{tomorrow.day}", in_reply_to_status_id: tweet.id)
        end
    end
end

We set TZ environment variable to set timezone. @streamClient.user monitor tweets. When it finds a tweet, the block will be executed with argument "tweet". To avoid response to the response, check that the tweet is not reply.

Then, see whether the tweet message contains "time", "today", or "tomorrow", and reply using "@restClient.update".

Run the Twitter bot

That's it!

On PaizaCloud Terminal, run the Twitter bot!

$ ruby bot.rb

f:id:paiza:20180110114713p:plain

Now, try to send mention on Twitter!

f:id:paiza:20180110163312p:plain

You got reply message! Now, the Twitter bot is done!

Note that on PaizaCloud free plan, the server will be suspended. To run the bot continuously, please upgrade to the BASIC plan.

Summary

We created a Twitter bot with Ruby on PaizaCloud.

A Twitter bot can be created with a short code, and can be changed easily. It is fun to create a bot thinking what to answer to users' tweet message. The bot created on PaizaCloud can run and publish right away. It is also fun to be used by friends or people around the world! Now, let's create your own Twitter bot!


With「PaizaCloud Cloud IDE」, you can flexibly and easily develop your web application or server application, and publish it, just in your browser. https://paiza.cloud


Jupyter Notebook online in 3 seconds with PaizaCloud Cloud IDE

f:id:paiza:20171227154920p:plain
(English article is here)

f:id:paiza:20151217152725j:plainHello I'm Tsuneo(@).

Python is one of the most popular programming languages for data processing, Web service, Web scraping, or creating bots. Nowadays, Python is getting more popular for machine learning and AI because it has great libraries for it.

But, Python alone does not have the graphical features like showing tables, graphs, or figures that is essential for analyzing data.

Here comes Jupyter Notebook.

With Jupyter Notebook, you can write Python code in your browser, and view the graphs or figures in it.

Also, Jupyter Notebook enables you to write documents using Markdown. So, you can put the program and document together, and even share it with others.

Yes, Jupyter Notebook is an all-in-one package to start Python programming.

But, to use Jupyter Notebook on your PC, you need to install Python, Jupyter Notebook, or libraries and set up those. Because each PC has a different OS, version, software, or configuration, installation often fails with errors, or may break other software environment.

If you have PCs at home and at your office, you may need to install it to both PCs, and you cannot share data with those PCs.

So, here, we use PaizaCloud .

PaizaCloud is a browser-based development environment. You no longer need to install and set up the development environment. You can casually just start Web or application development right now.

PaizaCloud have pre-installed Jupyter Notebook So, you can start Python programming, anywhere, anytime. Also, major libraries like NumPy, SciPy, Pandas, or Django are also installed.

As PaizaCloud have browser-based file management, text editor, terminal, and browser(browser-in-browser), you can easily combine Python with other tools or files.

As Jupyter Notebook runs in the cloud with PaizaCloud, you can also create the note on Windows or Mac, and view it on tablet like iPad.

As both Jupyter Notebook and PaizaCloud are for casual development, those are the best combination for Python development.

Now, let's start Python programming with Jupyter Notebook and PaizaCloud!

Getting started with PaizaCloud Cloud IDE

Let's start!

Here is the website of PaizaCloud Cloud IDE.

https://paiza.cloud/

Just sign up with email and click a link in the confirmation email. You can also sign up with GitHub or Google.

Create new server

Next, let's create a new server for the development workspace.

f:id:paiza:20171214154558p:plain

Click "new server" to open a dialog to set up the server.

Here, you can choose "Jupyter Notebook", and click "New Server" button.

f:id:paiza:20171228150413p:plain Just click "New Server" button in the dialog without any settings. s

f:id:paiza:20171229003417p:plain

Just in 3 seconds, you'll get a browser-based development environment.

Start Jupyter Notebook server

As you set "Jupyter Notebook" on the server creation, you already have Jupyter Notebook running!

f:id:paiza:20171227140611p:plain

You can also manually start Jupyter Notebook. Let's see.

At first, choose "Terminal" icon button and click it.

f:id:paiza:20171213234317p:plain

Terminal starts. Jupyter Notebook can start with a command "jupyter notebook". Type the command and push enter key.

$ jupyter notebook

f:id:paiza:20171227140023p:plain

The Jupyter Notebook server starts, and browser(in the browser) for the Jupyter Notebook automatically opens.

You'll also get a new button with text "8888" on the left side of the page.

Jupyter Notebook server runs on port 8888. PaizaCloud Cloud IDE detects the port number(3000), and automatically adds the button to open a browser for the port. You can also open the browser(in the browser) by clicking the button.

f:id:paiza:20171227140319p:plain

Using Jupyter Notebook

Jupyter Notebook manage Python program as "notebook"(The notebook has ".ipynb" file extension.)

Let's create a notebook. Click "New" button and choose "Python 3" on the menu.

f:id:paiza:20171227140418p:plain

The new notebook is created, and a new browser opens for the notebook.

f:id:paiza:20171227140737p:plain

You'll see a text box just right of a label "In [ ]: ". Here comes your Python code.

Now, let's print a string. Type "Hello " + "Paiza", and push "Run" button or Shift-Enter key to run the code.

'Hello ' + 'Paiza'

Jupyter notebook print the result string "Hello Paiza"!

f:id:paiza:20171227140822p:plain

Next, let's calculate.

2**10
2**100

You got the results!

f:id:paiza:20171227140920p:plain

Plot graph

Now, let's plot a graph. As PaizaCloud have a library "matplotlib" for plotting graph, or "NumPy" for data processing, you can just use it now.

Let's plot a sin function.

To show figures or graphs, add "%matplotlib inline" to show visuals inline. Use NumPy to create data points of sin function, and call "plot" function to plot the points.

%matplotlib inline
import matplotlib.pyplot as plt
import numpy as np

x = np.linspace(0, 10, 100)
y  = np.sin(x)
plt.plot(x, y)

You got the graph of sin function!

f:id:paiza:20171227141055p:plain

Let's plot a histogram. Here, we create a graph of normal distribution from random data. Create 10,000 random numbers using "randn" function, and plot them using "hist" function. "bins=100" means you have 100 boxes.

%matplotlib inline
from numpy.random import *
import matplotlib.pyplot as plt

R = randn(10000)
plt.hist(R, bins=100)
plt.show()

f:id:paiza:20171227141410p:plain

Now, you see a normal distribution like graph.

Try to change the number of random numbers, or the number of boxes.

Show image

You can create and show images. Use "imgshow" function to show the images.

Let's try!

%matplotlib inline
import pylab as plt
import numpy as np


Z=np.array(((1,2,3,4,5),(4,5,6,7,8),(7,8,9,10,11)))
im = plt.imshow(Z, cmap='hot')
plt.colorbar(im, orientation='horizontal')
plt.show()

(Ref :python - How can I display a np.array with pylab.imshow() - Stack Overflow)

You get a cool image!

f:id:paiza:20171227141540p:plain

Calculating Pi

Next, let's calculate Pi(the ratio of the circumference of a circle to its diameter) with Jupyter Notebook and PaizaCloud using Monte Carlo method. With Monte Carlo method, you'll create and put random points and calculate the number of points in the circle.

Here, create 1,000 points, and calculate the number of points in the circle. Also, make it visible by showing the points in the graph.

%matplotlib inline
import numpy as np
import matplotlib.pyplot as plt

SAMPLES=1000

xs = np.random.rand(SAMPLES)
ys = np.random.rand(SAMPLES)

inner = 0
for i in range(SAMPLES):
    x = xs[i]
    y = ys[i]
    if x**2 + y**2 < 1:
        inner += 1
print(inner *4 / SAMPLES)   # 3.1x

c1 = plt.Circle((0, 0), radius=1, fc="None", ec="r", linewidth=3)
ax = plt.gca()
ax.add_patch(c1)

plt.axis("scaled")
plt.xlim(0, 1)
plt.ylim(0, 1)

plt.scatter(xs, ys, marker="x")
plt.show()

f:id:paiza:20171227141838p:plain

While it is not so accurate, you got Pi value, and the figure with points for the calculation! It is more easy to understand with figures.

While we put 1,000 points here, you can try to change the number of points by changing a line "SAMPLES=1000".

Show graph from CSV file

Next, let's plot the world population.

The CSV file of the population of countries is available as CSV file, so let's use it. We can use Pandas to load the CSV file. As the Pandas is pre-installed on PaizaCloud, you can try right now.

Read the CSF file using "pandas.read_csv" function, select records where "CountryCode" is "WLD" using Pandas, and plot it using "plot" function.

%matplotlib inline
import requests
url = 'https://datahub.io/core/population/r/population.csv'
response = requests.get(url)

with open('population.csv', 'wb') as csv_file:
    csv_file.write(response.content)

import pandas
population = pandas.read_csv('population.csv', index_col=2)

plot = population[population['Country Code'] == 'WLD'].plot(title='World Population', lw=2, colormap='jet', marker='.', markersize=10)
plot.set_xlabel("Year")
plot.set_ylabel("Population")

The saved CSV file is available in the file finder(on the left side of the page). You can download or open the file. Let's double-click the CSV file to open it with text editor.

f:id:paiza:20171229002927p:plain Here, we retrieve the CSV file using Python code, but you can use other tools like "wget" to download it. You can also save the data to file and reuse it, or process it with the other tools. Like this, PaizaCloud allows you to use not only Jupyter Notebook alone but also Linux Server features.

Japanese title in the graph

In the previous example, we saw the world population. Now, let's plot the population of a specific country like Japan.

Change the "Country Code" from "WLD"(World) to "JPN"(Japan).

As PaizaCloud has Japanese fonts installed, you can use Japanese titles for the graph.

%matplotlib inline
import requests
url = 'https://datahub.io/core/population/r/population.csv'
response = requests.get(url)

with open('population.csv', 'wb') as csv_file:
    csv_file.write(response.content)

import pandas
population = pandas.read_csv('population.csv', index_col=2)

plot = population[population['Country Code'] == 'JPN'].plot(title='日本の人口', lw=2, colormap='jet', marker='.', markersize=10)
plot.set_xlabel("年")
plot.set_ylabel("人口")

f:id:paiza:20171227142457p:plain

Let's change the country or area, and plot the population!

Scraping

Next, let's retrieve a HTML file and parse it.

Use "request.get" to retrieve the HTML file, then parse the HTML file to get an image url from the "img" tag using "lxml", and show the images using matplotlib.

With Jupyter Notebook, you can directly show the images.

%matplotlib inline
import requests, lxml.html, io
from PIL import Image
import matplotlib.pyplot as plt

res = requests.get("http://paiza.hatenablog.com/entry/paizacloud_sinatra/2017/12/19")
root = lxml.html.fromstring(res.text).getroottree()

for imgElement in root.xpath('//img')[0:10]:
    url = imgElement.attrib['src']
    res = requests.get(imgElement.attrib['src'])
    image = Image.open(io.BytesIO(res.content))
    plt.figure(figsize = (2,2))
    plt.imshow(image)

f:id:paiza:20171227142821p:plain

You got the images embedded in the blog.

Try to change the URL!

Summary

We make Python programs with Jupyter Notebook and PaizaCloud.

As we can see the result as figure or graph, it is easy to change program and see what's happens.

As the PaizaCloud server runs in the cloud without installation or setting up, you can just try it in any PC or in tablet.

It is convenience for data processing, scraping or machine learning. Let's try to write the code !


With「PaizaCloud Cloud IDE」, you can flexibly and easily develop your Web application or server application, and publish it, just in your browser. https://paiza.cloud


Advantages of Developing Apps with MEAN Stack

MEAN is a collection of JavaScript-based programs that includes MongoDB, Express.js, AngularJS, and Node.js. You can understand more by the acronym of these technologies. It offers a robust platform to develop hybrid apps in less time. This is latest JavaScript technology and helps developers develop the slimmest and fastest applications and websites, providing an efficient environment, designed from both front end and back end, appropriately synced, and stored in a database that ultimately improves the functionality of your website and app. A stack is an organizer to manage the various frameworks and tools needed during the development process.  If you want to succeed as a web developer, a MEAN stack course can help you and you will be able to develop JavaScript apps easily.


Features of MEAN Stack:

The complete code is available in JavaScript and therefore is considered the most preferred programming language from client to the server.

  • Great back up to the MVC (Model View Controller) architecture.
  • MEAN components are open source, so automatic updates add a value-added feature.
  • Easy, efficient & reliable
  • Fully customizable according to your requirement
  • Cost-effective

Here are the standard benefits of developing an app in MEAN STACK.

One Language Policy:

The main advantage of it is the complete code is written in JavaScript, from client to server. You may understand its importance by considering the LAMP stack, which has a code written using PHP on your server, query MySQL data using SQL and utilizing JavaScript on the client side. So you would have to manage all these languages simultaneously. This could prove difficult and expensive. On the other hand, the MEAN stack allows you to use an expert JavaScript developer (MEAN Stack Developer) in order to achieve the desired result.


Avoid Common SQL Issues

When working with RDBMS, most programmers have to deal with a variety of issues associated with SQL. MongoDB is a schemaless database designed as a NoSQL. It is also globally used as a document database. The performance-driven model offered by NoSQL allows MongoDB to manage the bulk of structured and unstructured data effectively. Moreover, MongoDB has various integrated features to solve various SQL related issues.

Deploy Applications in the Cloud

Now, most companies deploy websites in the cloud to gain flexibility and scalability while minimizing cost. Contrary to conventional RDBMS, MongoDB runs seamlessly on cloud platforms. Furthermore, web developers can use MongoDB Atlas to establish, scale and control their database deployments effectively in the cloud.

Flexibility:

Contrary to My-SQL, it does not compel you to integrate data into tables. If you want to put personal information, you just need to add the field to your form, turn it up with the help of data in JSON document & integrate it into MongoDB collection. Also, it provides full cluster support along with automatic replication. Web apps become easy to build, test, and host using the cloud infrastructure.


Faster Speed:

Node.js is scalable and faster because of its non-blocking architecture. Angular.js is an open-source client-side JavaScript framework that offers reusability, maintenance, and testability. One of the amazing things about this framework is its powerful directives that evolve into domain-specific language & offers great testability.

Isomorphic Coding:

An important feature of this infrastructure is that if you have written code in a particular framework and have wanted to place it in another one, you can shift it over easily, and it runs mostly in the same way. This feature of MEAN stack makes it stand out from the crowd in the field of program development.

No wonder, MEAN stack is a growing technology that is taking over the world of programming. It is simple and is likely to stay for long.  

Basic Acronym for MEAN is


MongoDB: It is free of cost and is a cross-platform database that developers use for JavaScript. It uses a JSON document addressing style that aids entire data representation. The prominent reason responsible for the selection of this technology is to bind us to fair single language (JavaScript) for the whole app development.


ExpressJS: It represents one of the most dynamic tools used for developing actual functioning mobile and web applications. It provides the negligible framework used for web development such as Node.js. It functions quite enormously and makes it possible to design an entire website simply using Node.js and Express.js. This combination empowers us to design even software on the server-side. It means Node.js becomes really vital and Express.js supports in publishing the app on web domain.


AngularJS: It is a front-end JS framework that expands HTML along with new characteristics. It is known globally and is used in creating client-side apps with integrated code, and data needed for User Interface. It is categorically ideal in the sense that it is easy to learn and can be used to develop Single Page Applications.


Node.js: It is an open source cross-platform that prevails on a larger scale. It operates JavaScript-based run-time framework specifically designed for Google Chrome’s JSV8 engine. It is used by developers globally as it offers a free platform that integrates with ExpressJS to cater to application development.

Now you see, there are several benefits to using and learning mean stack. Think about where you are headed as an IT professional and do your research about which program to learn next. Of course, we love Mean Stack and would scream from rooftops about their awesomeness. But don’t listen to us, look around you decide for yourself.

Author’s Bio: Danish Wadhwa is a strategic thinker and an IT Pro. With more than six years of experience in the digital marketing industry, he is more than a results-driven individual. He is well-versed in providing high-end technical support, optimizing sales and automating tools to stimulate productivity for businesses.


With「PaizaCloud Cloud IDE」, you can flexibly and easily develop your web application or server application, and publish it, just in your browser. https://paiza.cloud